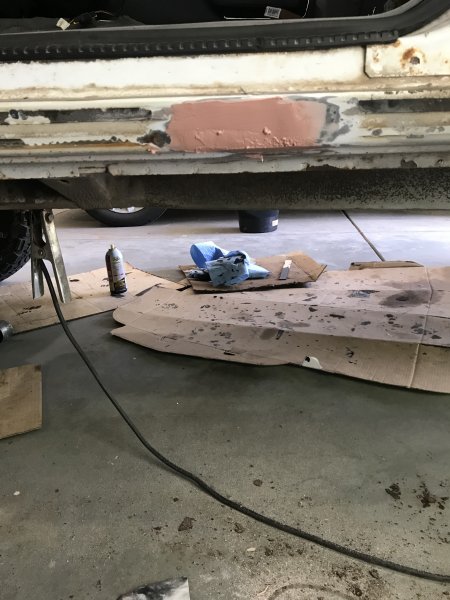
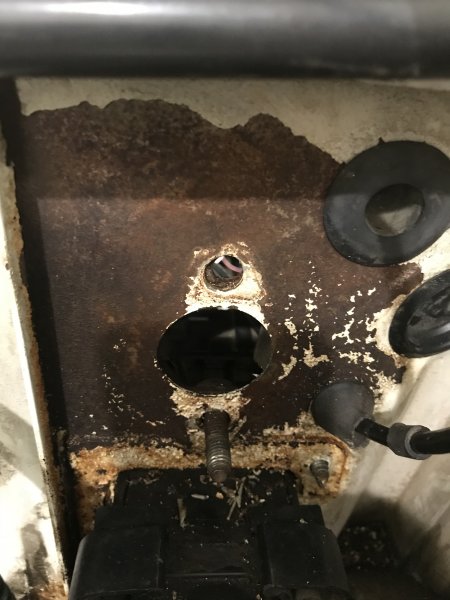
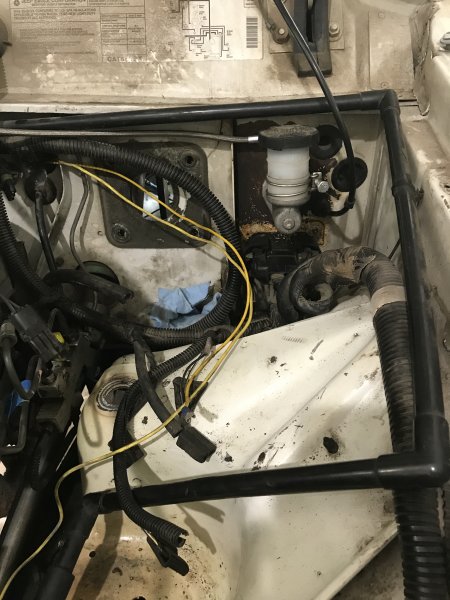
While attempting to remove the power steering lines I broke the plastic nipple for the return line off of the reservoir. So until a replacement reservoir is arrives, the steering refurb is on pause./QUOTE]
There has to be a way to fix this -- I have a parts truck that I was going to swap power steering pumps with -- broke that dam fragile return line nipple -- Barely touched it and it broke -- I have it sitting on the bench, gonna try and figure out how to get another fitting in there and seal it all up -- I'm thinking something brass
You are using an out of date browser. It may not display this or other websites correctly.
You should upgrade or use an alternative browser.
You should upgrade or use an alternative browser.
1990 Comanche Build - The Wilderbeest
- Thread starter agamble
- Start date
With the old brake booster and brake lines out, the realization that I shouldn't put the stock parts back in came to me. It was the perfect time to upgrade the Brake booster. The Comanche (86' - 92') and early Cherokees (84' - 94') came with a single-diaphragm brake booster. While this worked OK for a stock setup, once larger tires and a lift are added the lack of braking quickly becomes apparent. The later Cherokees (95' - 01') and Grand Cherokees (94' - 04') used a dual-diaphragm booster, which increases pressure in the brake lines, applying more pressure to the brakes, resulting in faster stops. So an easy upgrade is to swap in the dual booster. There are multiple ways to do this swap and I'm not going to go into great detail as there are sufficient write ups to be found. I used 00’ WJ booster and master cylinder, it’s rumored to give a bit better braking.
For the new larger booster to fit the firewall needs to be slightly modified.

The push rod on the Grand Cherokee has to be modified to allow the Renix era brake switch to be put on correctly. Getting the push rod to the right length was the most time consuming portion. Initially I ground to much off and the brake switch wouldn't activate the brake lights. A layer of JB Weld was put on the push rod and sanded down until it was at the correct length.
Marked the section that needed to be moved to allow the booster to be fully seated.
Used a Dremel to make the relief cuts then followed that with some pliers to fold section out of the way.

It’s recommended to use a ¼” spacer to keep the push rod lengths similar. After measuring the size distance between the 89’ and the 00’, and seeing the significant height distance between the brake pedal and accelerator during the test fit I decided a spacer was in order. If you grab the booster from the junkyard often times you may find a factory plastic spacer, I didn't have one, but I had a number of unused washers. A couple test fits later I had the correct spacing. Each stack was 6.7mm in height.

The Grand Cherokee brake system uses bubble flares while the MJ and XJ use a double flare. To mate up the two braking systems new 3/16 brake lines with bubble flares at the MC and double flares at the proportioning valve are needed.
For the new larger booster to fit the firewall needs to be slightly modified.
The push rod on the Grand Cherokee has to be modified to allow the Renix era brake switch to be put on correctly. Getting the push rod to the right length was the most time consuming portion. Initially I ground to much off and the brake switch wouldn't activate the brake lights. A layer of JB Weld was put on the push rod and sanded down until it was at the correct length.
Marked the section that needed to be moved to allow the booster to be fully seated.
Used a Dremel to make the relief cuts then followed that with some pliers to fold section out of the way.
It’s recommended to use a ¼” spacer to keep the push rod lengths similar. After measuring the size distance between the 89’ and the 00’, and seeing the significant height distance between the brake pedal and accelerator during the test fit I decided a spacer was in order. If you grab the booster from the junkyard often times you may find a factory plastic spacer, I didn't have one, but I had a number of unused washers. A couple test fits later I had the correct spacing. Each stack was 6.7mm in height.
The Grand Cherokee brake system uses bubble flares while the MJ and XJ use a double flare. To mate up the two braking systems new 3/16 brake lines with bubble flares at the MC and double flares at the proportioning valve are needed.
When I first went to test the push rod length on the brake booster for the brake lights I needed to connect up the battery to get power. When I touched the negative battery cable onto the negative post the truck started turning over. Thinking I left the ignition in the on position I went to turn it off and realize there are no keys in the truck. Odd right, maybe it was a fluke. I go and touch the negative battery cable to the negative post again and the truck starts turning over again. As long as the cable is in contact with the post the truck wants crank. Now at this point I am thinking I have a problem and I've never personally had this problem nor heard of this occurring. Off to the inter web for possible solutions.
First solution: I have the starter wired up incorrectly and/or the cable terminals is touching something it shouldn't on the starter. Out to the garage and loosen the starter wires, reposition, and ensure that nothing is touching. Crawl out from under the truck, touch the negative cable onto the post, the truck starts turning over. Go back into the house and read some more.
Second solution: Could be a bad starter solenoid. Out to the garage and under the truck again. Now I remove the whole starter to test the solenoid, it checks out. Crawl back under the truck and put the starter on and connect it back up. Touch the negative cable to the post. Truck begins to crank. Several threads read that even if the starter solenoid tests good it could still be bad. So I crawl back under to remove the starter....again, and swap the starter solenoid for a good one that I randomly have on hand. Crawl back under and connect everything back up. Get out from under the truck, touch the negative battery cable to the post, truck starts turning over again. Back into the house to read some more possible reasons.
Third and fourth solutions: Several threads talk about a bad starter relay or a faulty ignition switch. At this point I begin to think that they can't be bad as the truck was running flawlessly a month ago before I started swapping parts over. When it comes to repairs my philosophy has always been the K.I.S.S concept and realize these are getting more and more complex in repair and diagnostics. So I begin retrace what changes I have I done that might lead to this. Concluding the only thing that I have done with the electrical system was install new battery cables. Upon tracing the cables everything looks to be connected correctly. Doesn't make sense.....I trace again, more carefully and then I notice this, hard to detect but I found it.
The positive battery cable, silver terminal, that connects to the starter relay is just, and I mean just touching the plastic connection for the starter solenoid. I loosened the nut on the starter relay, moved the cable terminal away from the connector, snug everything back up, touch the negative battery cable to the post, no cranking. Two hours and some change later, problem solved.
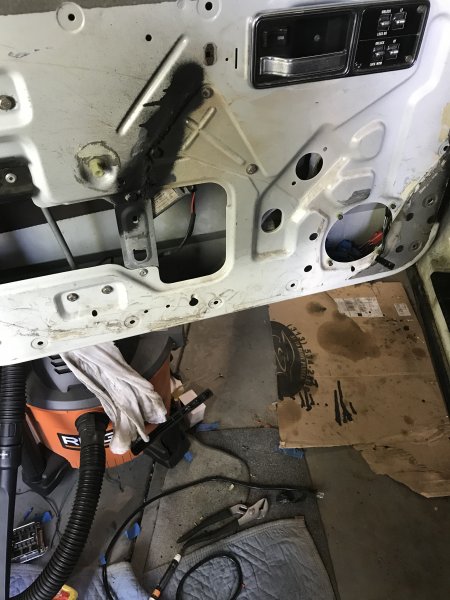
After sorting out the brakes and random cranking issue, I moved onto so more electrical items. Performed Cruiser54's Mostly Renix Tip #18 - Improving the Instrument Panel Ground. In his recommendations the new ground cable is 12" long. I only needed about 6" and attached it behind the cross support for the steering wheel.


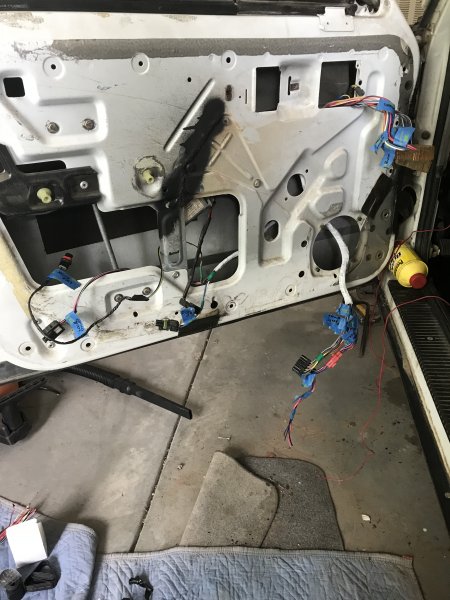
Next I decided to tackle the wiring for the power windows and locks. The truck originally had manual windows, but the original doors had the towing mirrors that over time rusted out in the mounting points and left large holes in the door. The replacement doors came with power windows. When the windows were wired the the drivers side control panel only operated the drivers door window and lock. I wanted it to control both so I didn't have to lay across the truck to open and/or close the passenger window or lock the door.
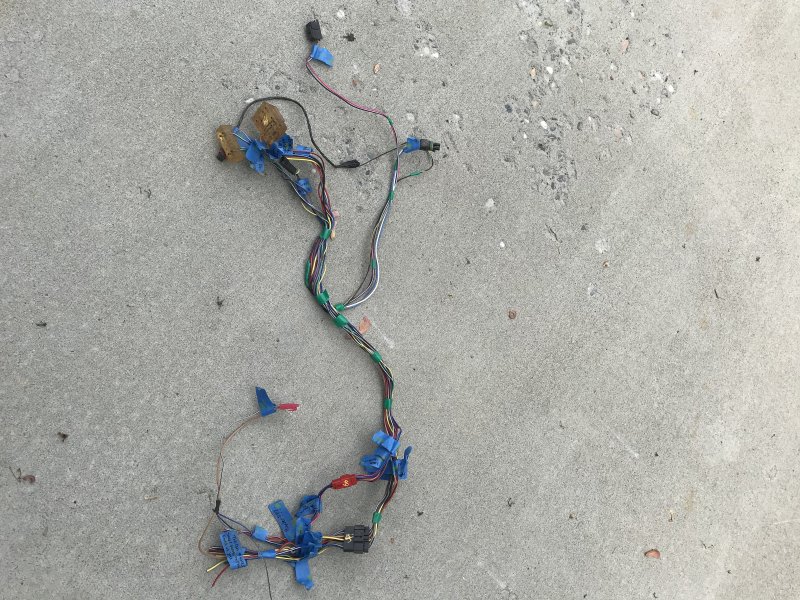
Earlier in the year a trip to the junkyard netted a 4 door Cherokee with power windows and locks. I stripped the wiring harnesses from the doors and into the cab and grabbed the master control panel. As I'd never done this and I couldn't find a wiring diagram online I started by unraveling the wiring harnesses and tracing each wire to see where and what it went to. Then using some painters tape labeled them for reference.
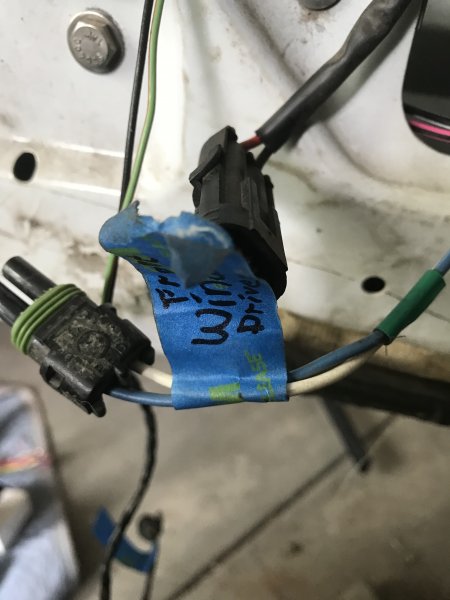
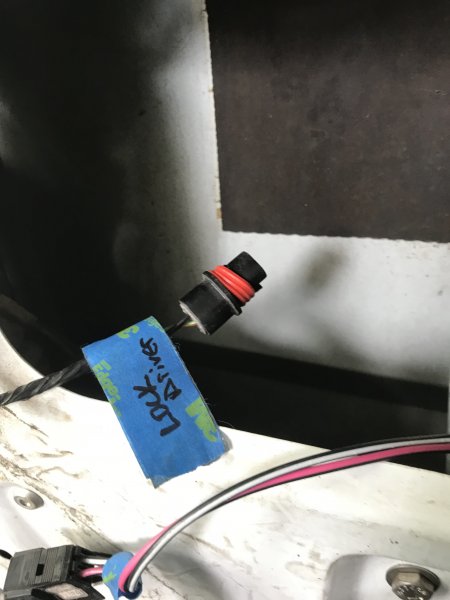
Once I knew what and where each wire went to where I rewrapped the wire harness.

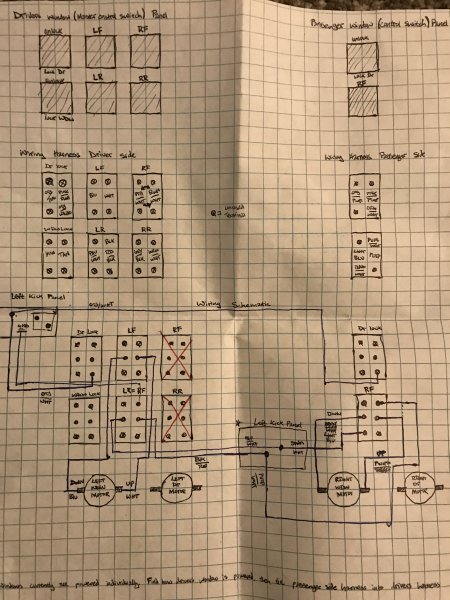
By this point a member on another web forum had reached out and helped me with the wiring. With their help I was able to map out the wiring diagram that I need for my application.
With a clear map for directions the wiring harness was installed and plugged in.
In addition while searching Ebay I came across and purchased a master control switch for a 86-96 two door Cherokee to give it a cleaner stock look.
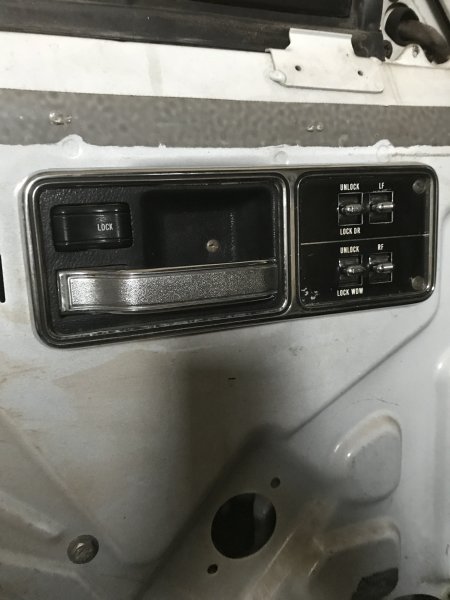
While the wiring harness is for a four door, with some swapping of connections it works with the two door control switch. To connect the master control panel to the passenger side window motor and lock actuator the new in cab wiring harness run along and tucked up under the dash.
Earlier in the year a trip to the junkyard netted a 4 door Cherokee with power windows and locks. I stripped the wiring harnesses from the doors and into the cab and grabbed the master control panel. As I'd never done this and I couldn't find a wiring diagram online I started by unraveling the wiring harnesses and tracing each wire to see where and what it went to. Then using some painters tape labeled them for reference.
Once I knew what and where each wire went to where I rewrapped the wire harness.
By this point a member on another web forum had reached out and helped me with the wiring. With their help I was able to map out the wiring diagram that I need for my application.
With a clear map for directions the wiring harness was installed and plugged in.
In addition while searching Ebay I came across and purchased a master control switch for a 86-96 two door Cherokee to give it a cleaner stock look.
While the wiring harness is for a four door, with some swapping of connections it works with the two door control switch. To connect the master control panel to the passenger side window motor and lock actuator the new in cab wiring harness run along and tucked up under the dash.
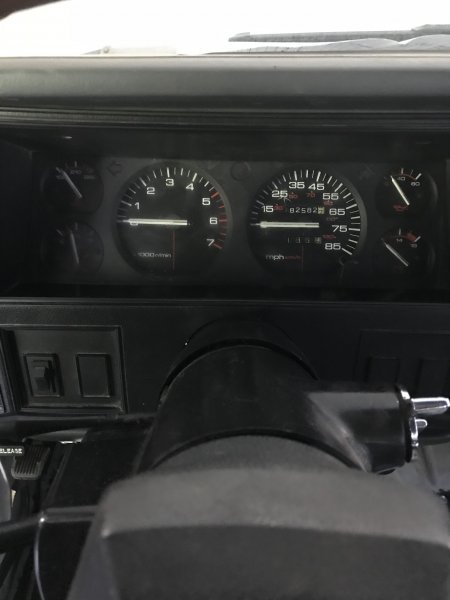
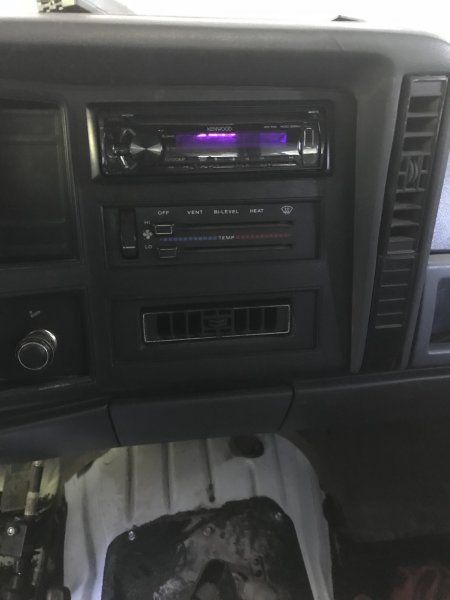
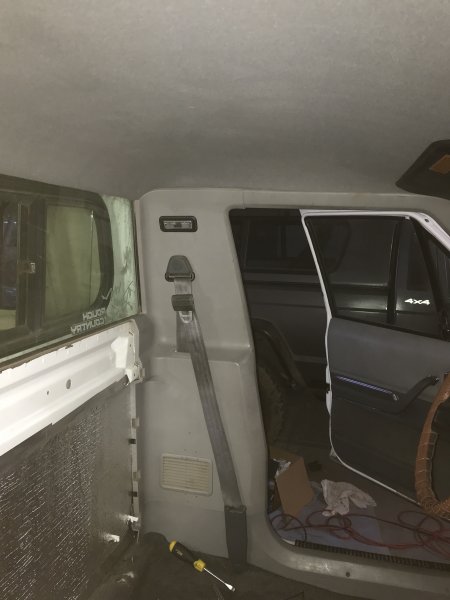
Moved my attention to interior items. Took care of a few of the easier items, such as swapping in full gauge cluster in place of the dummy lights and installing the head unit.
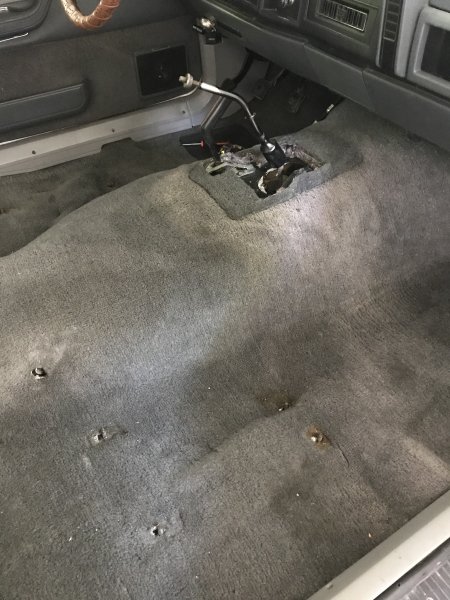
With the easier items out moved onto more time consuming things. To reduce noise and heat inside of the cab the factory placed a foam backing on transmission tunnel cover. 28 years later it was dry and deteriorated. When I removed the dry foam a sticky residue was left over from the adhesive that was used. Olive oil is a cheap and effective way to remove sticky things. A few ounces of olive oil, some time and elbow grease the sticky residue was gone.
With sticky stuff gone I put down sound deadener & heat barrier mat. Don't recall the brand, but I bought a 4' x 10' roll off of Amazon. The mat doesn't have an adhesive on it so a can of 3M Super 77 was used to stick it down. Seams were taped up with foil tape.
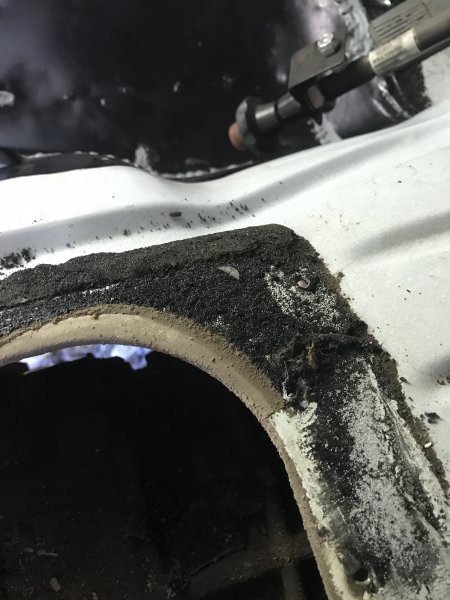
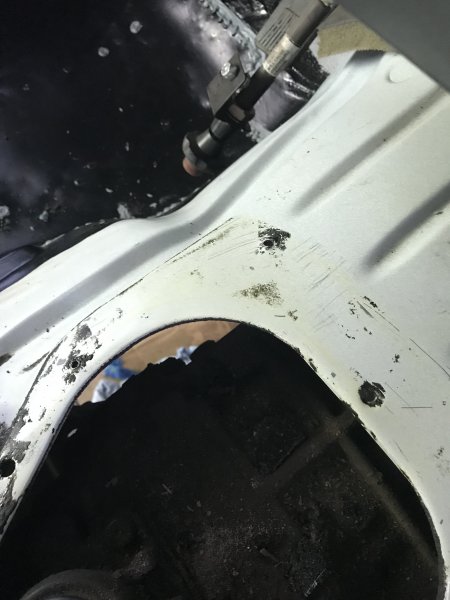
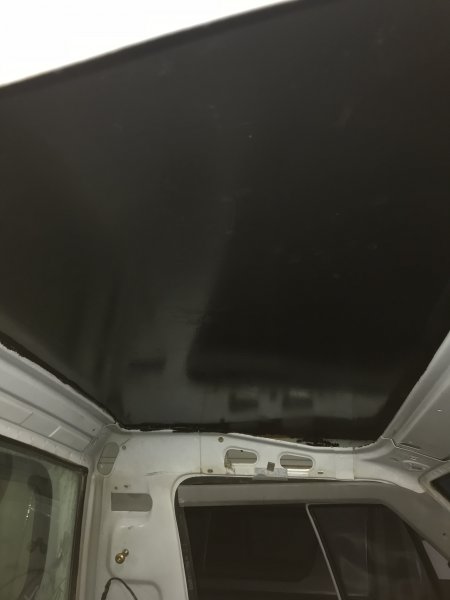
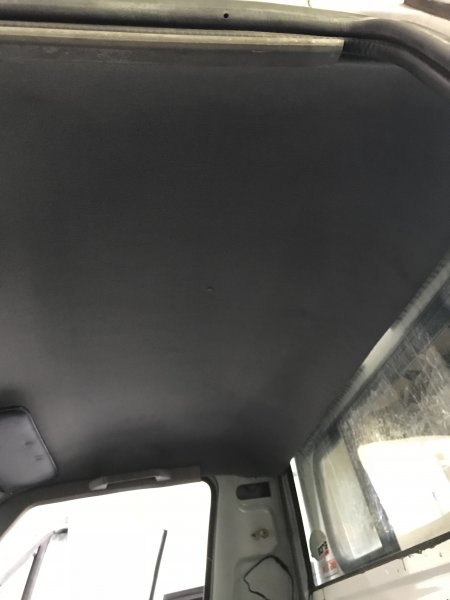
The original plan was to put a piece of sound deadener and heat barrier mat on the ceiling of the cab. To my surprise on removing the headliner I found a large amount of rust on the cab ceiling. I knew the windshield leaked, the only thing I can think of is that when it leaks some of the water that enters becomes trapped between the roof and some foam sleeping pad matting that had been installed at some point in time between the headliner and the roof. So my afternoon entailed applying Chasis Saver to the roof to stop the rust.
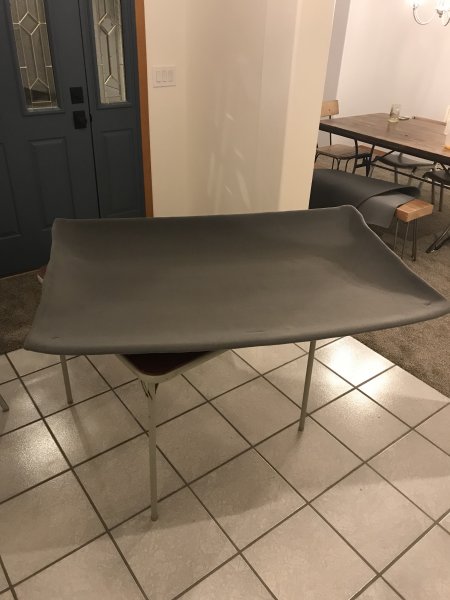
Since the headliner was going to be out for more time than anticipated I made a jaunt to the local Joann's fabric store to get some headliner material and recovered the headliner while it was out.
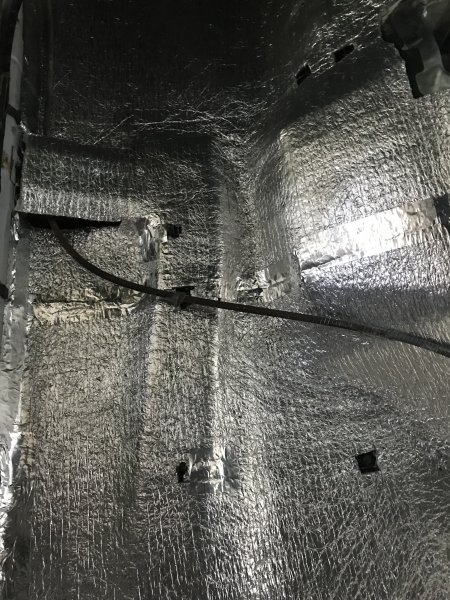
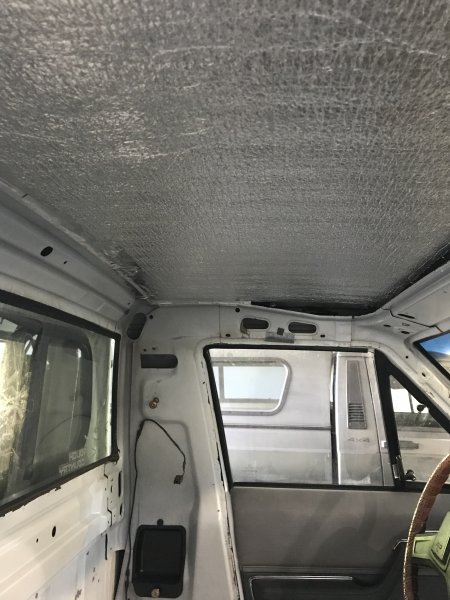
A couple days later once the Rust inhibitor had dried and cured I put the sound and heat barrier in and started piecing the interior back together.
Since the headliner was going to be out for more time than anticipated I made a jaunt to the local Joann's fabric store to get some headliner material and recovered the headliner while it was out.
A couple days later once the Rust inhibitor had dried and cured I put the sound and heat barrier in and started piecing the interior back together.
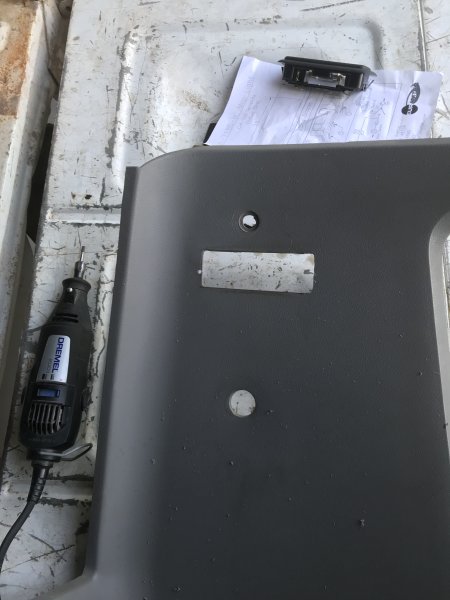
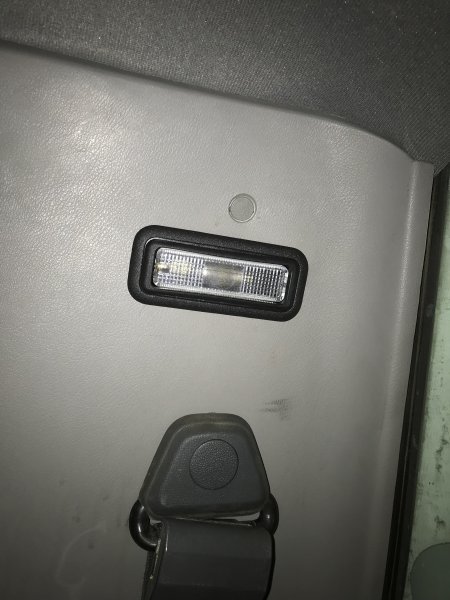
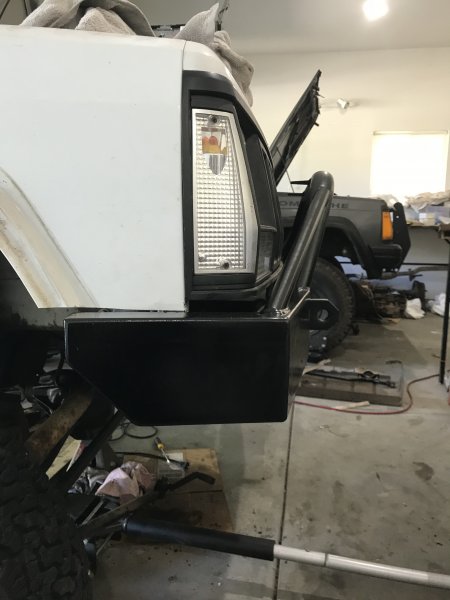
The original B-pillar lights no longer stayed in their mounting locations, as a cheap fix grabber screws were used to keep them pinched in place. I neglected to get a picture of this, but you can see the hole it left behind. As a replacement I used some aftermarket Euramatec lights that have a stock look than other alternatives that I have seen used in the past. The installation is very easy. The existing hole needs to be enlarged width wise by about a quarter of an inch. A dremel with a rotary bit but made quick and easy work. Wiring was also straight forward. Clip the existing connector off, wire on three female connects, plug on according to the wiring diagram that comes with the lights.
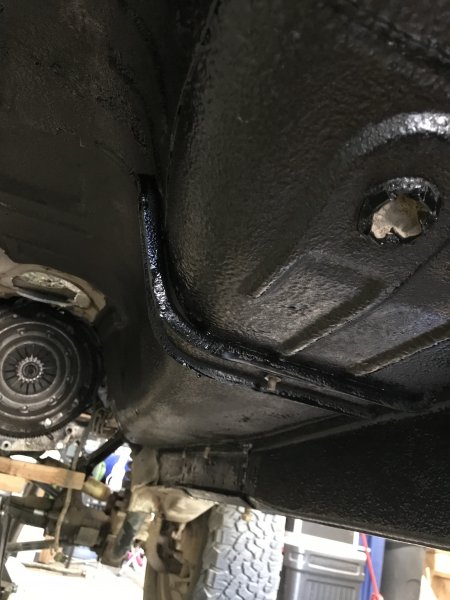
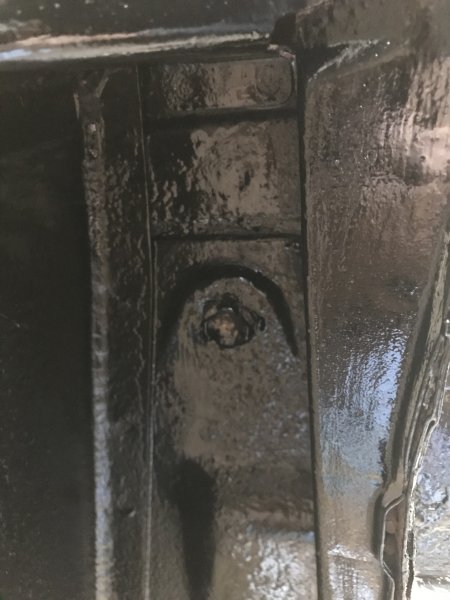
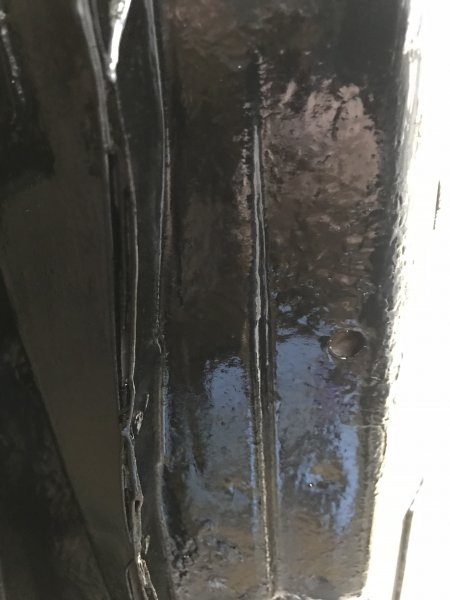
Spent a good amount of time on the underside of the Jeep cleaning and covering the undercarriage, paying particle attention to the cab corners and rear floor pans. to compliment all the rust repair (floor pans and portion of the transmission tunnel) and prevention on the interior. In hindsight I should have done some sort of wash on the under carriage before dismantling. But then again how well I would have been able to clean the undercarriage with all the parts in place is a whole different question. I used a wire cup to brush off any loose dirt, flaking rust that was present, remaining factory sound deadening spray and whatever else was under there. The obligatory before shots:
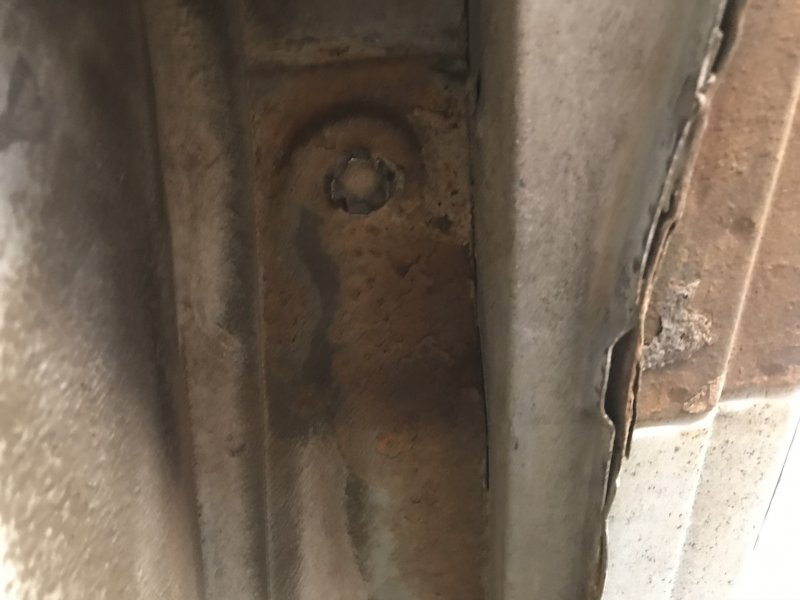
While working on the interior there wasn't any visible rust on the rear floor pans or the cab corners. While prepping the exterior I performed a thickness check and the rust appears to be superficial. My method for testing was very high tech, I took a screw driver and stabbed at various places to see if it would punch through... I know, super technical. I was not going easy on the punching and all impact points had a strong metal clang.
I used the same product, Chassis Saver, that I used for the interior. Where there was exposed rust and/or sound deadening spray from the factory it adhered nice and thick on the first coating. As the product instructions state, it works great if it has something to bite onto. The roughed up painted areas took two coats to get good coverage.
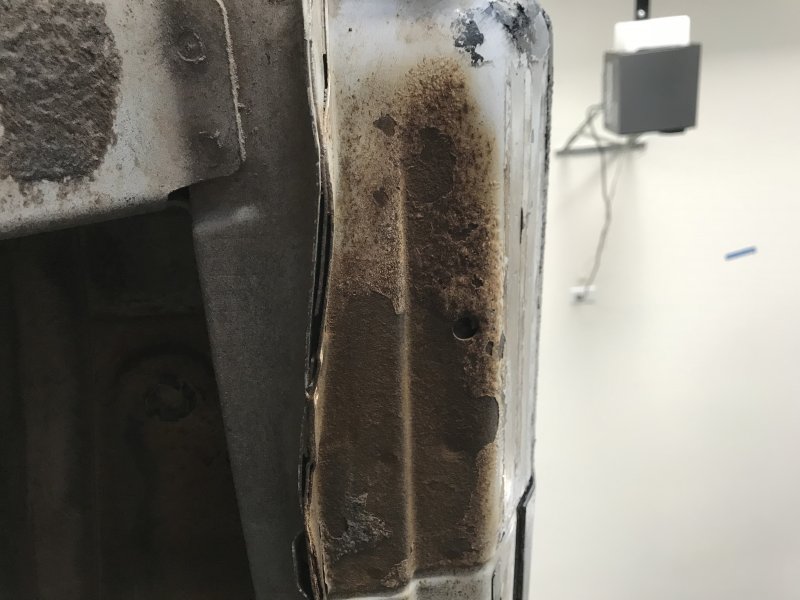
I also performed the screw driver test on the rockers. The passenger side not an issue, when I got to the drivers side rocker I punched through a couple places. This side had a couple areas that still seemed okay strength wise but definitely have rust issues. I might see about getting some rust inhibitor to spray inside the rocker. But even that might not be enough. If I was still living where there are harsh winters and lots of road salt I would say that the rocker might make it couple more years before it gives out. But being in the high desert of eastern Washington, dry, very little snow fall, and I don't use this as a daily driver. It should last multiple years before I have any serious issues. In a couple months or year, I may just end up cutting out the rocker and replacing it with a new one. For now I cut out what material was bad and patched it using left over material from the floor pans. A little bondo smoothed the patched area. First coat:
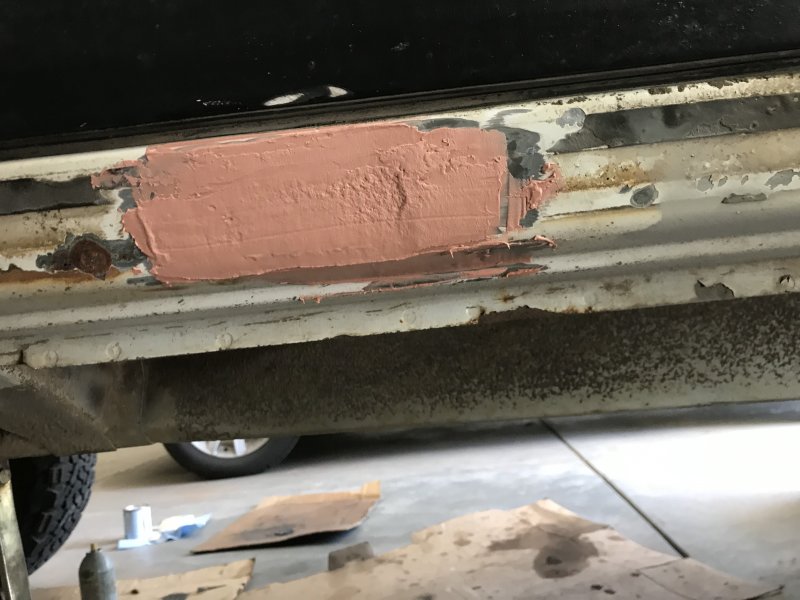
A Second coat to make it level after sanding down the first.
While working on the interior there wasn't any visible rust on the rear floor pans or the cab corners. While prepping the exterior I performed a thickness check and the rust appears to be superficial. My method for testing was very high tech, I took a screw driver and stabbed at various places to see if it would punch through... I know, super technical. I was not going easy on the punching and all impact points had a strong metal clang.
I used the same product, Chassis Saver, that I used for the interior. Where there was exposed rust and/or sound deadening spray from the factory it adhered nice and thick on the first coating. As the product instructions state, it works great if it has something to bite onto. The roughed up painted areas took two coats to get good coverage.
I also performed the screw driver test on the rockers. The passenger side not an issue, when I got to the drivers side rocker I punched through a couple places. This side had a couple areas that still seemed okay strength wise but definitely have rust issues. I might see about getting some rust inhibitor to spray inside the rocker. But even that might not be enough. If I was still living where there are harsh winters and lots of road salt I would say that the rocker might make it couple more years before it gives out. But being in the high desert of eastern Washington, dry, very little snow fall, and I don't use this as a daily driver. It should last multiple years before I have any serious issues. In a couple months or year, I may just end up cutting out the rocker and replacing it with a new one. For now I cut out what material was bad and patched it using left over material from the floor pans. A little bondo smoothed the patched area. First coat:
A Second coat to make it level after sanding down the first.
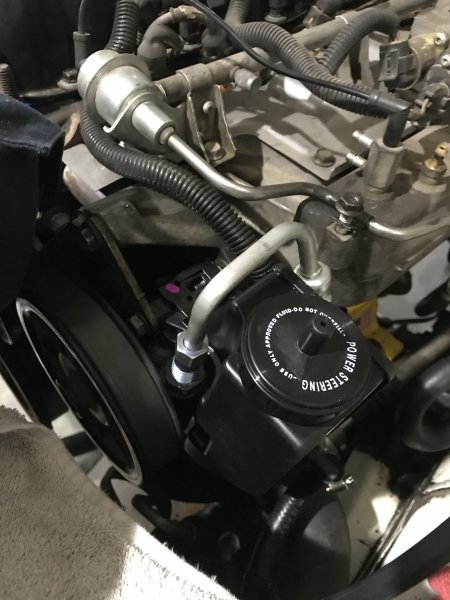
Earlier on in the process I swapped steering boxes. While trying to remove the return line on power steering pump I snapped the plastic nipple off and all the fluid ran out onto the garage floor. I always have the same feeling when it comes to buying new parts. It's a mixture of dread and joy. Dread at the fact of I have to spend money that I don't really want to spend, but joy that I get to/have a reason to buy a new part. Which usually means upgrade time. Alas, no upgrade was to be had this time. I've always been intrigued by the PSC steering reservoir, but I couldn't justify the $400 dollars for the system.Maybe one day, for now went with a remanufactured power steering pump. The swap went quick. I spent more time removing old grease and grime from the previous leaking pump.
Once the pump was replaced moved to refreshing the bumper that came on the Jeep. I'm not 100% sure, but my best guess is that it is a Nates4x4 based off of design. For now it meets my needs. Future plans......how far in the future is to be seen, are to get a winch bumper. Refreshing of the bumper consisted of a a quick flapper disc buffing, followed by a coat of Chassis Saver on the areas that were showing heavy rust and pitting. That was followed by two coats of Rust-O-leum Appliance Epoxy. I've become a big fan of the stuff. I like the durability it provides compared to regular spray paint as well as the finish. I've taken to using it on bumpers and sliders. Only down side is you get two color options, white or black.

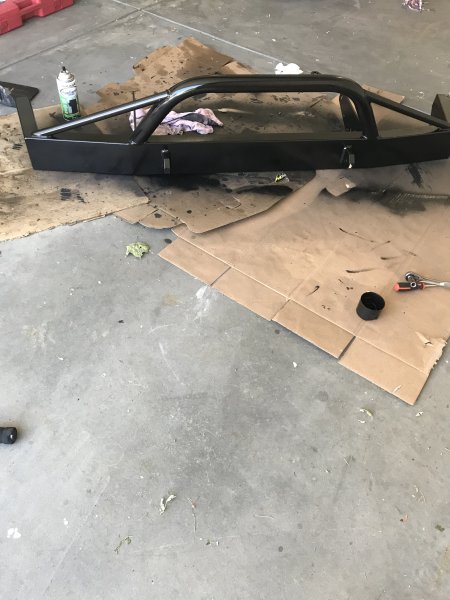
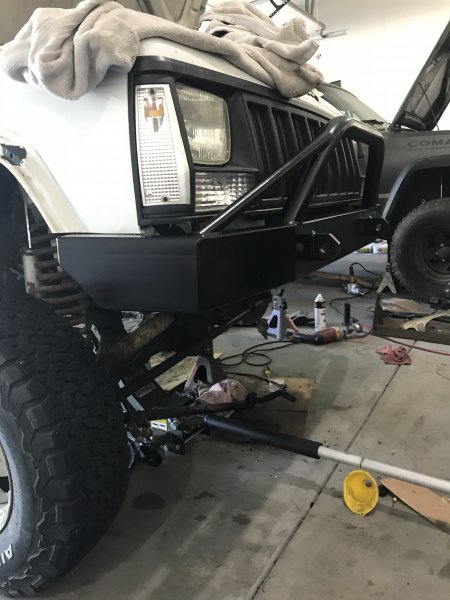
Once the pump was replaced moved to refreshing the bumper that came on the Jeep. I'm not 100% sure, but my best guess is that it is a Nates4x4 based off of design. For now it meets my needs. Future plans......how far in the future is to be seen, are to get a winch bumper. Refreshing of the bumper consisted of a a quick flapper disc buffing, followed by a coat of Chassis Saver on the areas that were showing heavy rust and pitting. That was followed by two coats of Rust-O-leum Appliance Epoxy. I've become a big fan of the stuff. I like the durability it provides compared to regular spray paint as well as the finish. I've taken to using it on bumpers and sliders. Only down side is you get two color options, white or black.
While waiting for the bumper to dry I started the prep work for the installation IronRockOffroad Rock-Link Long Arms. The long arms are designed for the XJ but with some very minor problem solving they work on the MJ. The instructions require that all structures that stick out further than the frame rail need to be removed from the areas where the long arm brackets mount. I removed the extra brace brackets are used for the crossmember and trimmed the lip that sticks in towards the transmission.
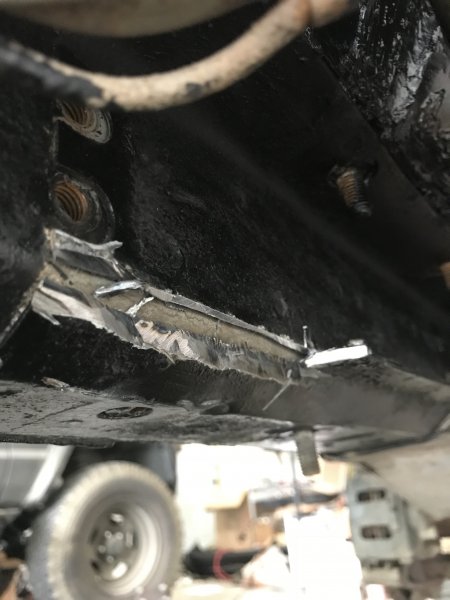
A second test fit showed that the rear stud for the extra brace needed to be removed for the arm bracket to sit flush on the frame rail.

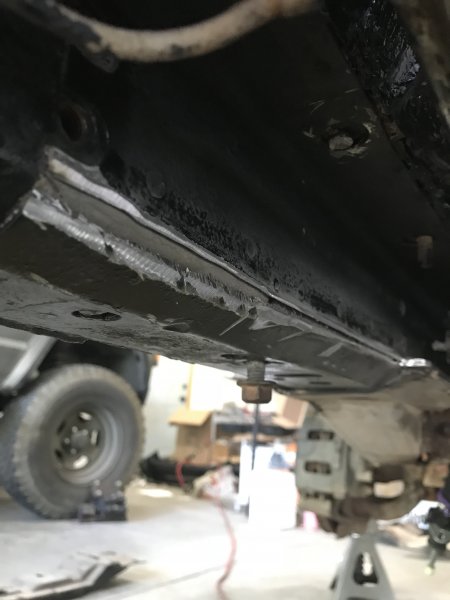
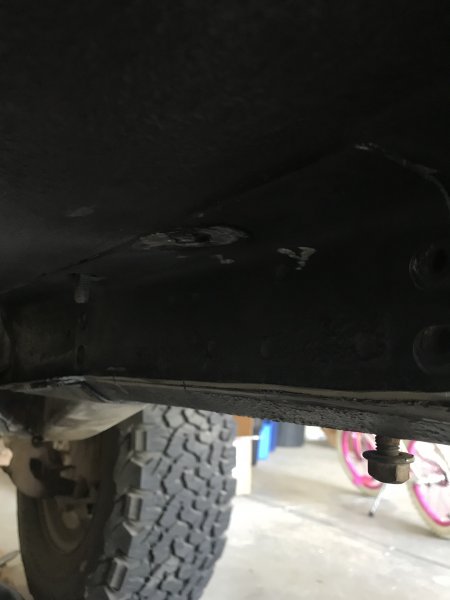
With both sides prepped I reapplied Chassis Saver to the areas of the undercarriage where it was ground off when removing the structures that would interfere with mounting the long arm brackets.
A second test fit showed that the rear stud for the extra brace needed to be removed for the arm bracket to sit flush on the frame rail.
With both sides prepped I reapplied Chassis Saver to the areas of the undercarriage where it was ground off when removing the structures that would interfere with mounting the long arm brackets.
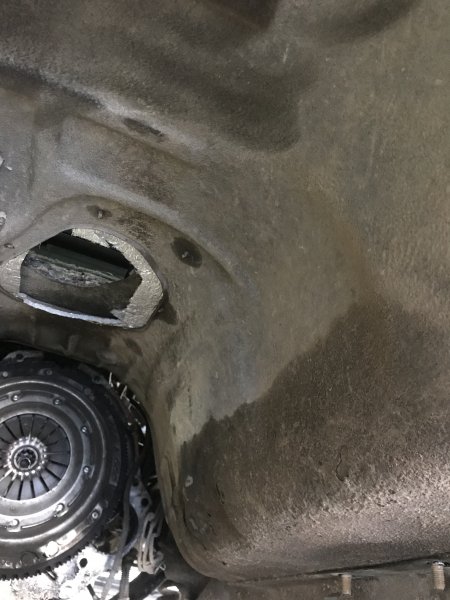
The Jeep came equipped with the internal slave AX-15. While the AX-15 is a stout transmission, the internal slave setup is less than ideal. Any time repairs need to be made to the slave or fittings the entire tranny has to be dropped. Having had to do this several times, it became apparent that was not in my best interest. It was time to swap to an external slave setup. All jeeps manufactured after 94' with a standard transmission came equipped with an external slave AX-15. For those of you interested the swap is fairly easy and can be done for a reasonable price.
In my case I did an entire transmission swap. I am using an external AX-15 from a 98' XJ that I had rebuilt. It came complete, meaning I had the external slave bell housing, the clutch fork and bearing retainer. If you don't already have these parts you will need to source them. Due to the differences between the Renix era (86' - 90') and newer OBDI/OBDII (91' - 00') computer systems, when performing the swap in a Renix era Jeep the clutch system for Renix era (i.e., fly wheel and CPS sensor) must be used with the newer transmission.

When Chrysler changed from the internal slave setup to the external slave, the transmission input shaft diameter was changed meaning if you are using an external slave AX-15 in an older 4.0L a new pilot bearing may be in order.

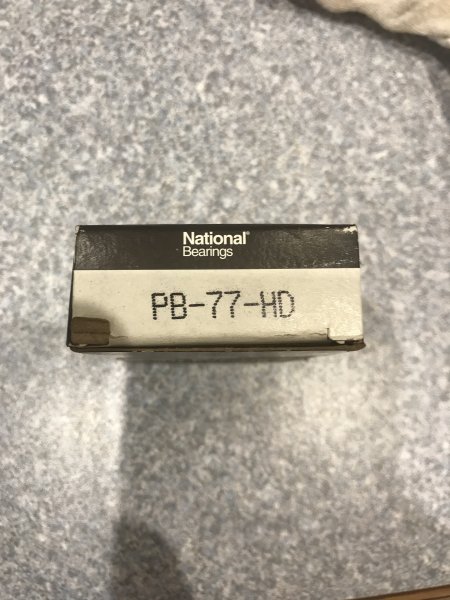
A 72 - 73’ CJ, 350 V8 pilot bearing is recommended when swapping in an external AX-15 in an older 4.0L. It has an ID of 0.751 inches, OD of 1.056 inches, and depth of 0.88 inches (National part number PB77HD or Dorman part number 14674). For my application I went with the National bearing.

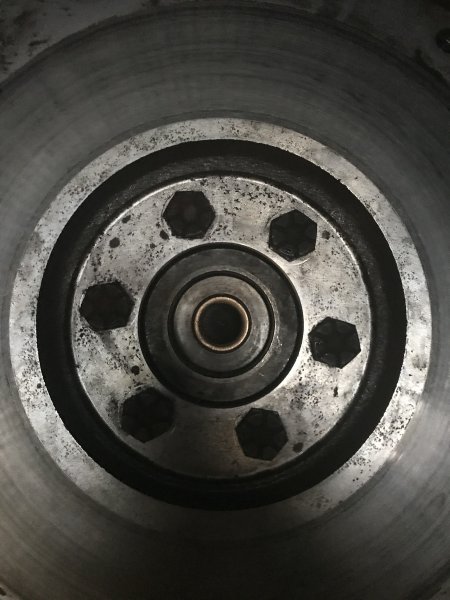
The bronze bearings are impregnated with oil, so when installing do not use grease as it will contaminate the bearing. I've read to make for an easier install the night before place the bearing in some fresh motor oil and store it in the freezer. Now I may be incorrect, but I figured if its already impregnated with oil why would I need to soak it again. And in the winter its just as likely to freeze so it should not affect the bearing in any way to freeze it without additional oil. So 24 hours later I began the install. I used a make shift install tool...an old shop broom handle cut down to size. I slowly tapped it into place, taking care to make sure it was square while inserting it.
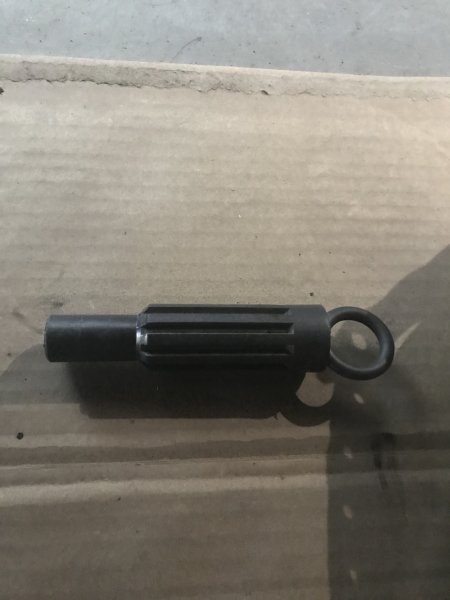
With the pilot bearing in place I moved onto installing the Luk Heavy Duty Clutch Kit. At this point as long as the clutch kit is designed for the AX-15 it is compatible. The kit comes with an alignment tool to use when installing the friction disc to the flywheel.
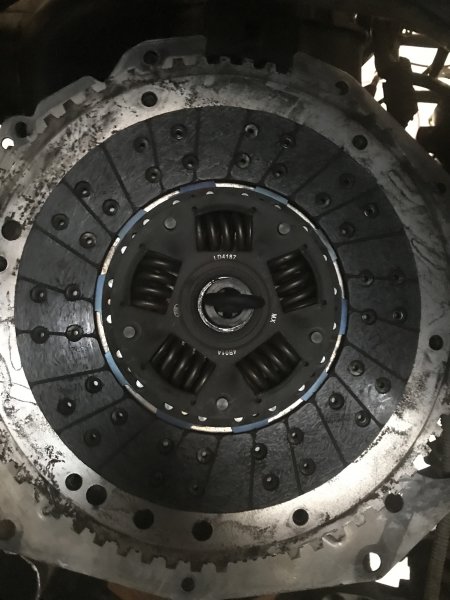

Fly wheel, pilot bearing, and clutch kit in.
In my case I did an entire transmission swap. I am using an external AX-15 from a 98' XJ that I had rebuilt. It came complete, meaning I had the external slave bell housing, the clutch fork and bearing retainer. If you don't already have these parts you will need to source them. Due to the differences between the Renix era (86' - 90') and newer OBDI/OBDII (91' - 00') computer systems, when performing the swap in a Renix era Jeep the clutch system for Renix era (i.e., fly wheel and CPS sensor) must be used with the newer transmission.
When Chrysler changed from the internal slave setup to the external slave, the transmission input shaft diameter was changed meaning if you are using an external slave AX-15 in an older 4.0L a new pilot bearing may be in order.
- The BA10/5 and internal slave AX-15 have a pilot bearing with an Inside Diameter (ID) of 0.5934 inches, Outside Diameter (OD) of 1.055 inches, and depth of 0.719 inches (OE part number 53009181).
- The external slave AX-15 has a pilot bearing with an ID of 0.7518 inches, OD of 1.8161 inches, and depth of 0.719 inches (OE part number 33004041). The standard pilot bearing that comes usually will not fit into the crankcase as it will have to large an OD.
A 72 - 73’ CJ, 350 V8 pilot bearing is recommended when swapping in an external AX-15 in an older 4.0L. It has an ID of 0.751 inches, OD of 1.056 inches, and depth of 0.88 inches (National part number PB77HD or Dorman part number 14674). For my application I went with the National bearing.
The bronze bearings are impregnated with oil, so when installing do not use grease as it will contaminate the bearing. I've read to make for an easier install the night before place the bearing in some fresh motor oil and store it in the freezer. Now I may be incorrect, but I figured if its already impregnated with oil why would I need to soak it again. And in the winter its just as likely to freeze so it should not affect the bearing in any way to freeze it without additional oil. So 24 hours later I began the install. I used a make shift install tool...an old shop broom handle cut down to size. I slowly tapped it into place, taking care to make sure it was square while inserting it.
With the pilot bearing in place I moved onto installing the Luk Heavy Duty Clutch Kit. At this point as long as the clutch kit is designed for the AX-15 it is compatible. The kit comes with an alignment tool to use when installing the friction disc to the flywheel.
Fly wheel, pilot bearing, and clutch kit in.
Last edited:
With the clutch kit in the next thing to address is connected the clutch master cylinder to the slave cylinder. When going from an internal slave to an external slave, there are various ways to go about getting the clutch master cylinder and external slave connected. One method is to buy the complete kit for the external slave configuration. The issue that I have heard with this is that it requires the drilling of a new upper mounting hole in order for the later clutch master cylinder to fit properly in Renix era Jeeps. I have no personal experience with this so I cannot confirm this.
To avoid headache and making unnecessary holes I went with a second option. Advanced Adapters sells hydraulic fittings that allow you to retain the year specific clutch master cylinder while mating it up to the slave cylinder at the bell housing. You can order the complete setup (Jeep Slave Cylinder Assembly For NV3550/AX15 Bellhousing, P/N 716340) or you can purchase the parts individually. Why I don't know, but I had a brand new slave cylinder for an external AX-15 laying around so I purchased the individual parts. To connect the stainless steel hose (716130-60, 60" length or 716130H, 42" length) you will need the early master cylinder fitting that is a 7/16 inverted flare style (P/N 716130F). This fitting will thread right into the clutch master cylinder.
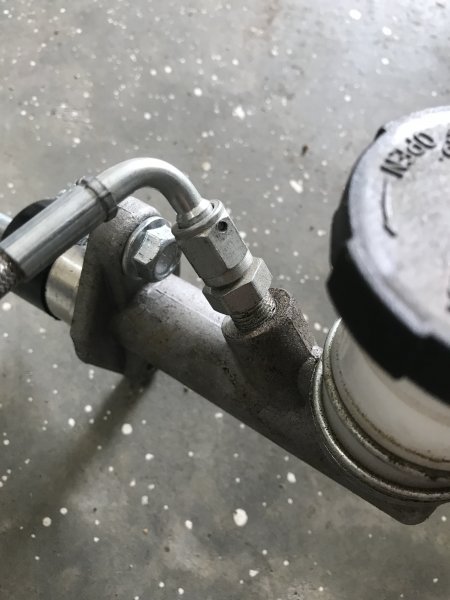
Then to connect the stainless steel hose to the slave cylinder you will need the TJ Master Cylinder Fitting and Slave Cylinder Fitting (P/N 716130 TJ) and O-ring (P/N 716130OR).
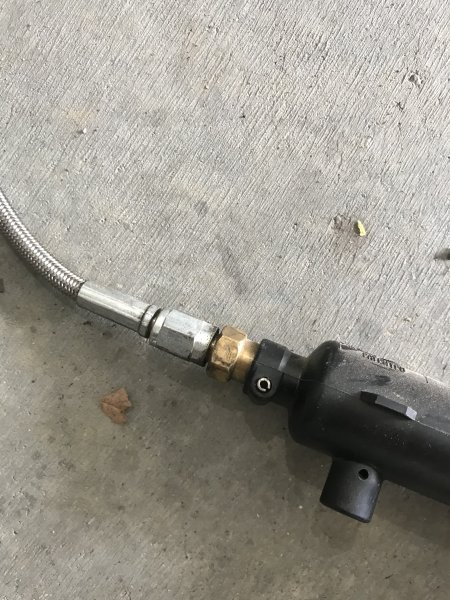
Once its all connected you will need to prime the hydraulic system. The slave cylinder does not have a bleeder valve. In order to prime the hydraulic system you'll need to let the pump the fully extended slave rod (don't cut or break the retaining straps that come with the slave cylinder). While holding the slave cylinder at a 45 degree angle, pour the fluid into the slave until its full. At this point insert the fitting, o-ring, and hose. And place in the retaining pin. Once secured with the retaining pin hold the slave in a vertical position with the rod pointing down to the floor and slowly push the rod inward about 1". After about 10-15 strokes there should not be any air bubbles in the master cylinder reservoir.
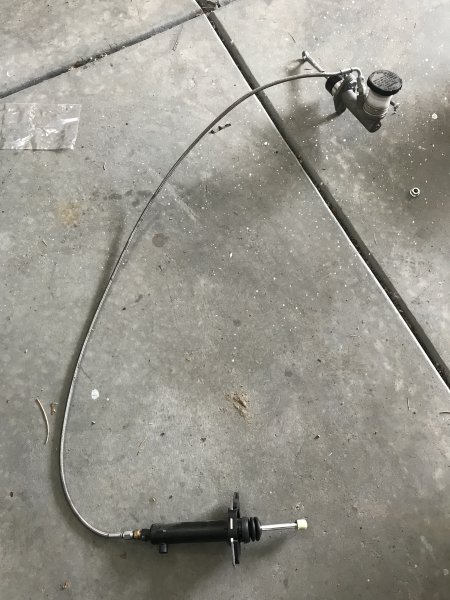
Bled, connected, and ready to install.
Mounted up and waiting for the transmission to be put in.
To avoid headache and making unnecessary holes I went with a second option. Advanced Adapters sells hydraulic fittings that allow you to retain the year specific clutch master cylinder while mating it up to the slave cylinder at the bell housing. You can order the complete setup (Jeep Slave Cylinder Assembly For NV3550/AX15 Bellhousing, P/N 716340) or you can purchase the parts individually. Why I don't know, but I had a brand new slave cylinder for an external AX-15 laying around so I purchased the individual parts. To connect the stainless steel hose (716130-60, 60" length or 716130H, 42" length) you will need the early master cylinder fitting that is a 7/16 inverted flare style (P/N 716130F). This fitting will thread right into the clutch master cylinder.
Then to connect the stainless steel hose to the slave cylinder you will need the TJ Master Cylinder Fitting and Slave Cylinder Fitting (P/N 716130 TJ) and O-ring (P/N 716130OR).
Once its all connected you will need to prime the hydraulic system. The slave cylinder does not have a bleeder valve. In order to prime the hydraulic system you'll need to let the pump the fully extended slave rod (don't cut or break the retaining straps that come with the slave cylinder). While holding the slave cylinder at a 45 degree angle, pour the fluid into the slave until its full. At this point insert the fitting, o-ring, and hose. And place in the retaining pin. Once secured with the retaining pin hold the slave in a vertical position with the rod pointing down to the floor and slowly push the rod inward about 1". After about 10-15 strokes there should not be any air bubbles in the master cylinder reservoir.
Bled, connected, and ready to install.
Mounted up and waiting for the transmission to be put in.