You are using an out of date browser. It may not display this or other websites correctly.
You should upgrade or use an alternative browser.
You should upgrade or use an alternative browser.
Barn Door for JK factory hardtops
- Thread starter jscherb
- Start date
jscherb
Expedition Leader
Thank you. I'm very happy with how it came through manufacturing.Looks fantastic! What company is going to release them? I want to be on the top of the list.
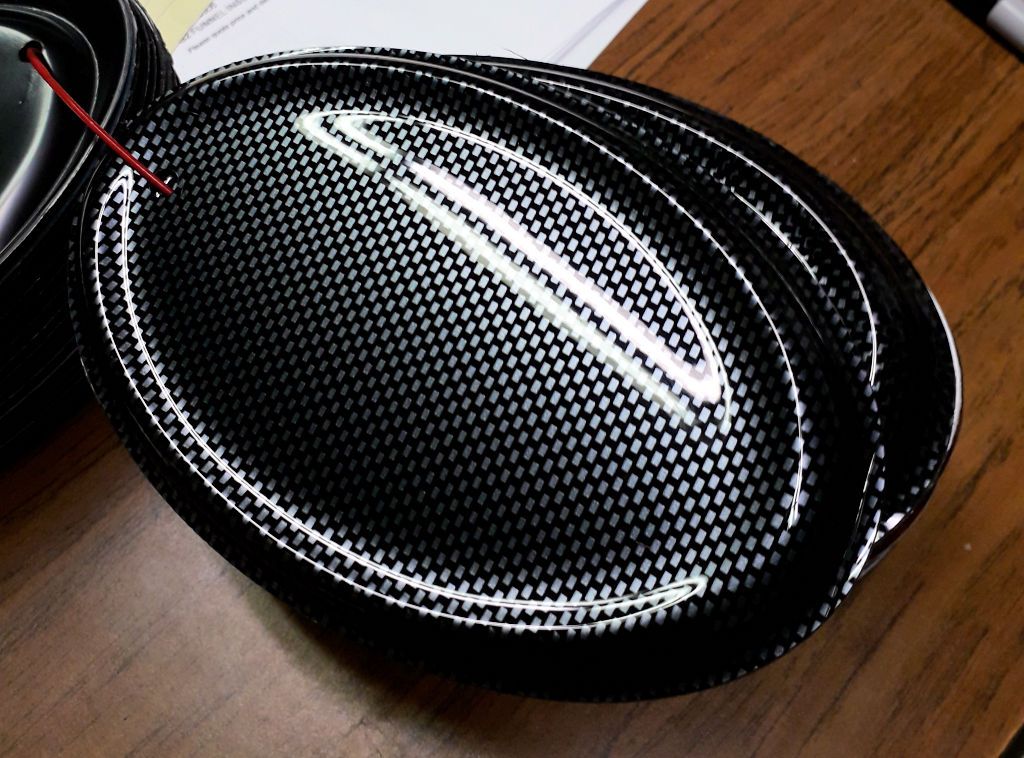
I don't have authorization at this point from the company to reveal who they are, sorry. Might be able to reveal more in a few days, I've been asked to join a conference call in the next few days between the company that plans to market the grille and the plastics company that's manufacturing it for them; subjects include details like production quantities and packaging and more interesting subjects like the plastic the production grille should be molded in. The preproduction grilles so far have been molded in "generic" ABS that the plastics company uses for prototypes and other general purpose molding, but there are quite a few options for production. I'm suggesting a smooth or possibly textured matte black for the first production run, but we'll also discuss a range of more interesting plastic finishes such as this faux carbon fiber.
Last edited:
jscherb
Expedition Leader
What kind of wrap are you thinking of?We are not putting these on Honda's, no carbon fiber for me ?. Smooth and black so I can put a wrap on it will do just fine for me... Can't wait. Keep us in the loop on timing please.
jscherb
Expedition Leader
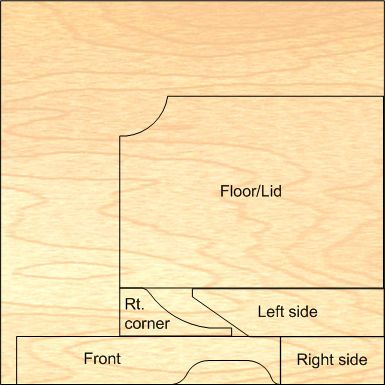
This is a preliminary cutting pattern for the components of the floor storage compartment, they're laid out on a 4' x 4' piece of plywood. Before cutting plywood I'll make the key parts from cardstock to test the dimensions and fit. Once any necessary changes are made to the patterns I'll cut wood.
I found a nice compact locking paddle handle latch that will be perfect for the lid of the compartment, it arrived in the mail today.
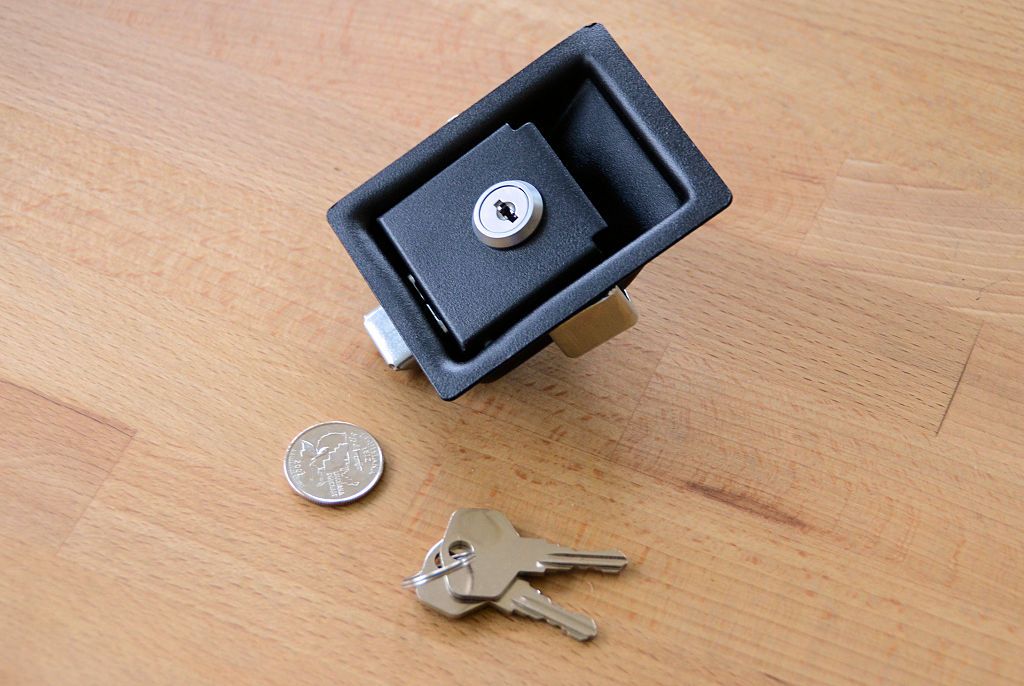
I found a nice compact locking paddle handle latch that will be perfect for the lid of the compartment, it arrived in the mail today.
jscherb
Expedition Leader
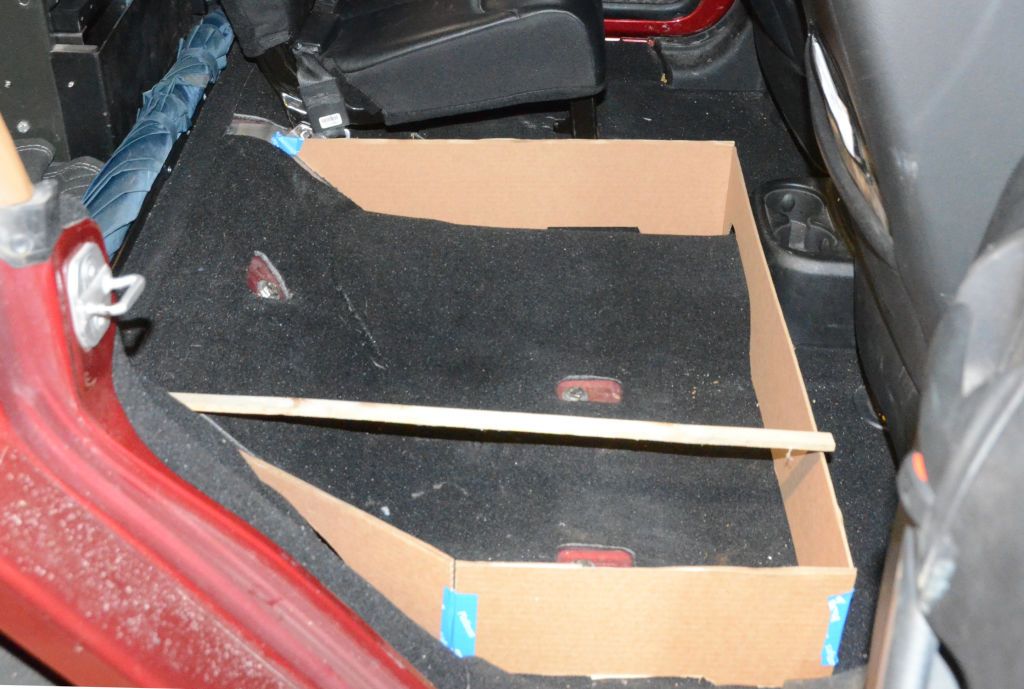
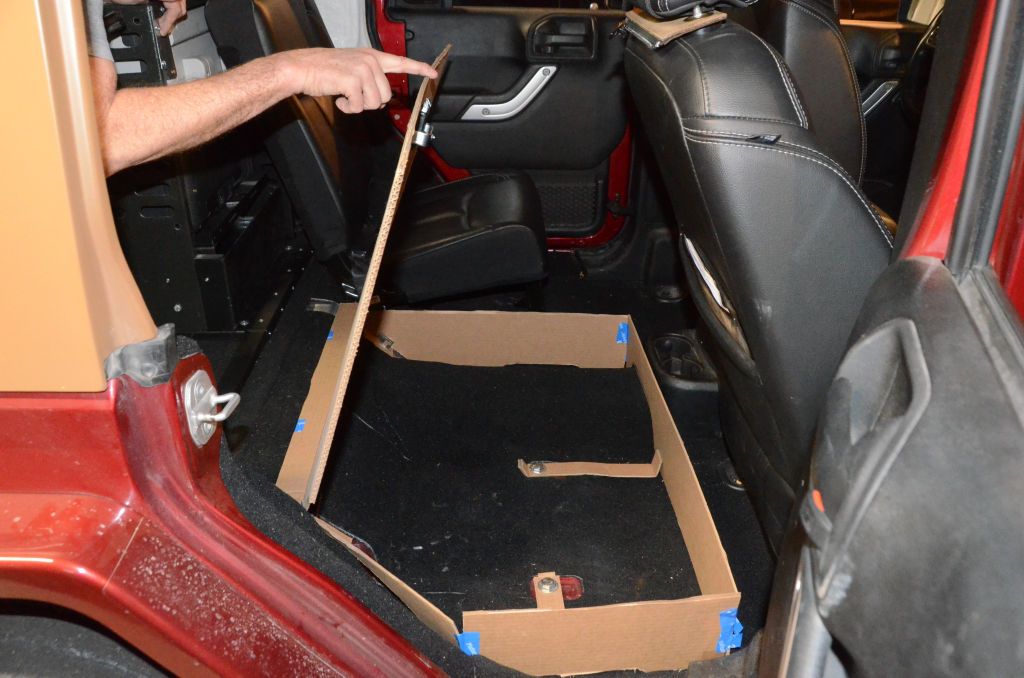
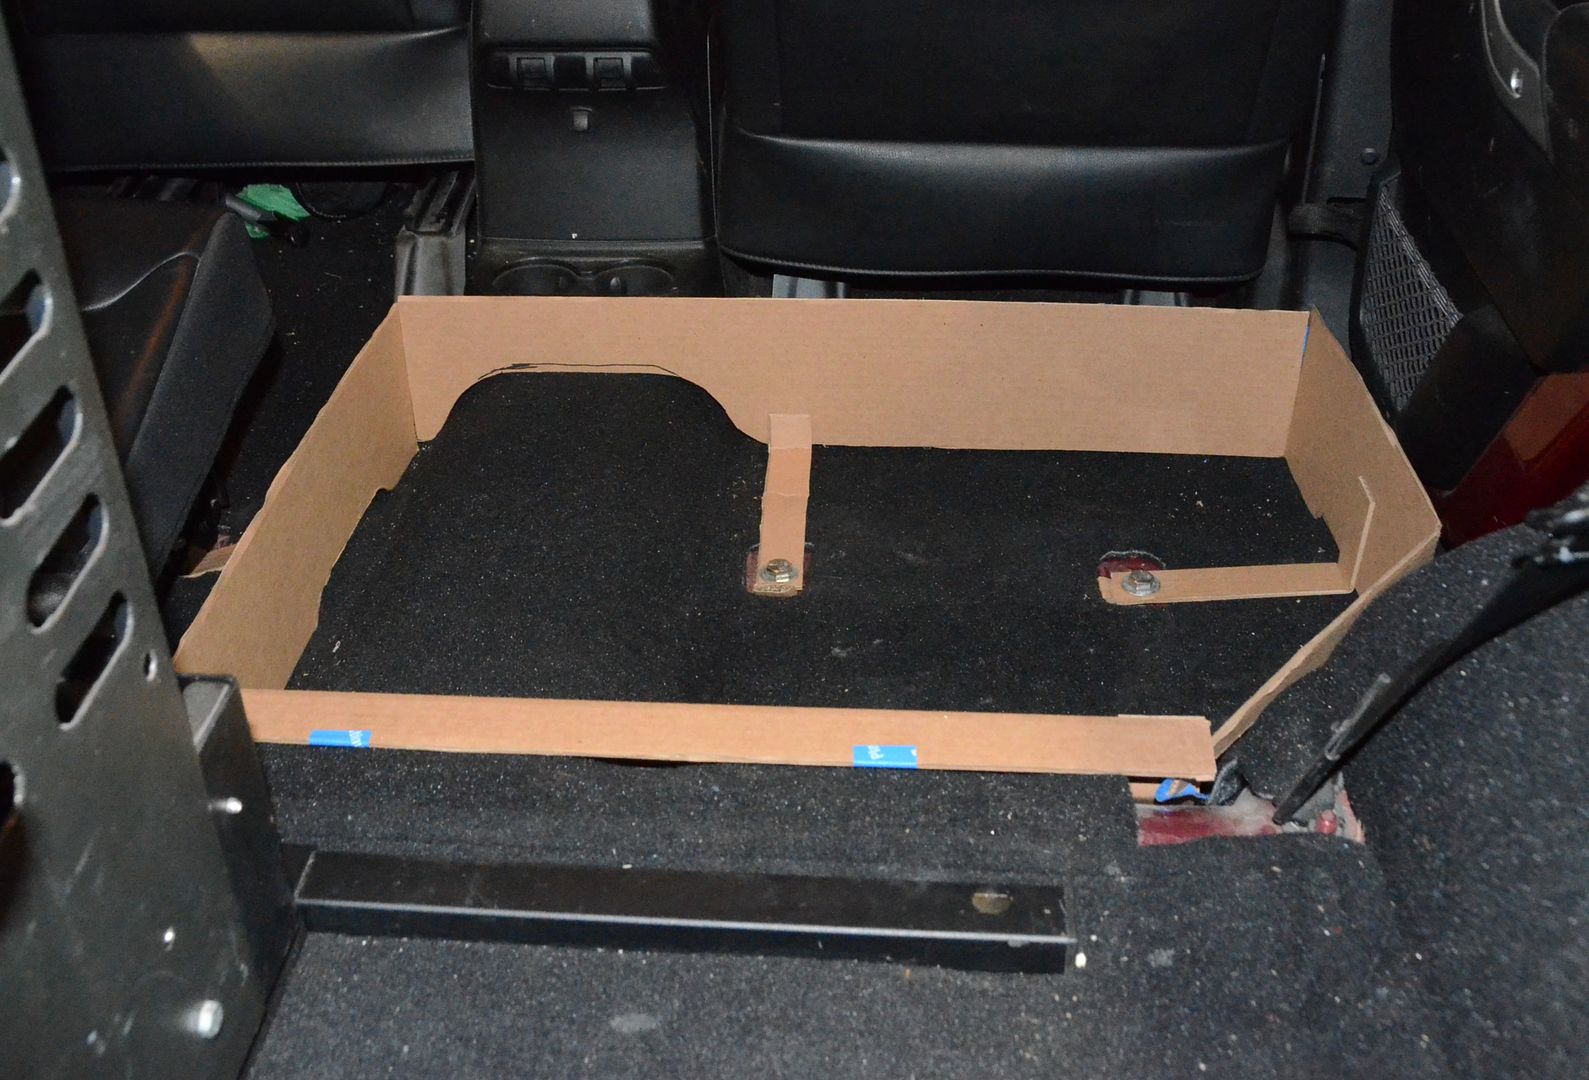
Finished the cardboard mockup. Here's the lid with the paddle latch installed:
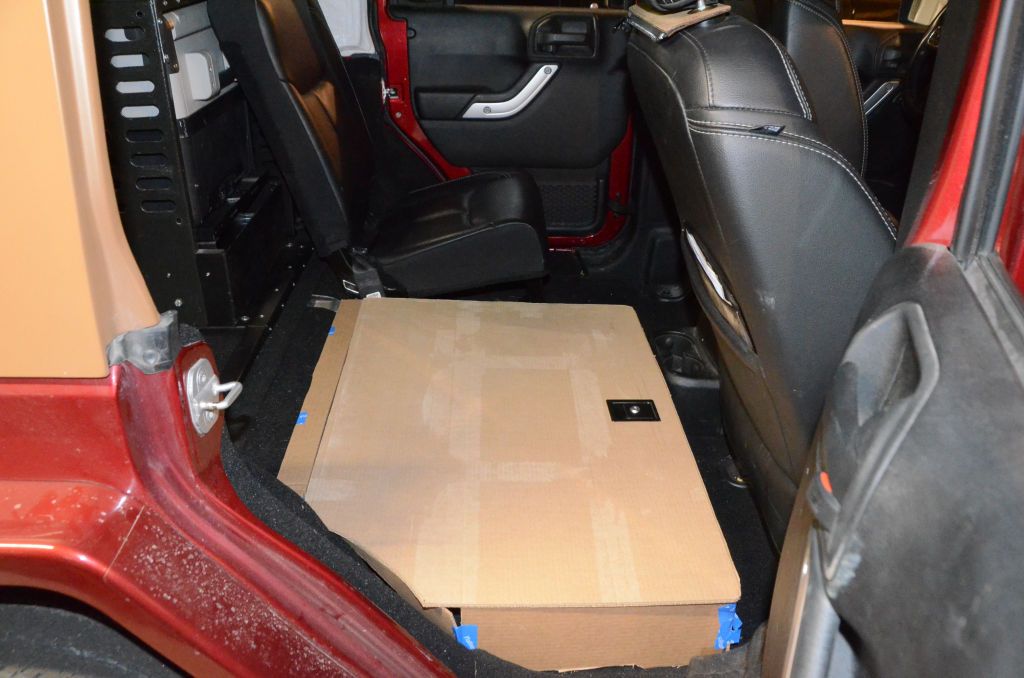
I made the mockup to hinge at the back. Could be at the front or the back but the hinge at the back seems like the best to me. I'm open to discussion on putting the hinge at the front if someone has a good reason for that.
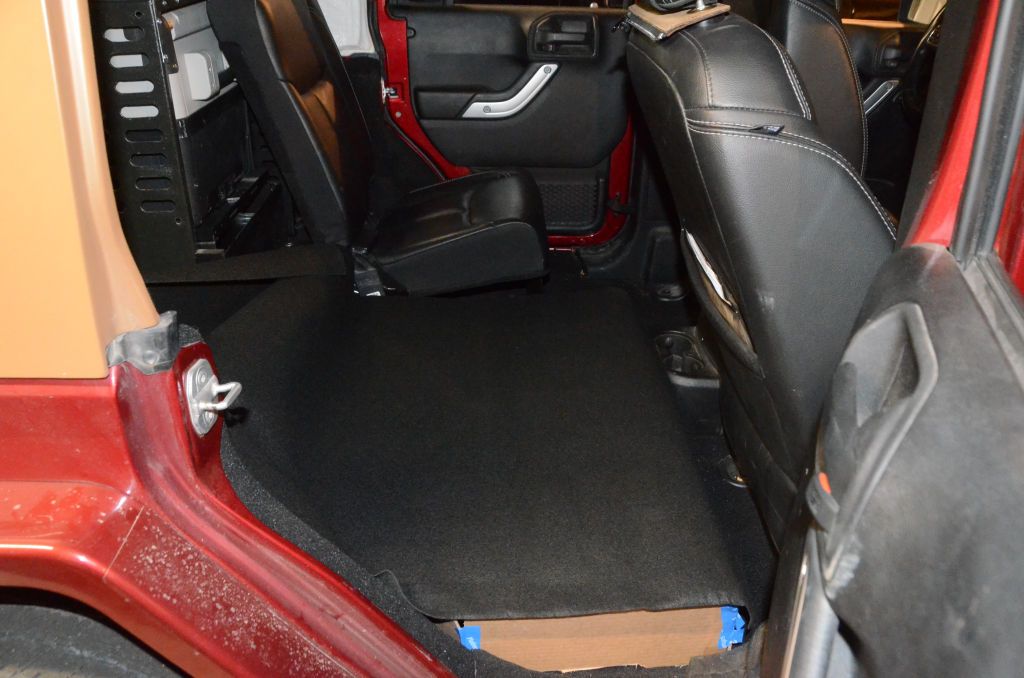
I found carpet that's a reasonable match for what's in the Jeep already so the lid and sides of the compartment will be carpeted. In this photo I'm checking out how the carpet looks.
I made the mockup to hinge at the back. Could be at the front or the back but the hinge at the back seems like the best to me. I'm open to discussion on putting the hinge at the front if someone has a good reason for that.
I found carpet that's a reasonable match for what's in the Jeep already so the lid and sides of the compartment will be carpeted. In this photo I'm checking out how the carpet looks.
jscherb
Expedition Leader
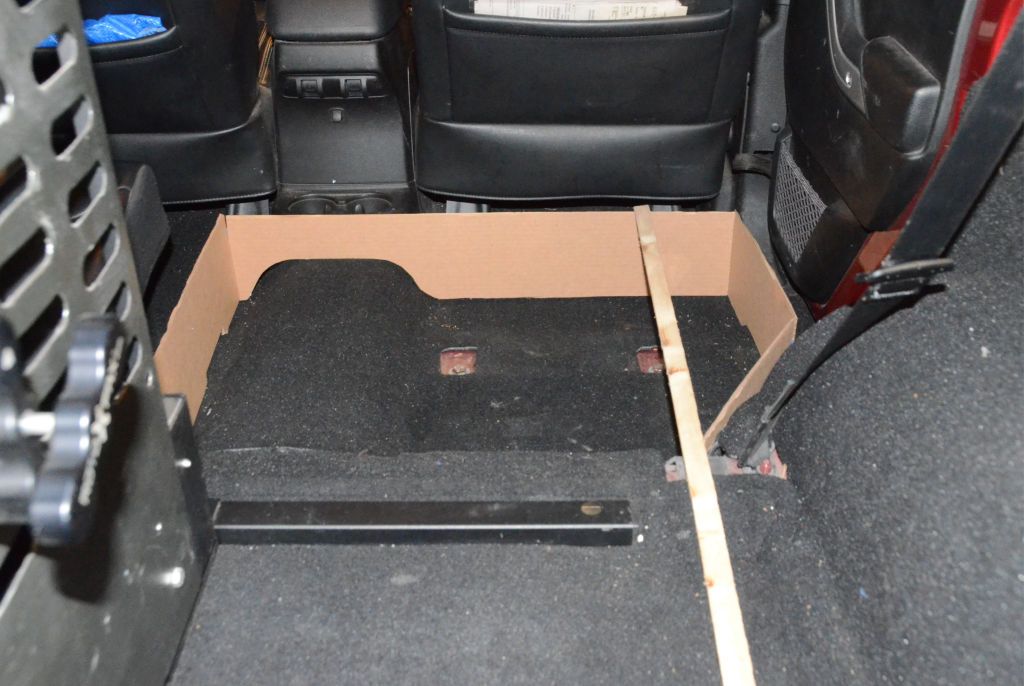
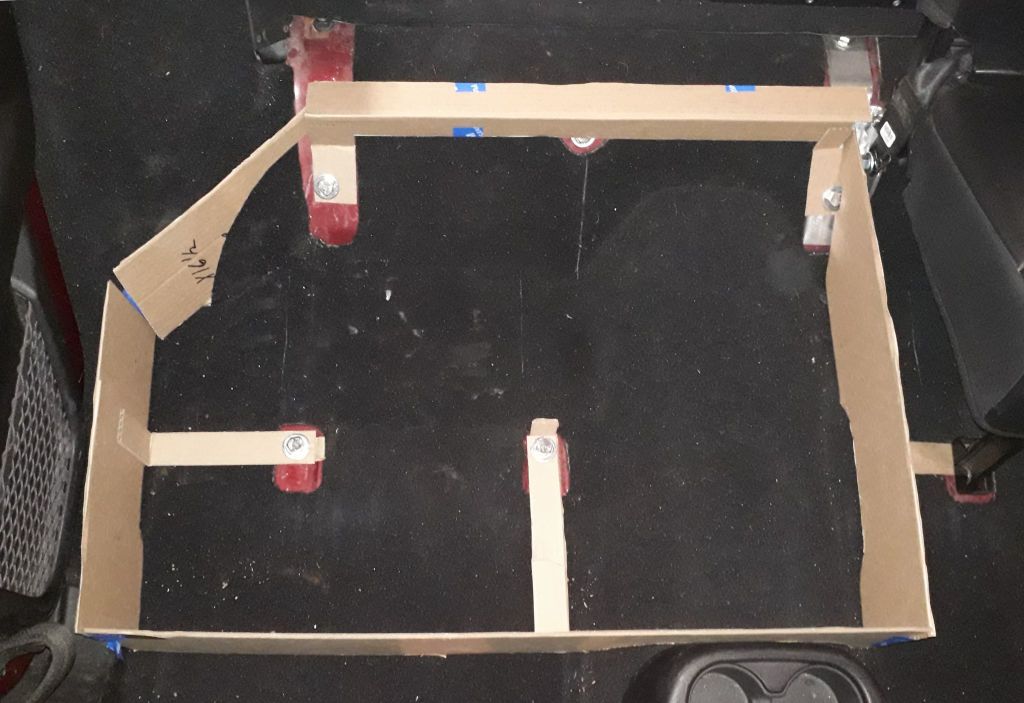
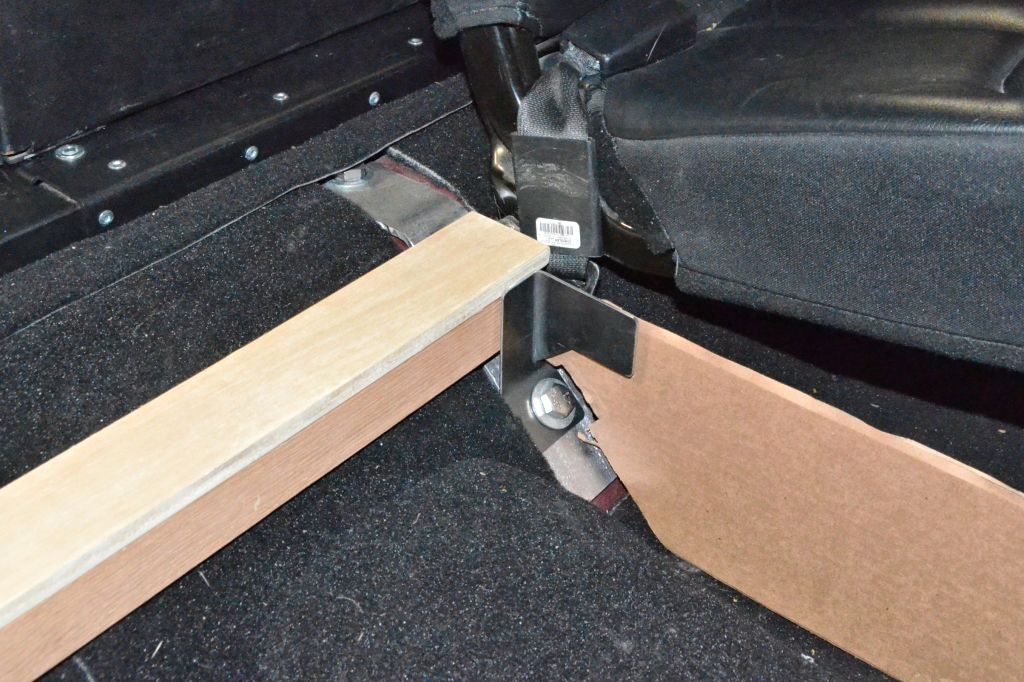
Looking at the base, the mounting brackets are mocked up in cardboard and can be seen in these photos. All brackets use existing holes in the floor - there are two along the back edge, two in the center and one to the foot of the remaining seat.
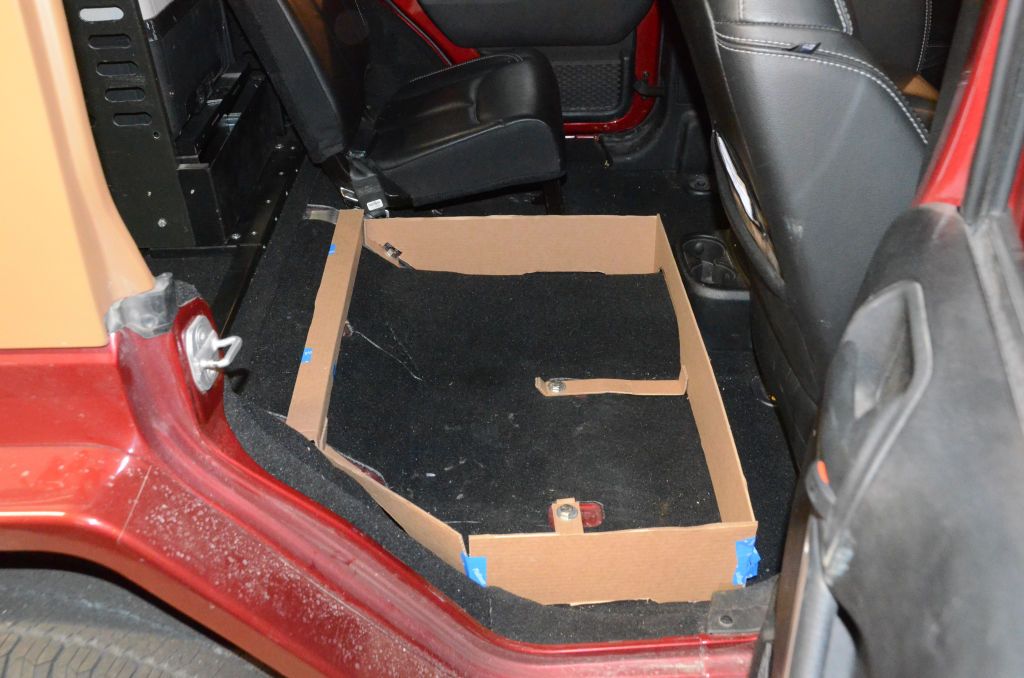
May not need the bracket that runs front-back in the center of this next photo but I'll probably make all 5 brackets and test it with all 5 brackets and with just 4.
Once I do a few tweaks to the patterns to account for the thickness of the plywood vs. the carboard mockup, I'll cut some wood.
May not need the bracket that runs front-back in the center of this next photo but I'll probably make all 5 brackets and test it with all 5 brackets and with just 4.
Once I do a few tweaks to the patterns to account for the thickness of the plywood vs. the carboard mockup, I'll cut some wood.
I wouldn't be able to buy one of these because I have to keep my seats in for my kids but I have a Ursa Minor top and a third row seat. At night when I'm camping I will sit in the third row seat and if I had this, it would be better with the hinge up front because I can just lift it up to get to things.
jscherb
Expedition Leader
Sounds like a front hinge makes sense for your configuration. For me I think the rear hinge will make the most sense but the way the compartment is designed, it can be hinged either way so what I'll do is draw the plans and write the instructions showing both configurations.I wouldn't be able to buy one of these because I have to keep my seats in for my kids but I have a Ursa Minor top and a third row seat. At night when I'm camping I will sit in the third row seat and if I had this, it would be better with the hinge up front because I can just lift it up to get to things.
BTW the compartment is no more permanently installed than the 60 side of the seat is - the same bolts you remove to pull the big side of the seat out are the ones that hold the compartment in place, so it's not unreasonable to run with the full seat for daily driving and swap the seat for the compartment for a particular expedition.
Speaking of plans, where I'm heading with this project is creating a set of brackets that could be turned into a product if someone wanted to bring them to market. The seat delete bracket and the compartment brackets are separate, so if only the seat delete is wanted only that bracket could be installed or all of the brackets could be installed for a compartment. I'll also create patterns for the plywood parts and write the instructions so an average DIYer could build this. This doesn't mean this will ever become a product; I do most of my designs so they could be products if that opportunity arises even though I am almost always just building something for my own use.
jscherb
Expedition Leader
This morning I started cutting wood so I could make the rear brackets for the storage compartment. The brackets aren't in final form yet, but the idea for these brackets in the back of the compartment is for them to secure the compartment to the floor and also to reinforce the corners of the compartment, so the brackets attach to two sides of the compartment. The brackets will bolt to the wood of the compartment but I haven't drilled those holes in the brackets yet because I'm still working on the exact sizing of the brackets.
Left side, next to the 40 side of the seat. This bracket has a 90 degree brace for the corner of the compartment.
Right side. This one has a 45 degree brace for the corner.

Making the brackets like this should make it much easier for a DIY-er to successfully build the compartment.
Tomorrow I'll cut more wood.
Left side, next to the 40 side of the seat. This bracket has a 90 degree brace for the corner of the compartment.
Right side. This one has a 45 degree brace for the corner.
Making the brackets like this should make it much easier for a DIY-er to successfully build the compartment.
Tomorrow I'll cut more wood.
jscherb
Expedition Leader
The frame pieces are all cut and clamped in place. I haven't trimmed the top of the frame pieces yet because I needed to get it assembled to this point before I could tell where to cut the top to make it level with the back floor; I'll do that next.
Everything is bolt-together using brackets in the corners and brackets to secure it to the floor. Still need to make the brackets for the front of the frame.
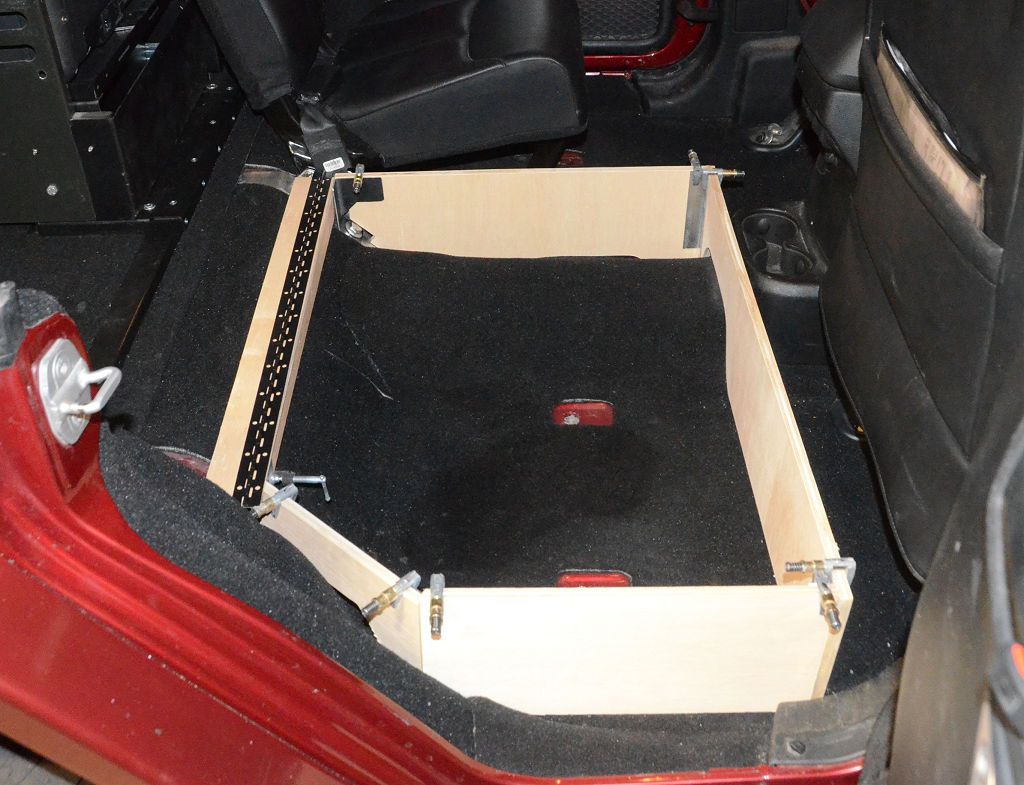
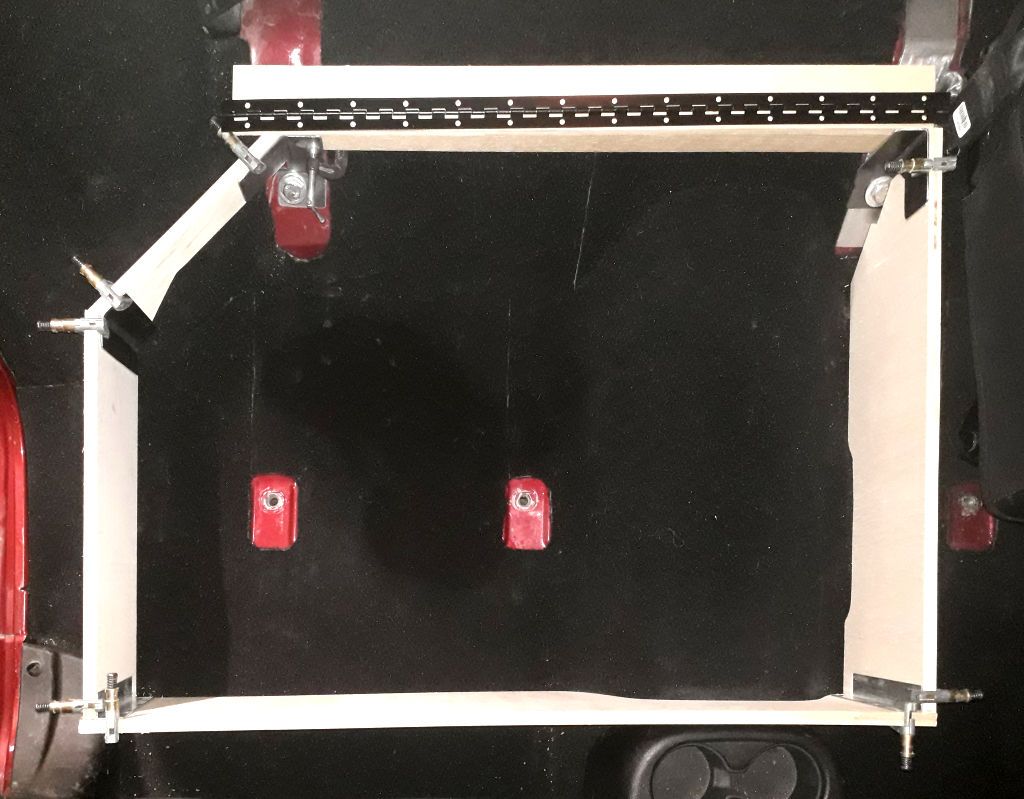
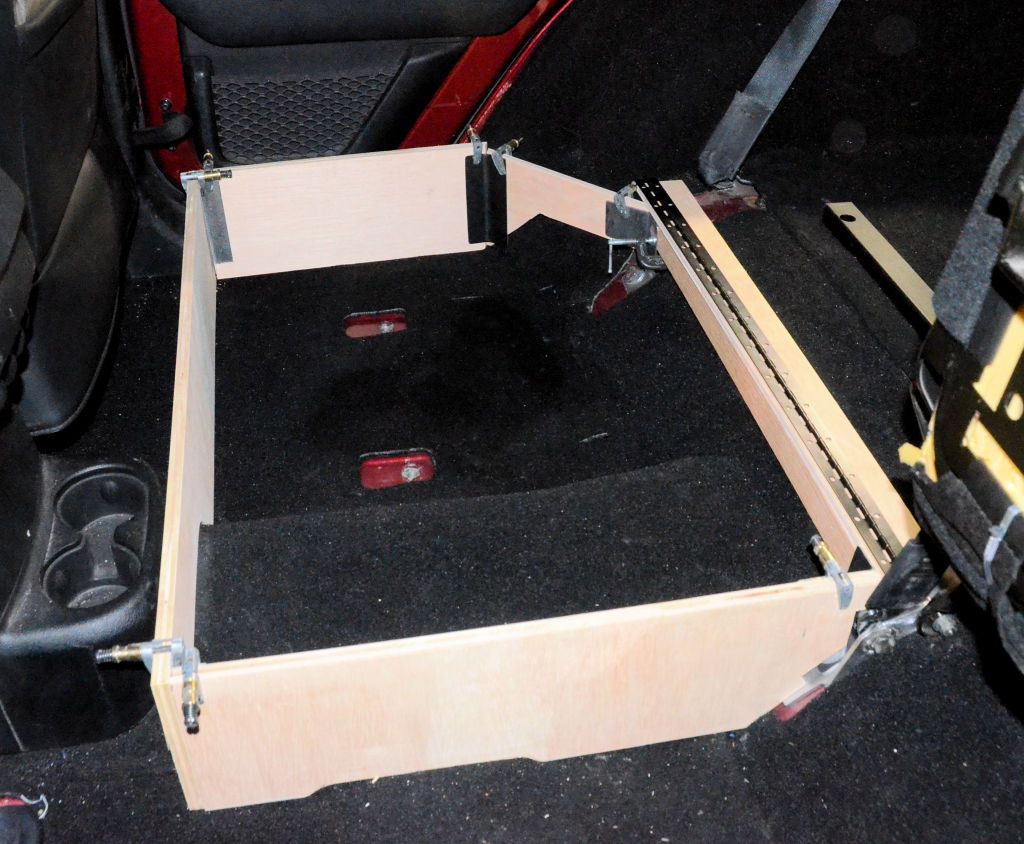
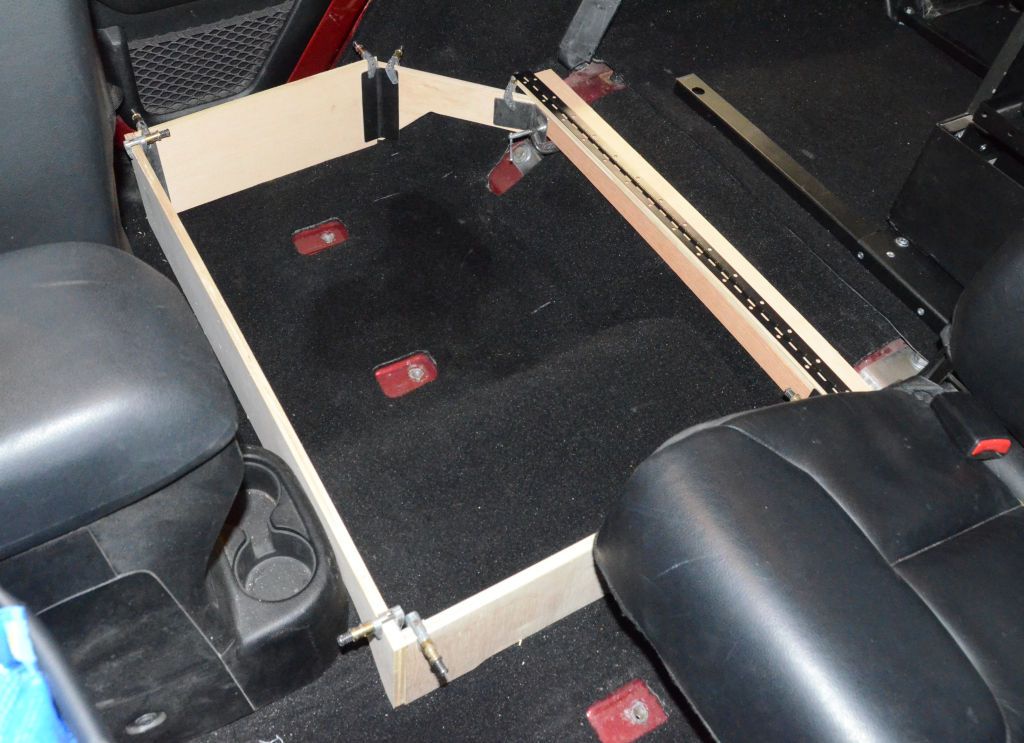
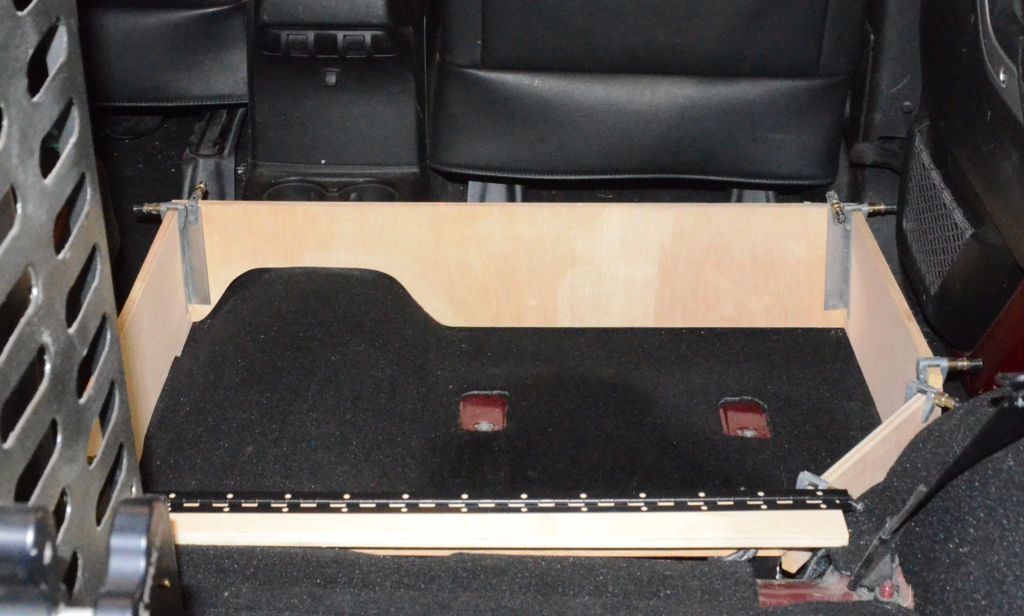
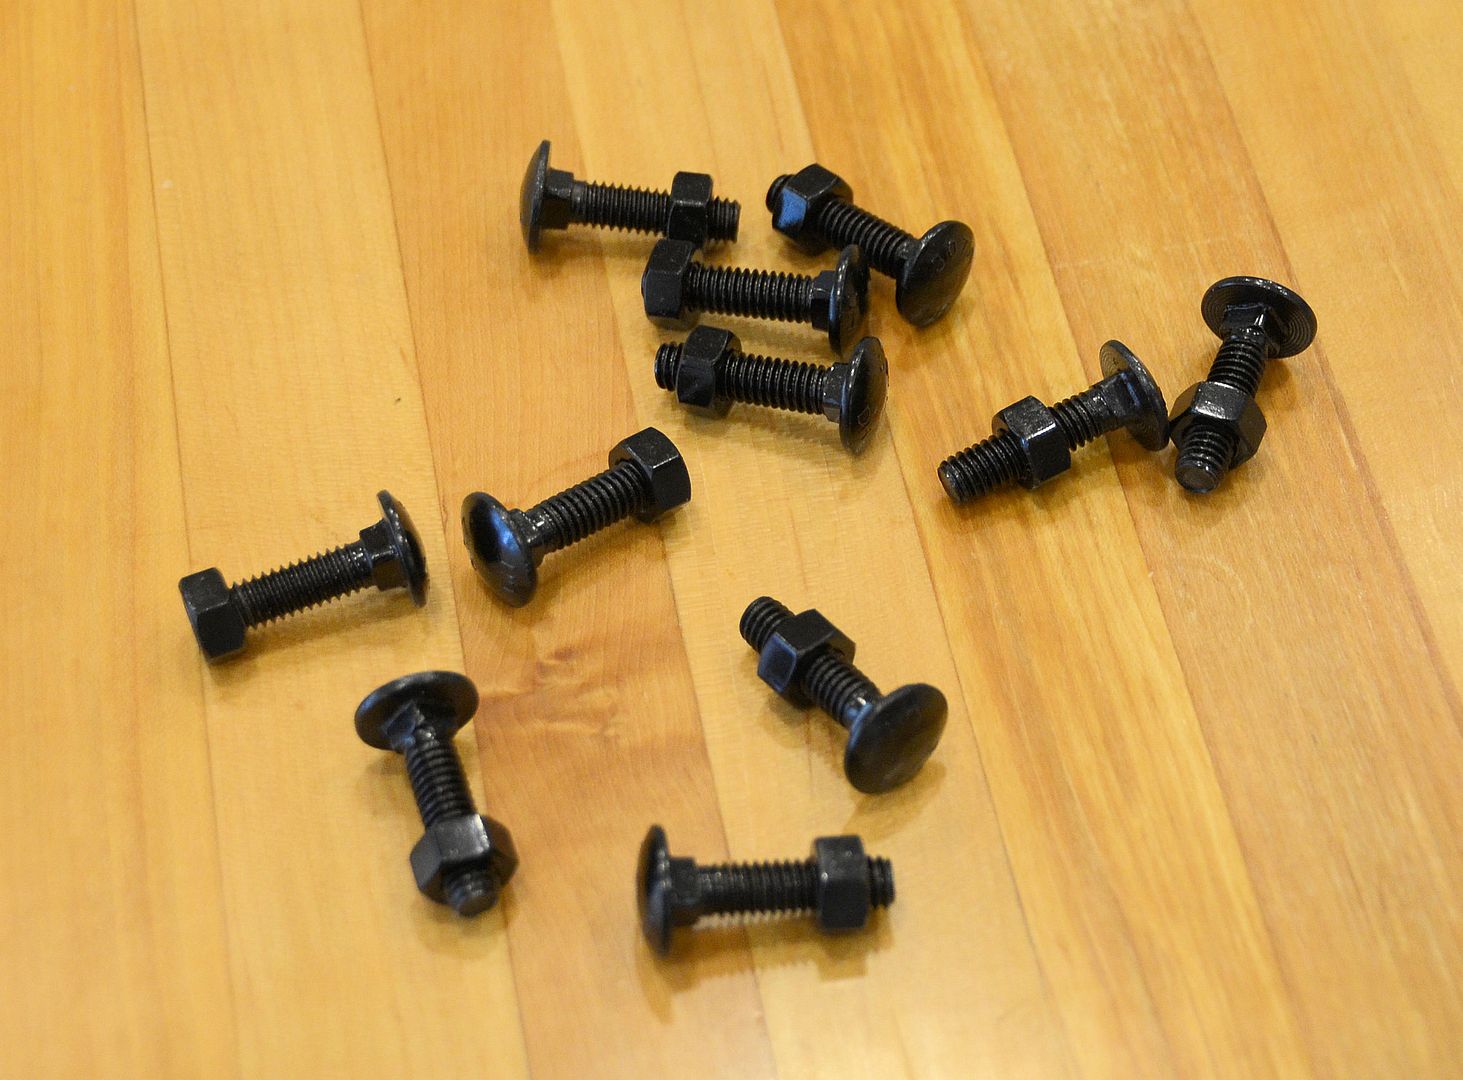
The corner brackets aren't drilled yet. The frame pieces will bolt to the corner brackets using black outdoor carriage bolts, the bolt heads won't look out of place on the black carpet on the sides of the frame:
I'll be using a black piano hinge for the lid, it's in the photos.
Everything is bolt-together using brackets in the corners and brackets to secure it to the floor. Still need to make the brackets for the front of the frame.
The corner brackets aren't drilled yet. The frame pieces will bolt to the corner brackets using black outdoor carriage bolts, the bolt heads won't look out of place on the black carpet on the sides of the frame:
I'll be using a black piano hinge for the lid, it's in the photos.