Meet the Trot'n Turtle - Unimog U1300L Build

Coachgeo

Explorer
Put the Fire box on a trailer and make it a portable shop trailer. Tis my plan. Takinge an old box of back of old moving truck (Box I alrealy have) and outfit it with all my tools after plopping it on a Lowboy trailer. When build garage shop will leave big door to walk into trailer for tools. Garage will then only need to be big enough for working on things. Will cut cost of building garage/shop.
 

patoz

Expedition Leader
This is an awesome build with a great truck! The work quality is very good and looks professional. Your attention to detail really shows.

As a retired Fire Chief and EMT, I appreciate the fact you removed the RW1 body intact and installed a replacement instead of destroying it just to salvage the bed piece. It kills me to see guys ripping ambulance equipment and components apart, rather that take the time to remove them correctly. Like you said, that body is an work of art, and if I had something to put it on I'd be talking to you about it. I even thought maybe I could put it on a trailer and use it that way, but I'm supposed to be looking for a new house and the last thing I need right now is another project.

Good luck, and I'm looking forward to seeing where this goes!


Yeah that box is just to cool to chop up! It would make one heck of a service truck!


Hodakaguy


I just wish you hurry up and do something with it, so I can quit worrying about how I can buy it and what to do with it! :coffeedrink:
 

Hodakaguy

Adventurer
I just wish you hurry up and do something with it, so I can quit worrying about how I can buy it and what to do with it! :coffeedrink:

It's currently for sale.. $4500. I'd be afraid to see what this box would cost to have built new!

Hodakaguy
 

patoz

Expedition Leader
It's currently for sale.. $4500. I'd be afraid to see what this box would cost to have built new!

Hodakaguy


I agree, and that's why people don't understand why emergency vehicles cost so must!

I would love to have it, but like I said I need to find a new house before I take on anything else. Just out of curiosity, do you have any idea what it weighs?
 

Hodakaguy

Adventurer
Got a little time today to work on the overhead console. First up cut out the parts, I'm slowly getting better at programming the CNC plasma machine (Not mine but I have access to it :)

Parts cut.

20161215_110106_1.jpg


20161215_115334.jpg


20161215_115442.jpg


Using the finger brake to form the box portion of the console

20161215_120656.jpg


Pieces formed up.

20161215_110106.jpg


Getting ready to tig weld the pan to the base. Using lots of clamps to keep it from warping, also jumped around with the weld to distribute the heat.

PC151266.jpg


PC151271.jpg


PC151278.jpg


Came out nice and flat. I will blend the welds down smooth tomorrow...but here's a sneak peak of how it will fit. The front is slightly angled for better visibility. Here my father is holding the console in place for a quick picture.

PC151282.jpg


More to come....

Hodakaguy
 

Hodakaguy

Adventurer
Thats cool !

I might suggest building that console on hinges or similar.
These sort of electrical projects are never really "finished".
Its always handy to easily open up wiring to reconfigure or diagnose problems. Never mind the initially building it...
Also, the front what carries switches, LED displays, etc. as a separate piece.

I originally thought about a hinged setup on one side and a latch on the other, I may eventually wish I had went that route :). I have another plan involving a couple short straps to support the box then its removed, we'll see how it all works out. Hopefully once its complete I won't have to be in there all that often :).

Hodakaguy
 

Hodakaguy

Adventurer
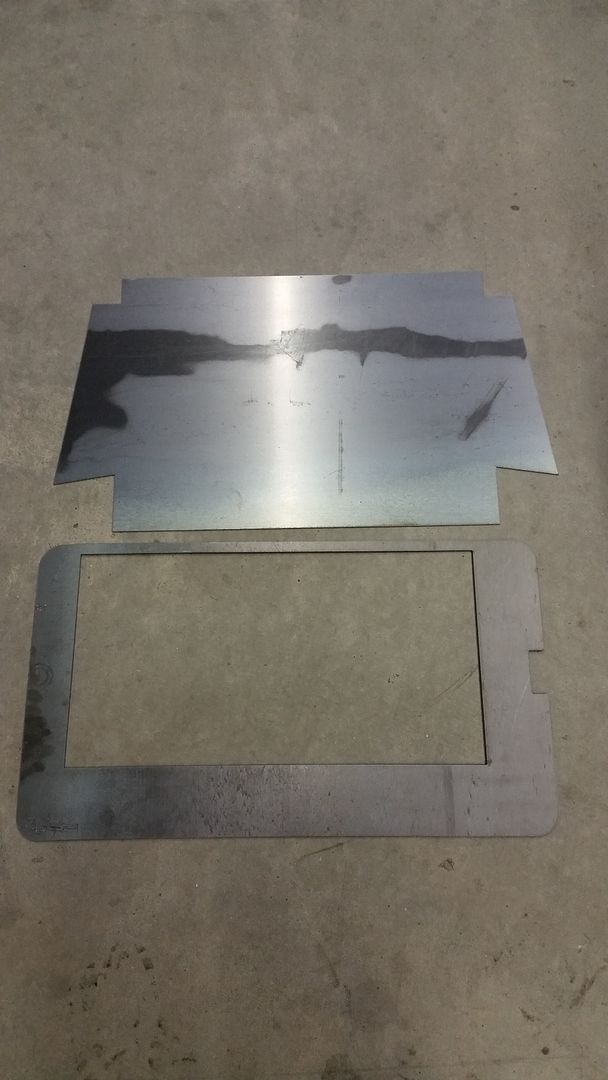
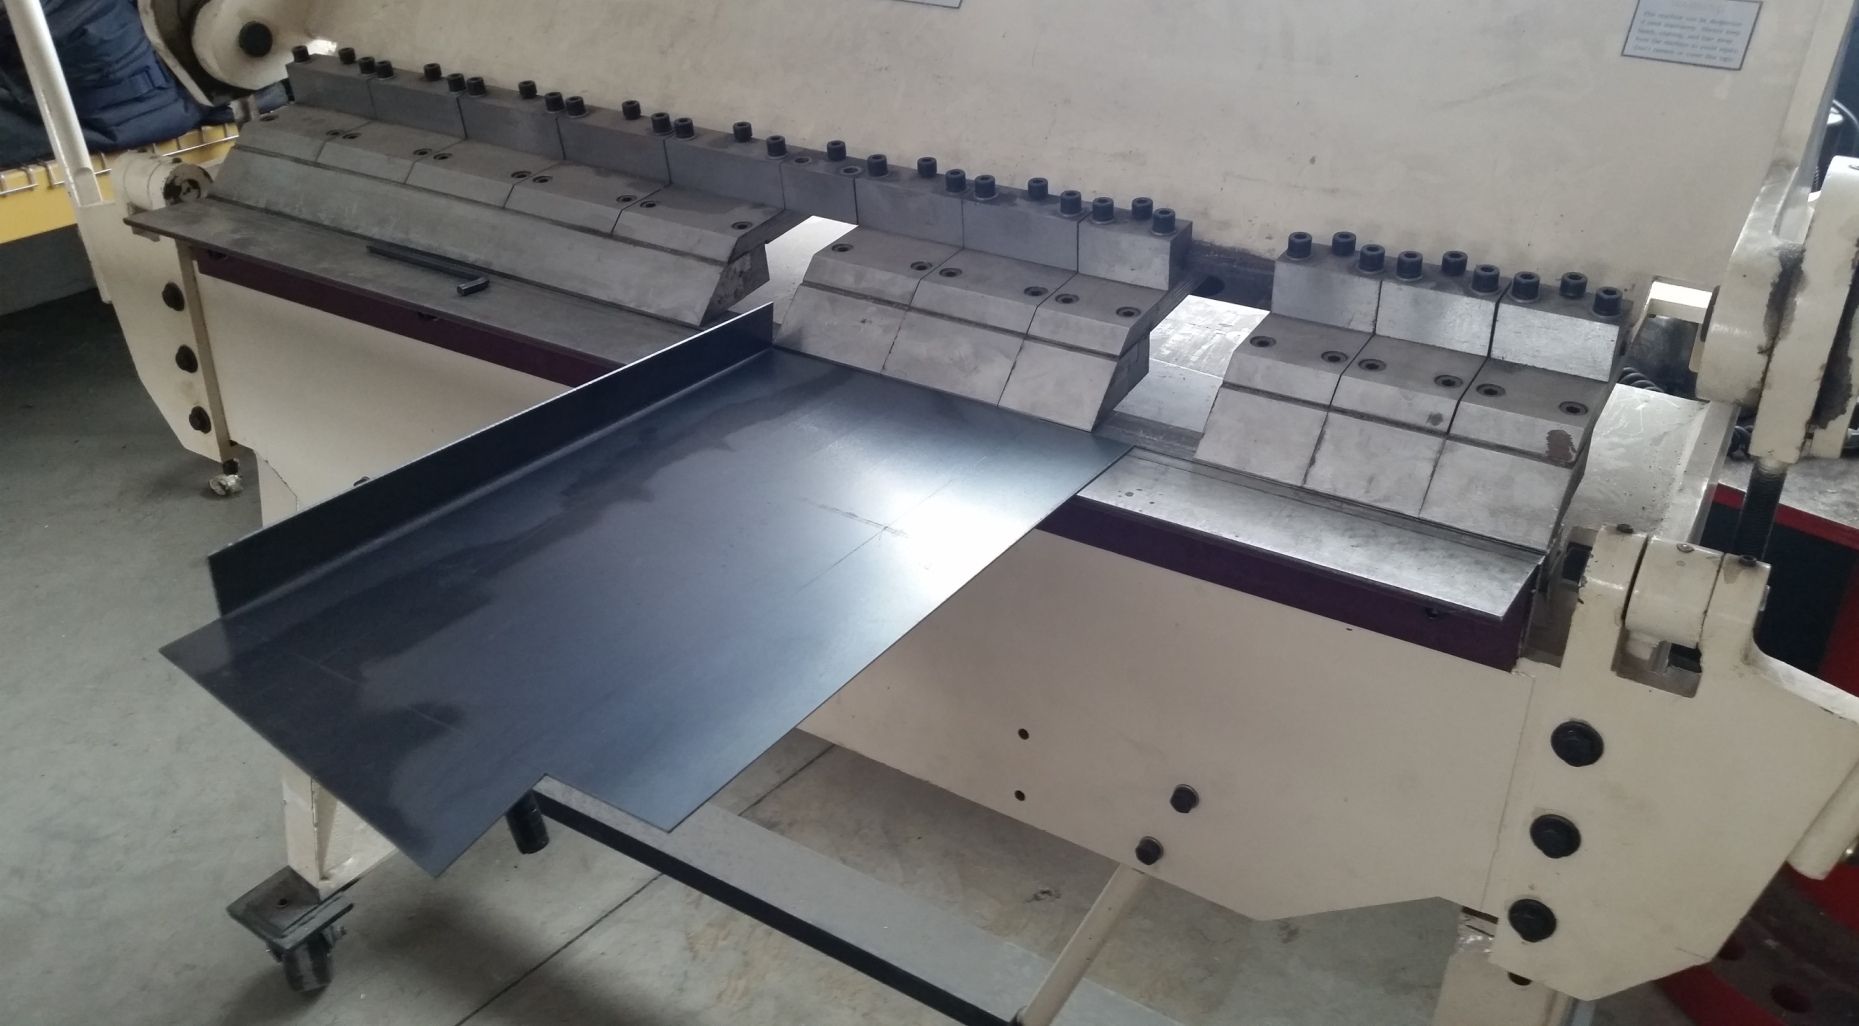
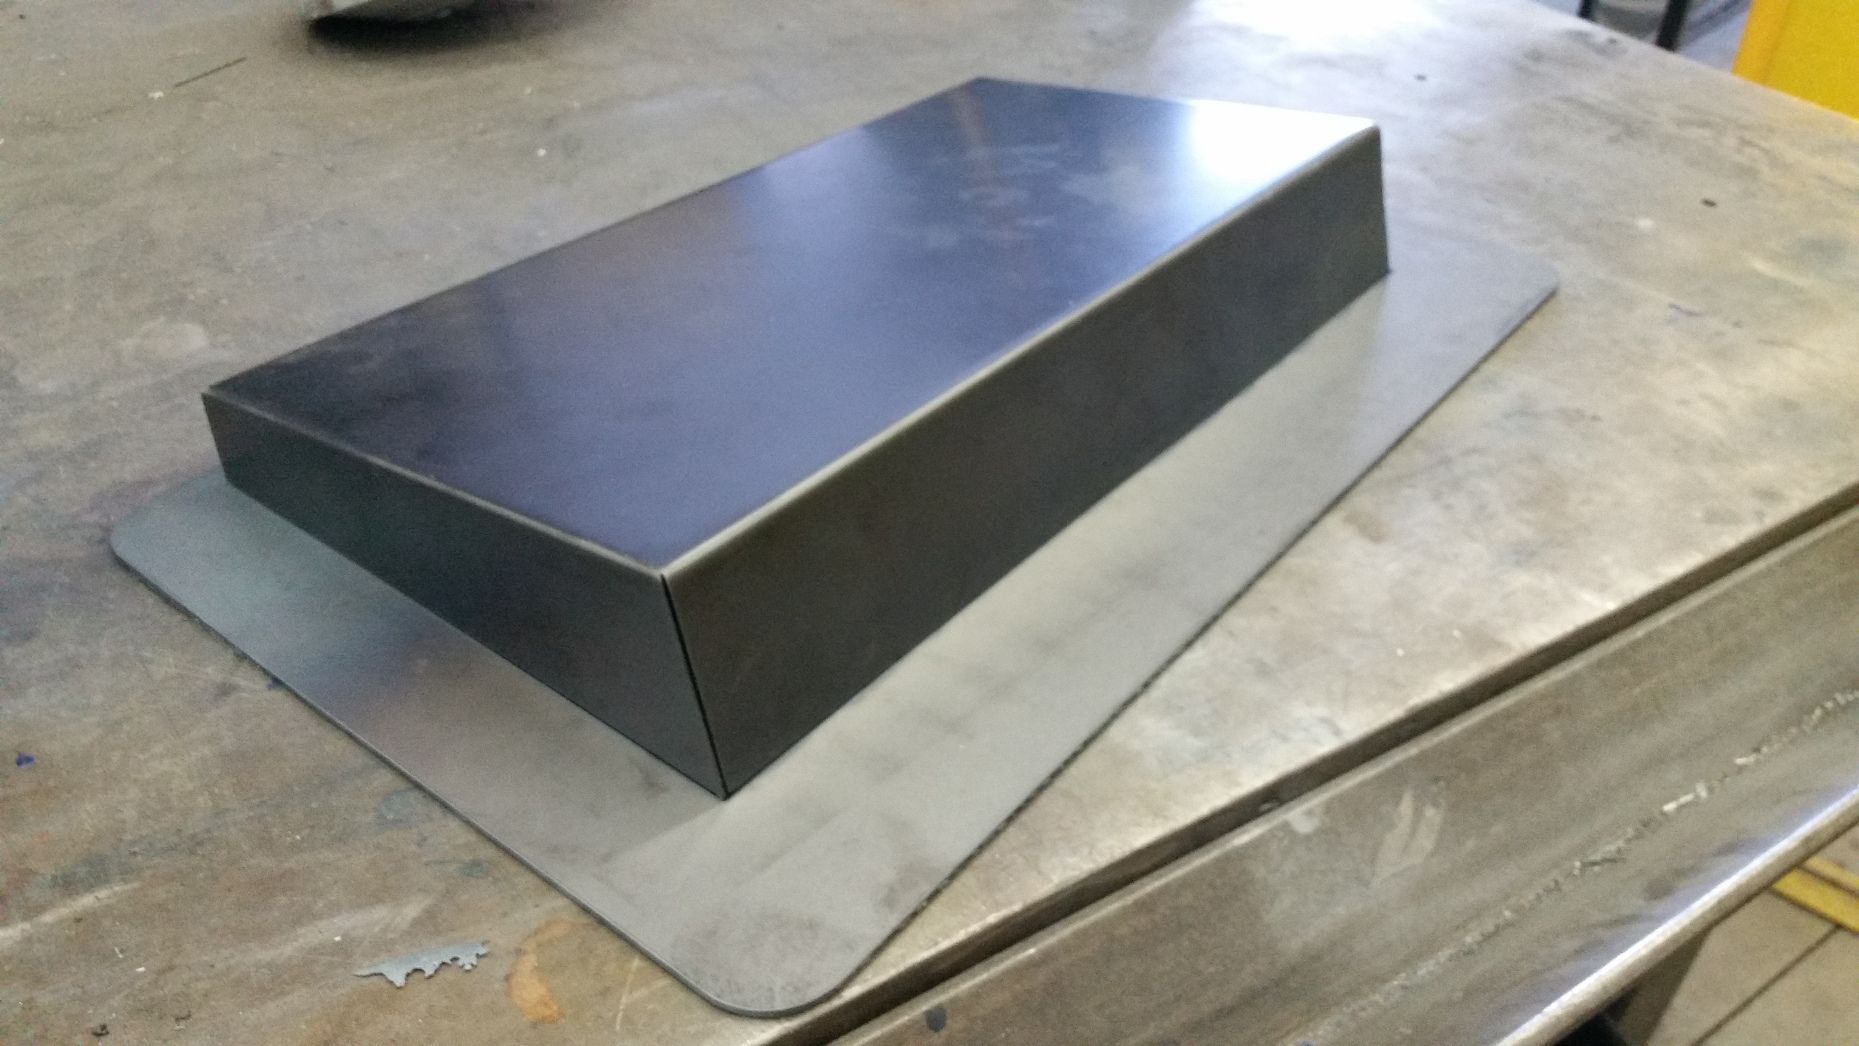
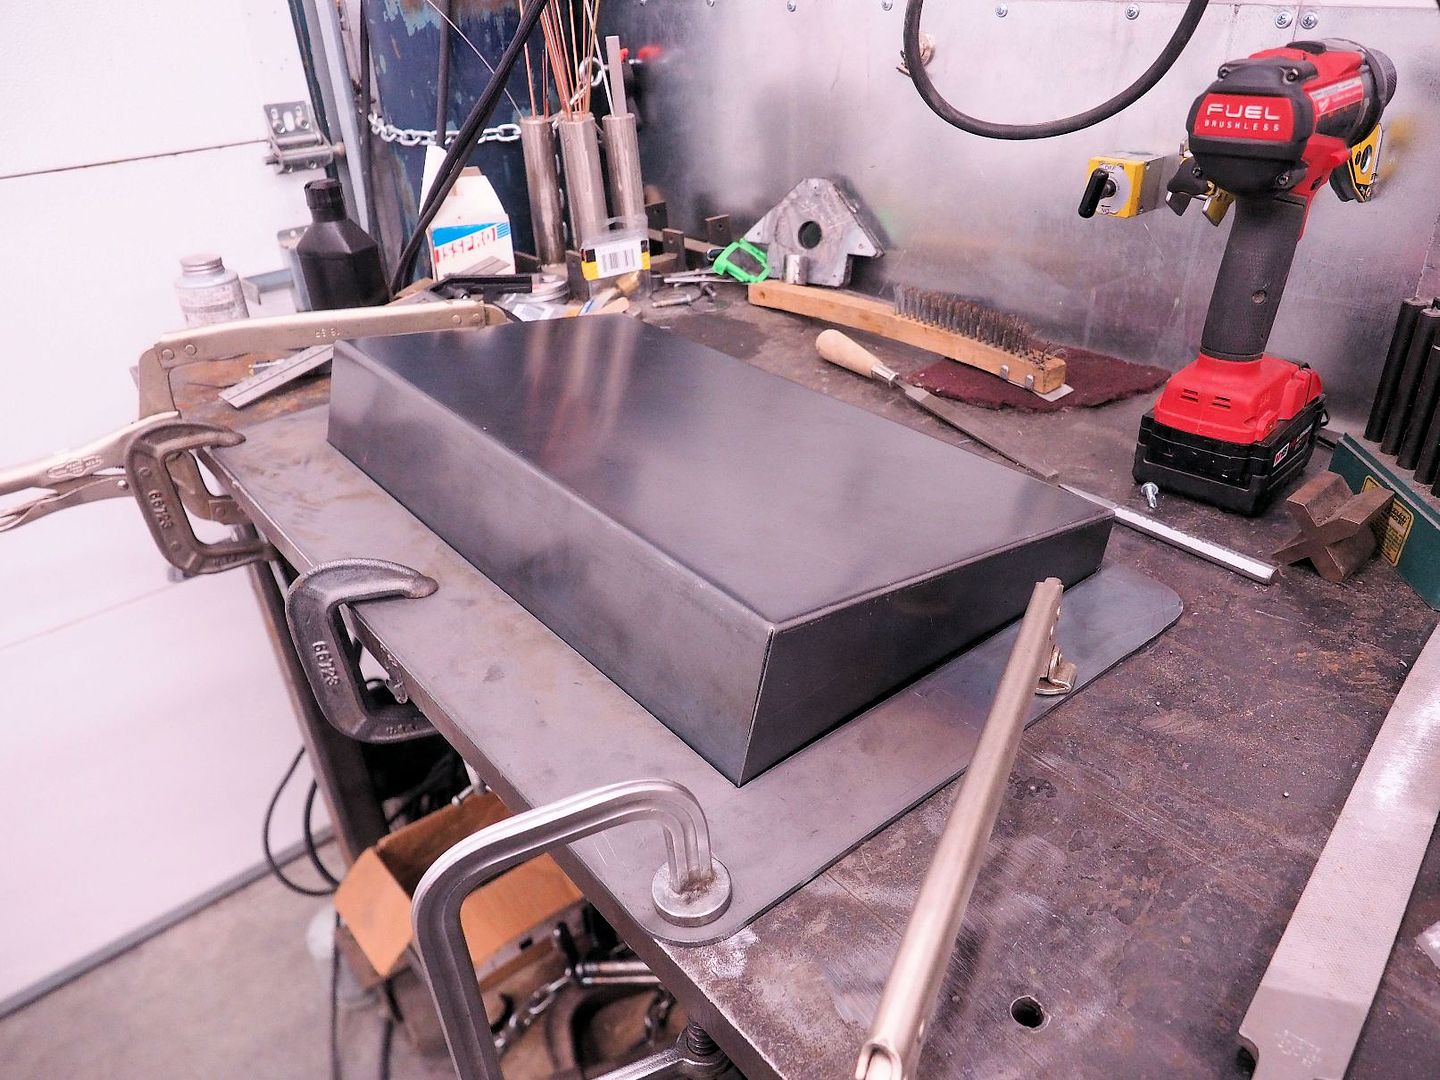
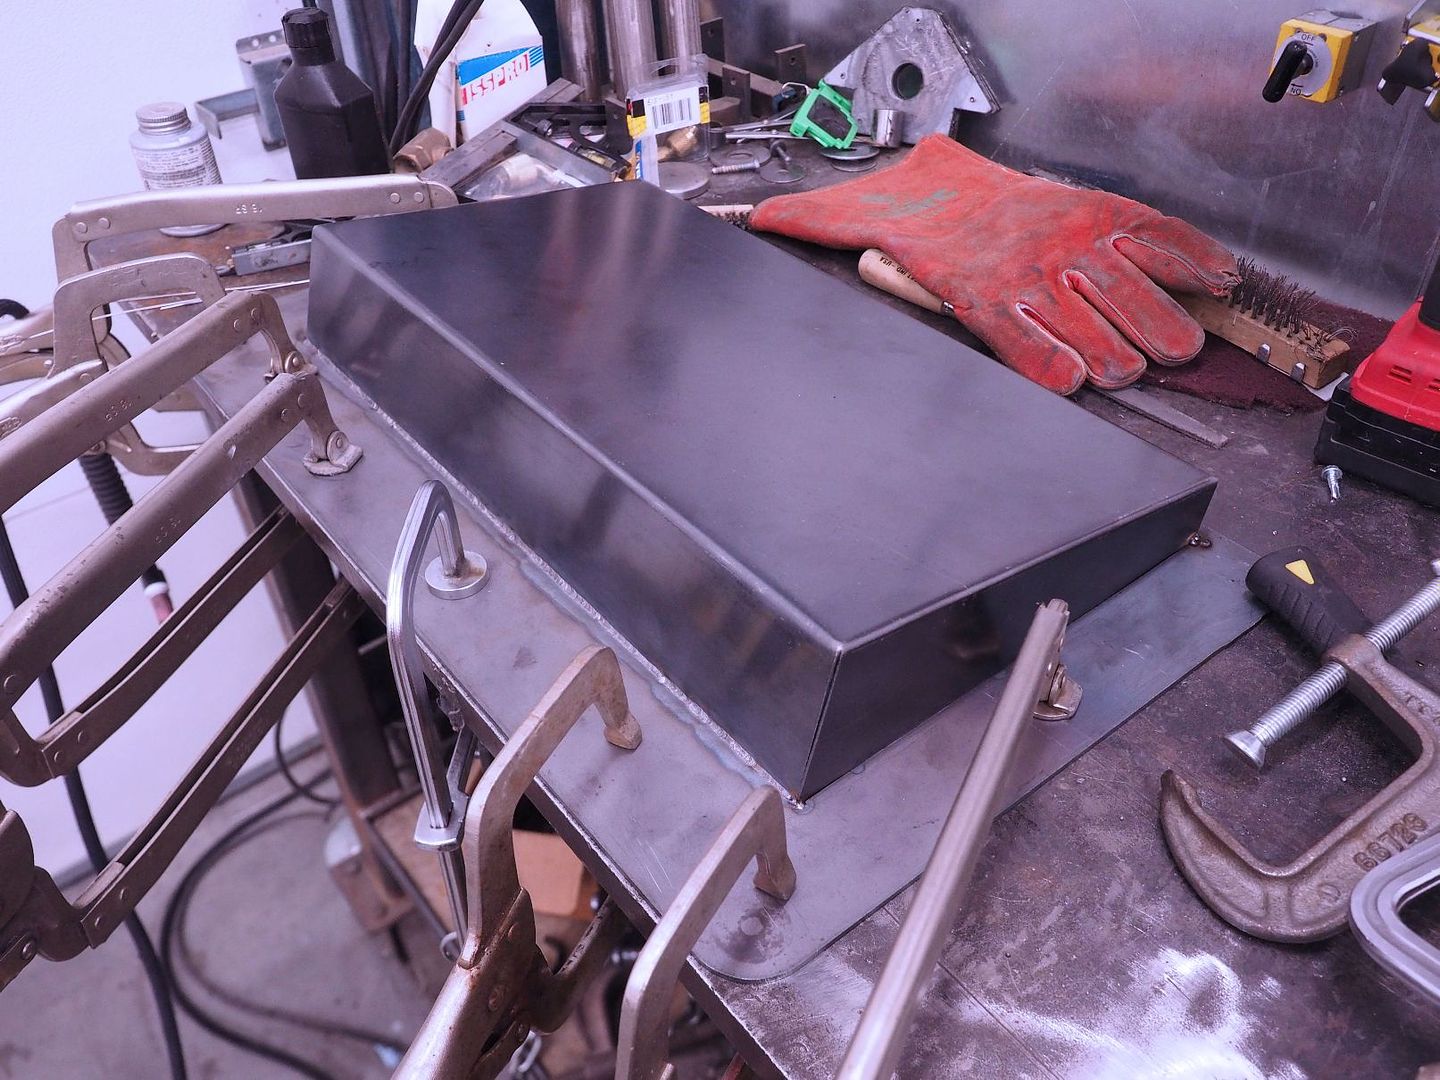
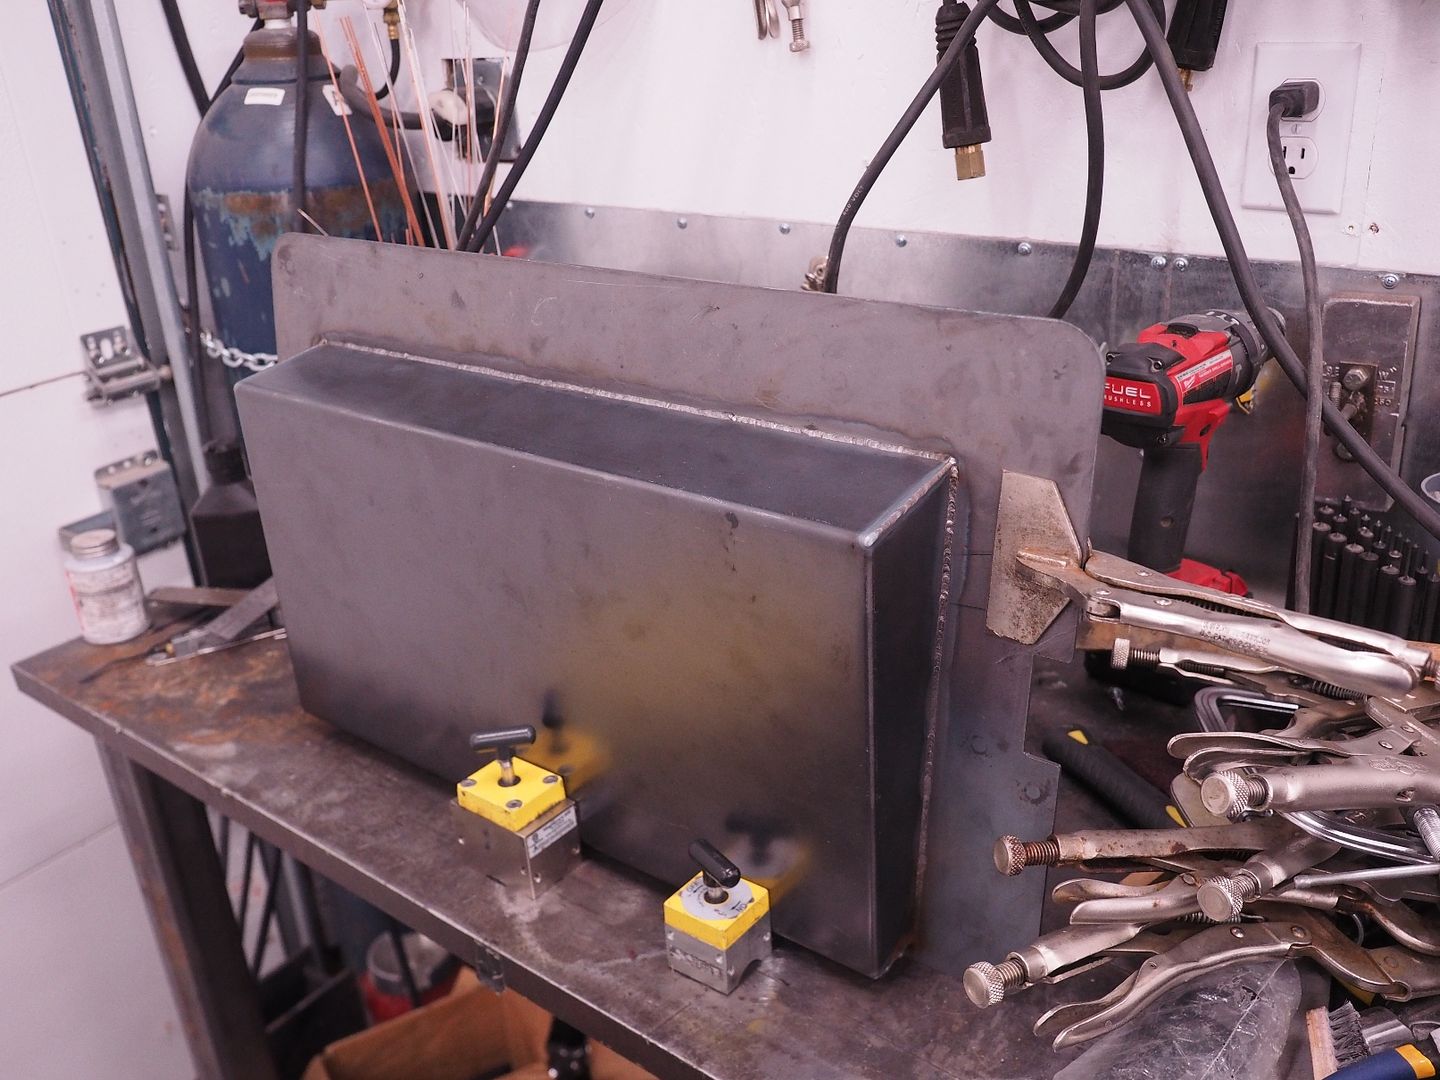
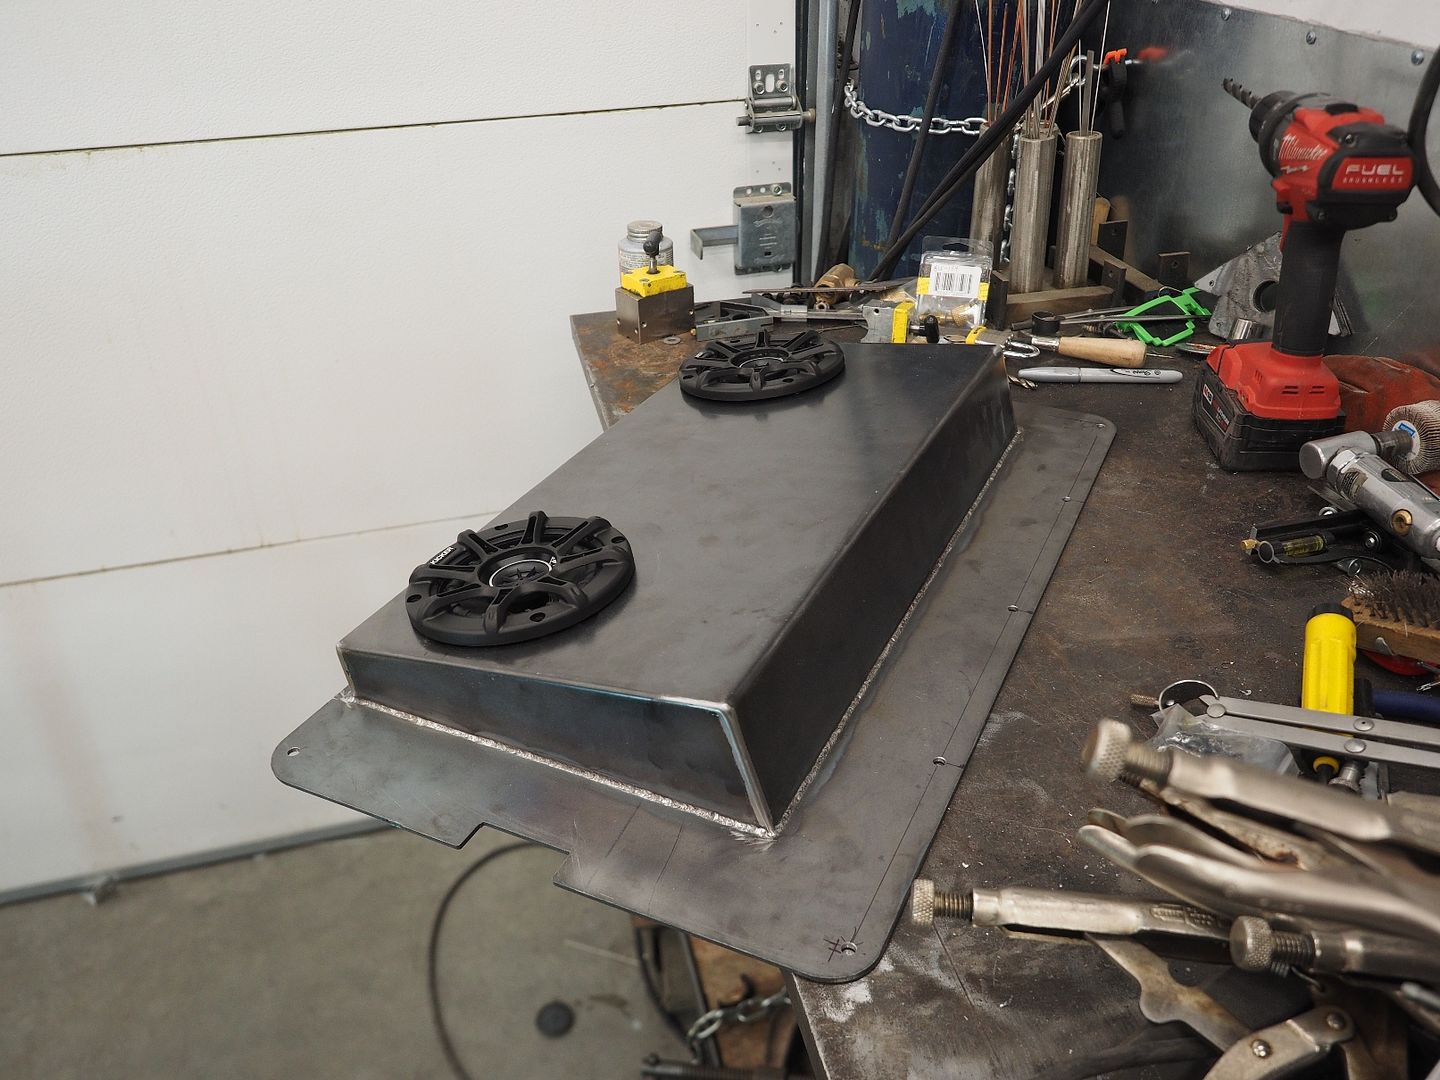
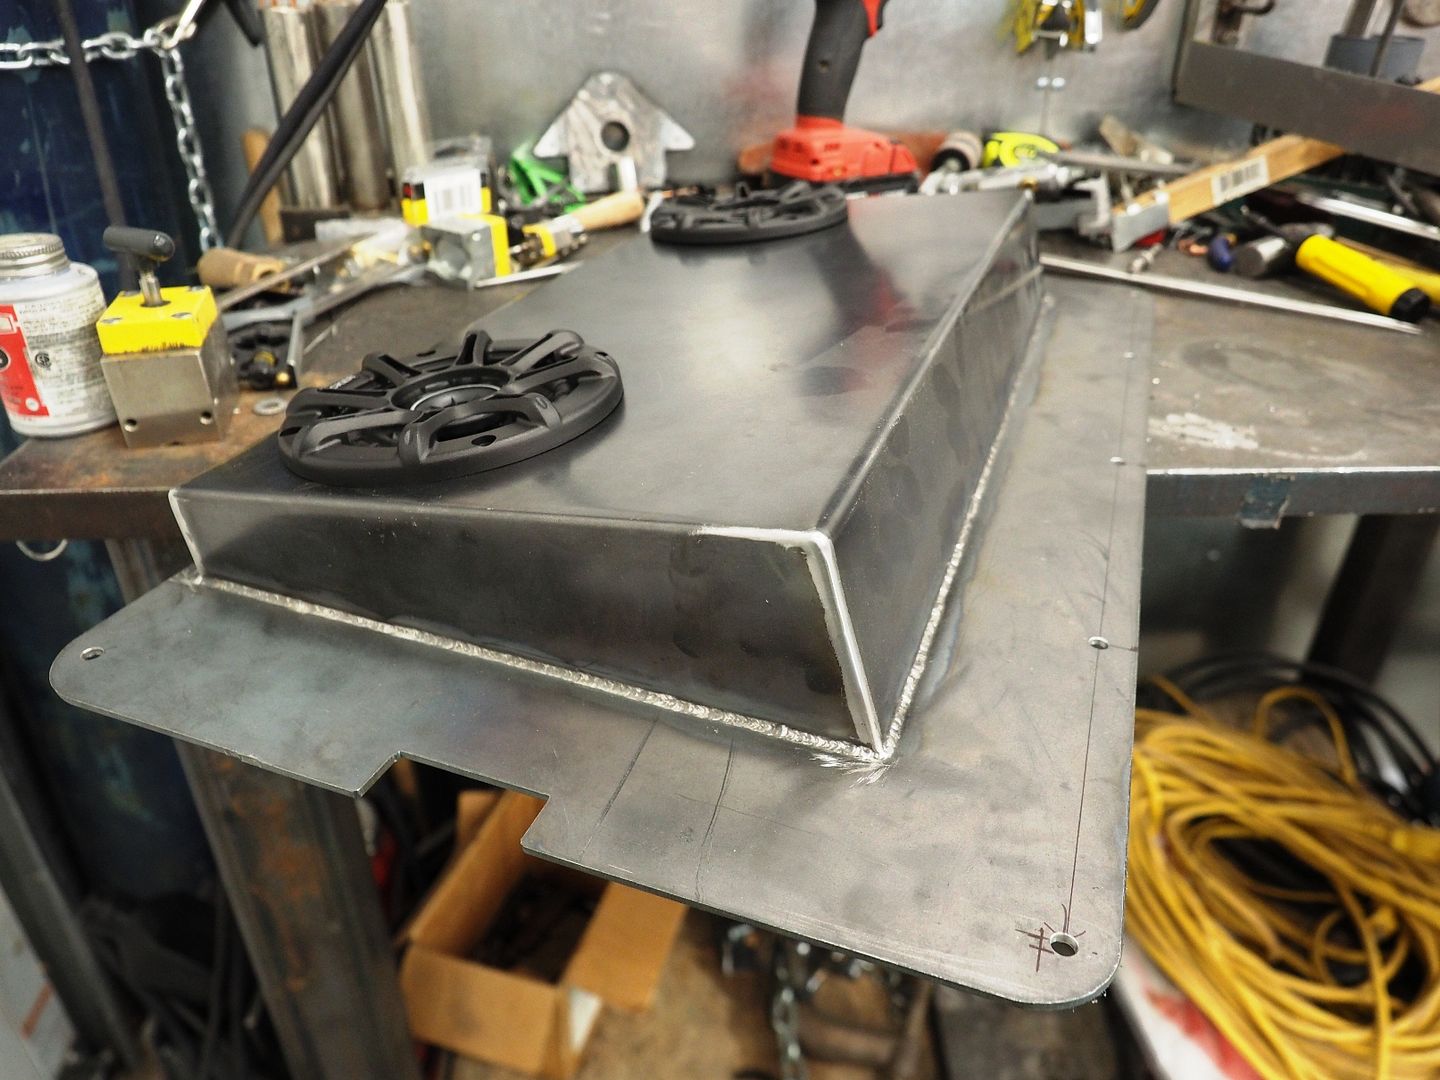
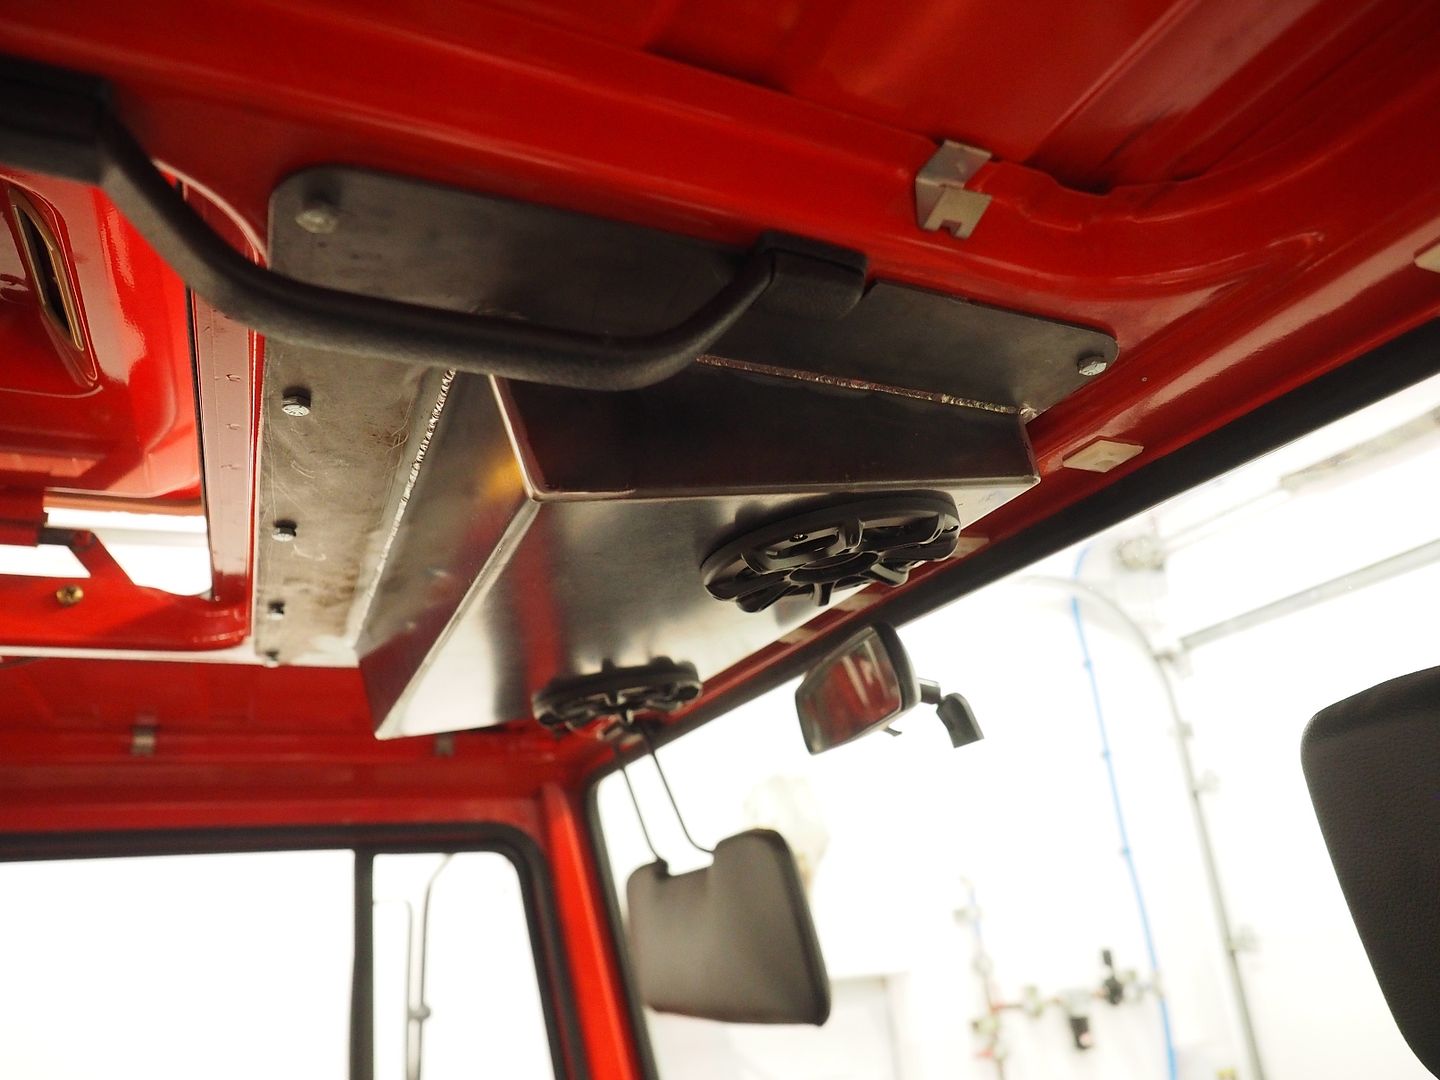
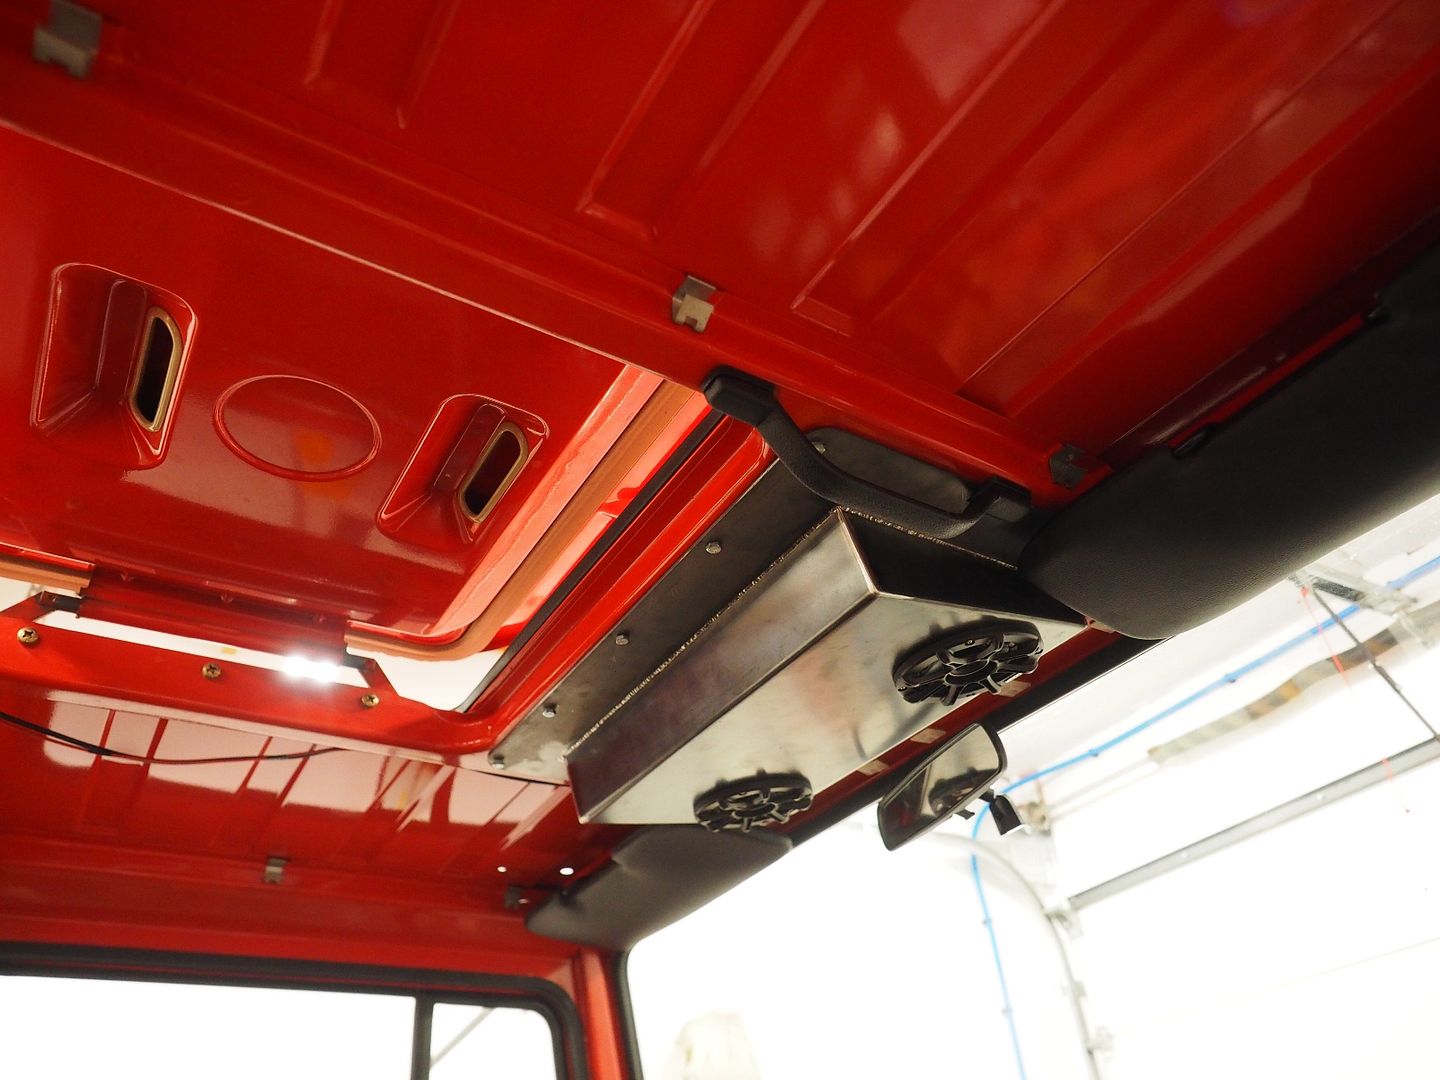
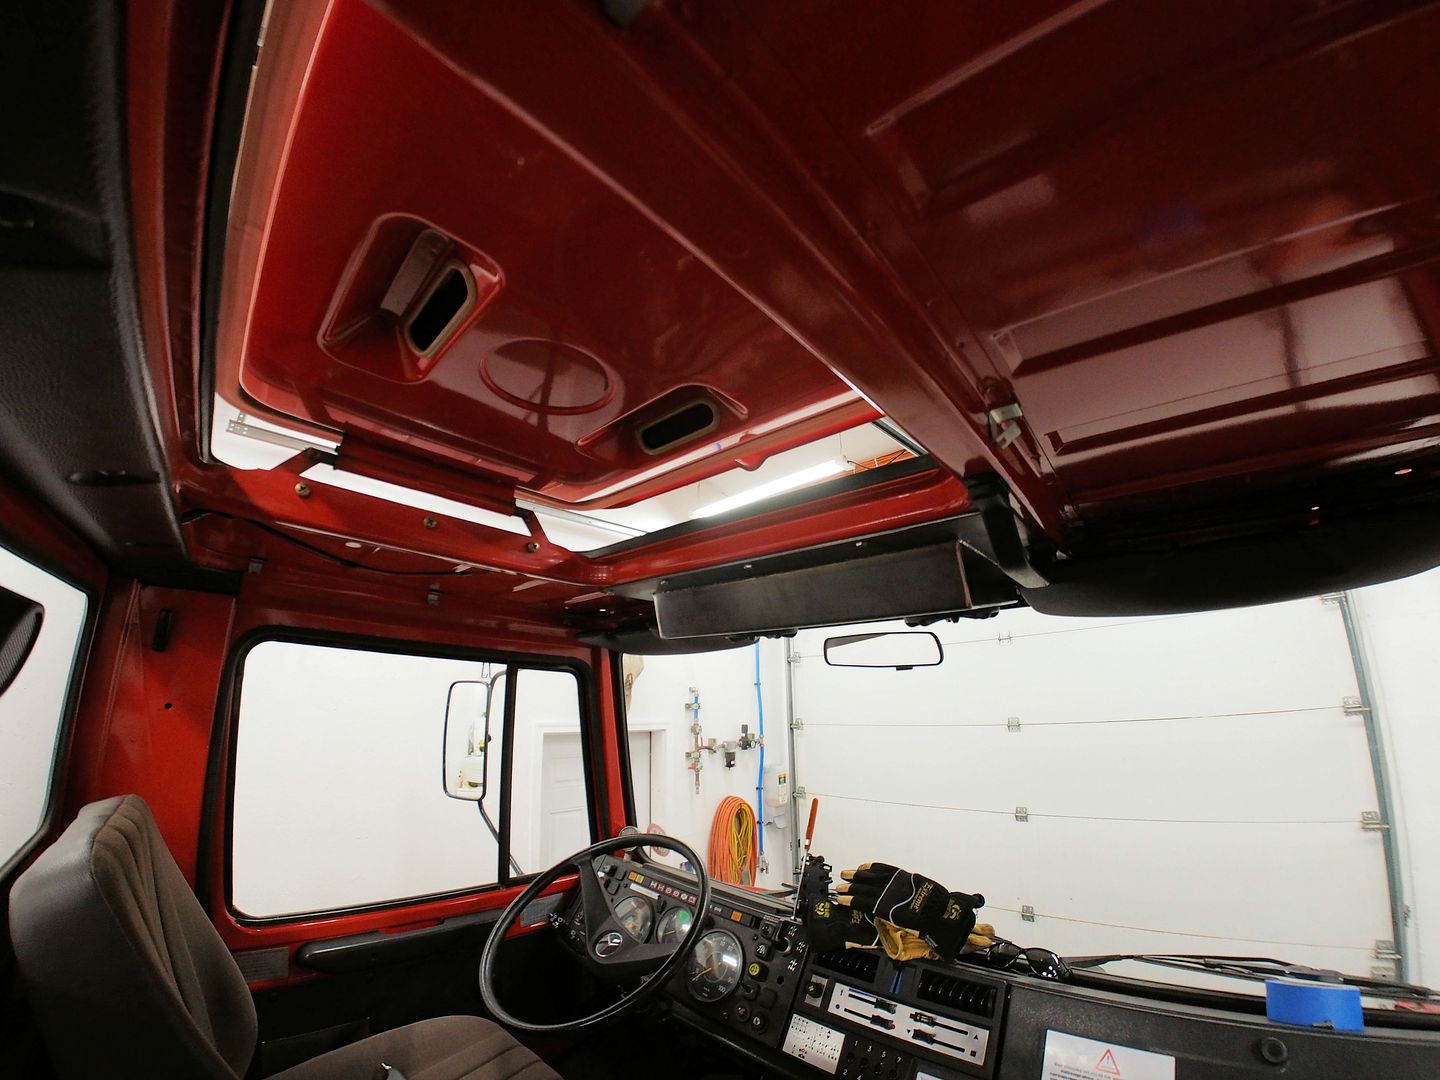
Little more work on the overhead console today. Did some blending on the corners of the box this morning, will touch up the welds before paint as well.

PC161287.jpg


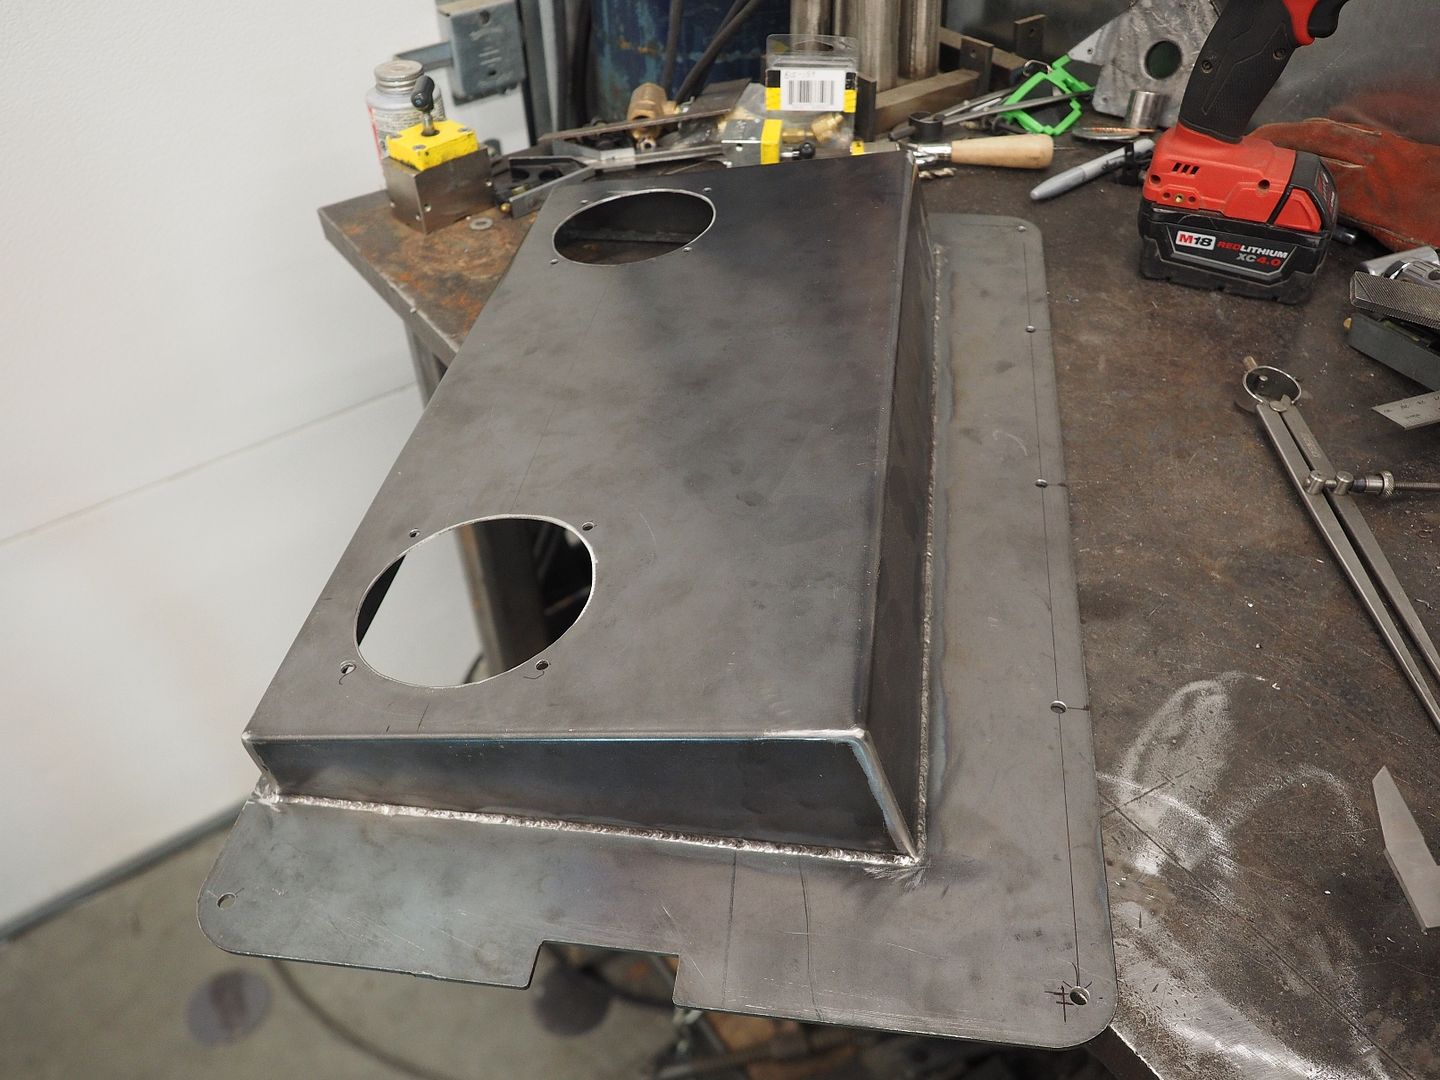
Cut in the speaker holes and drilled the mounting holes in the base.

PC161293.jpg


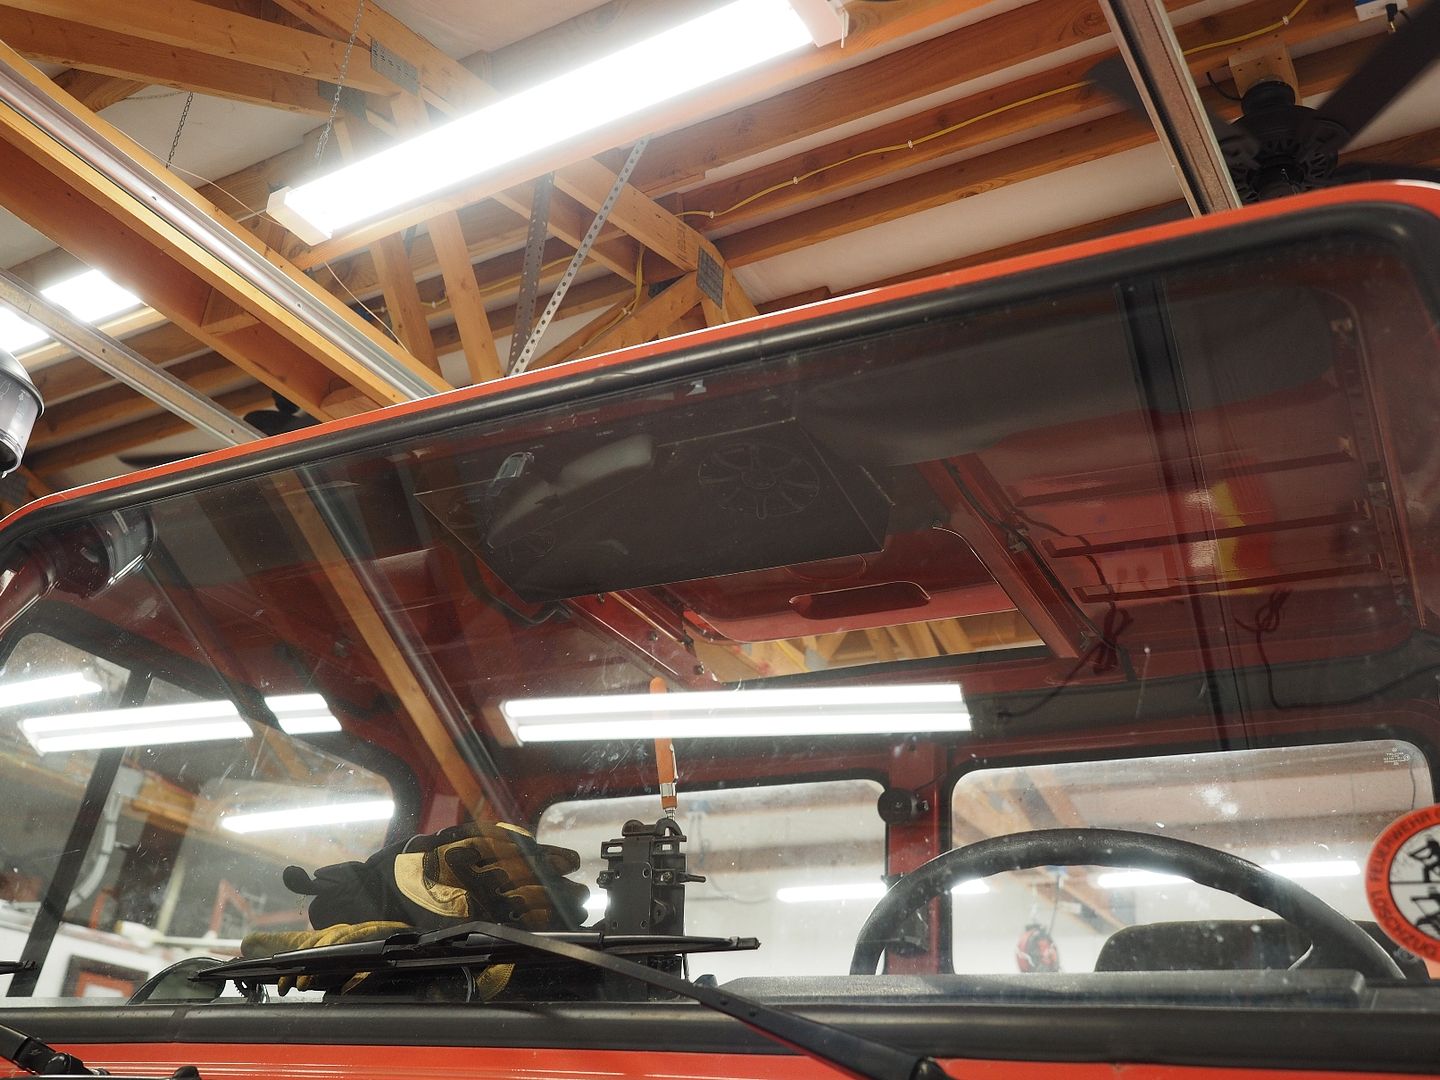
Not a lot of places to install speakers in the cab so this should work nicely.

PC161291.jpg


PC161300.jpg


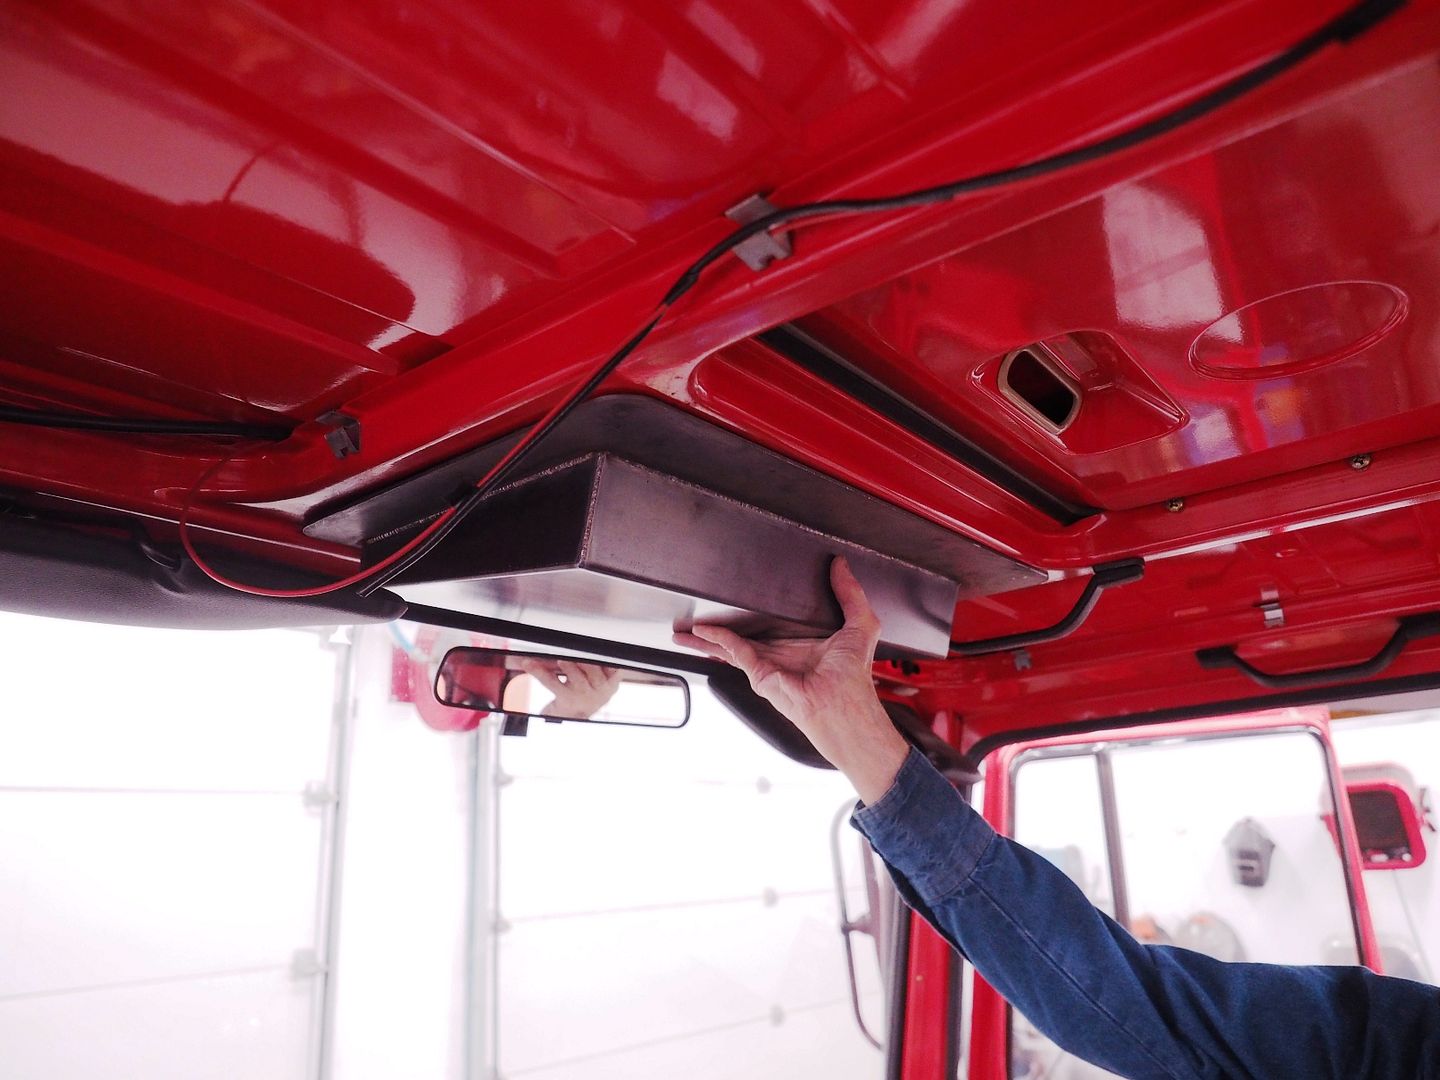
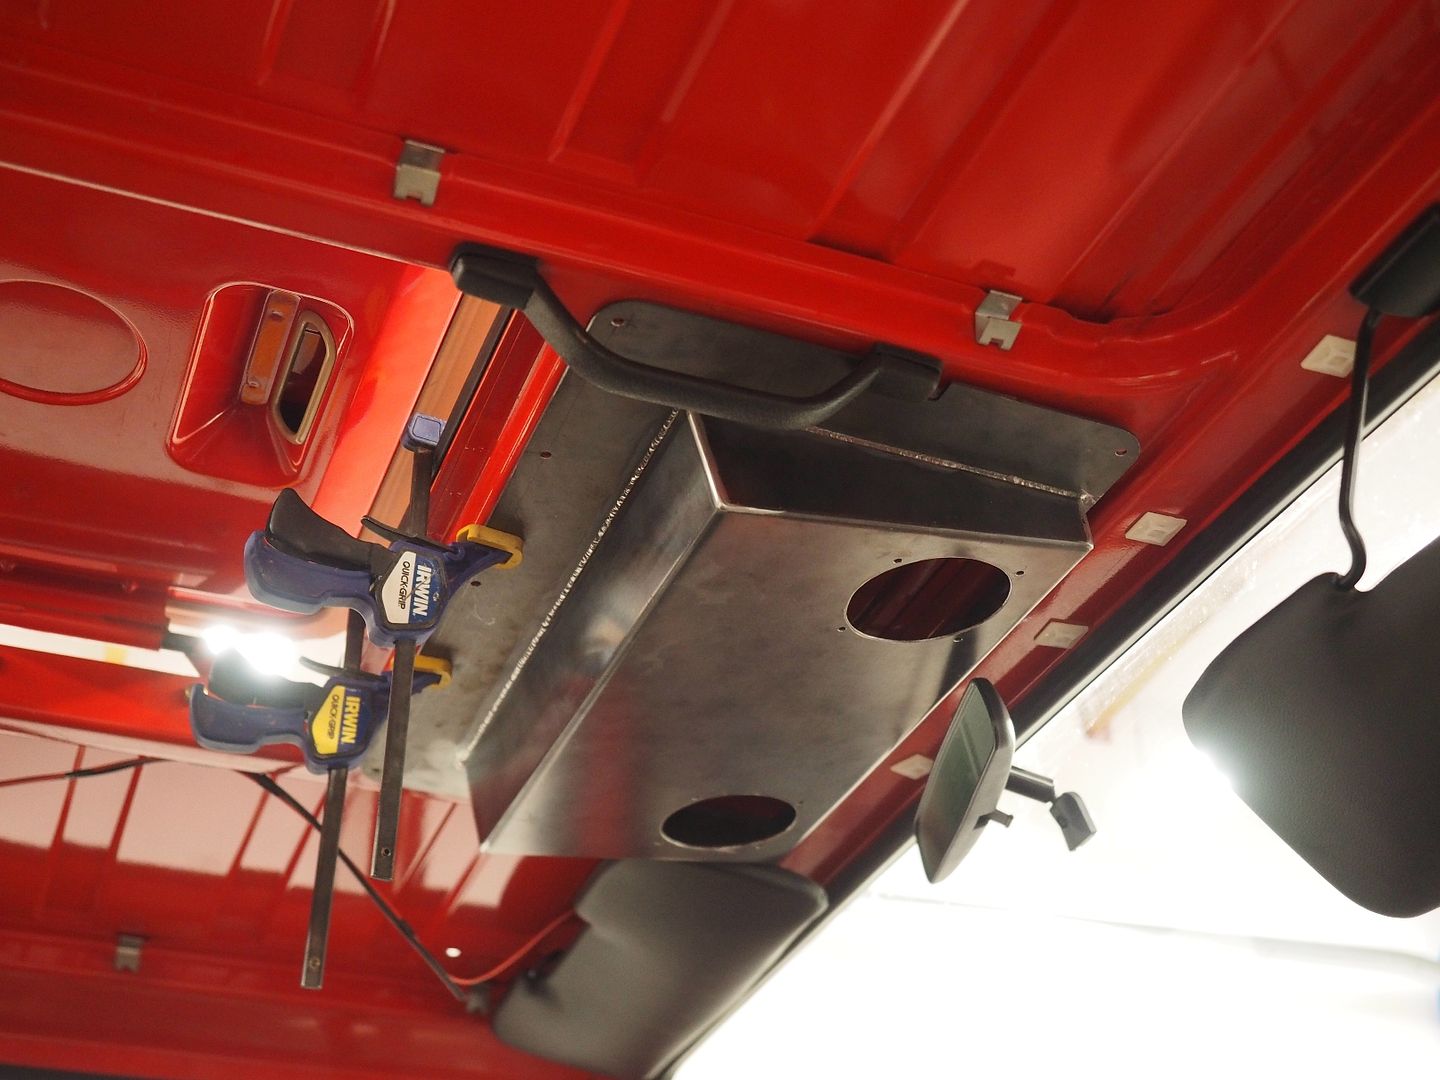
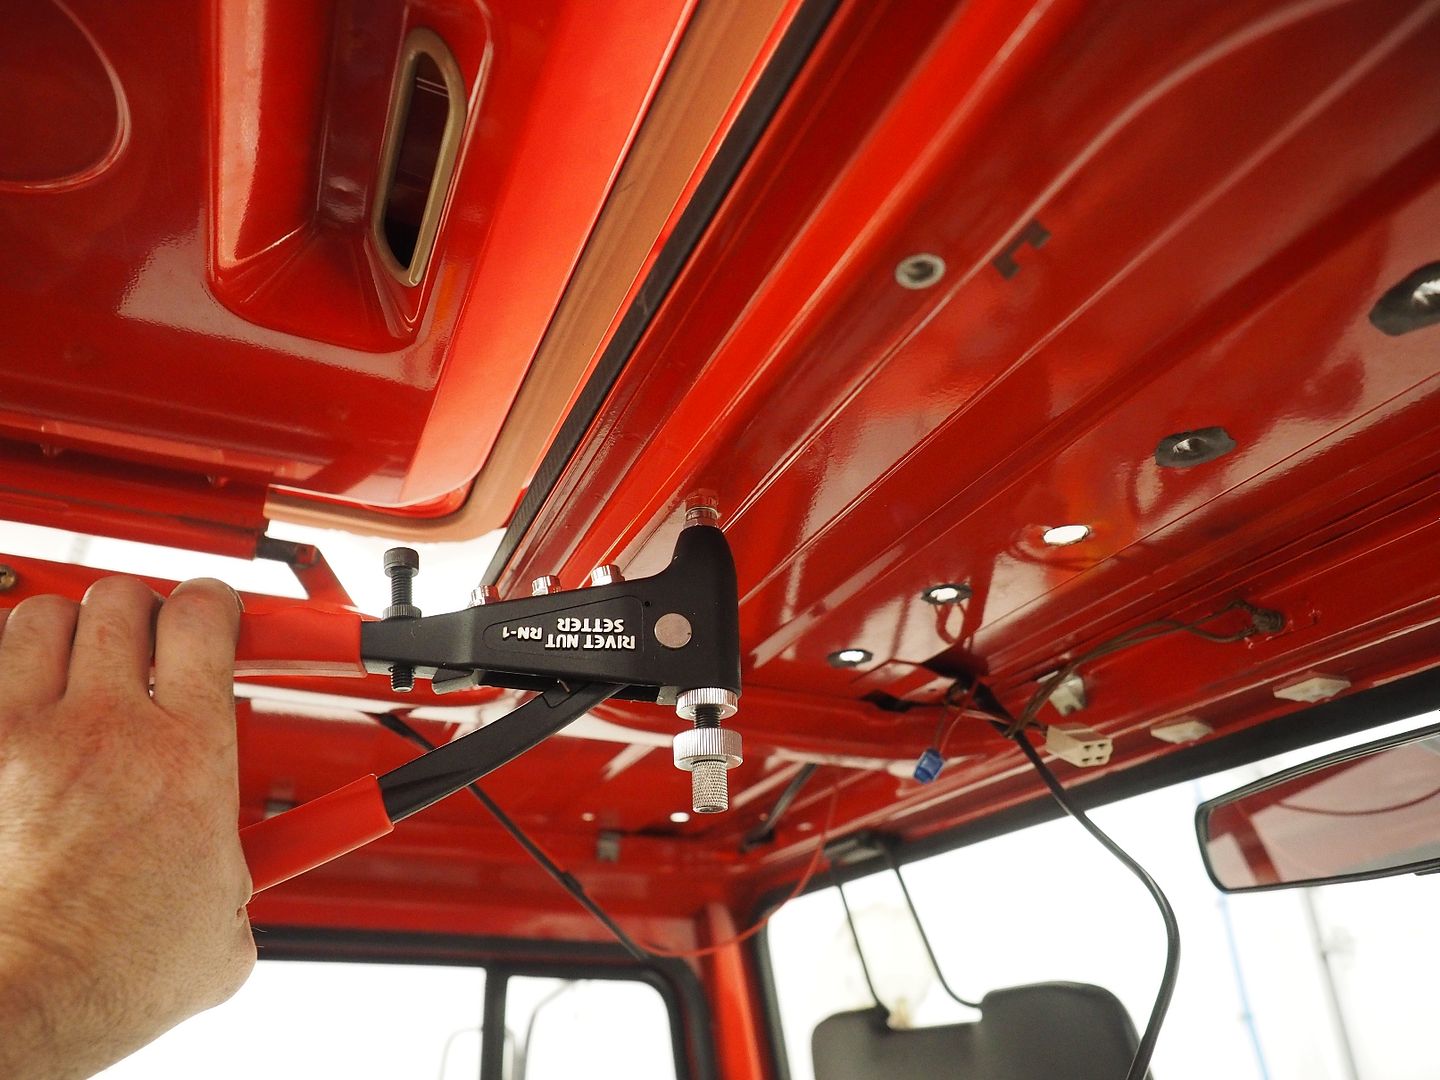
Clamping the console in place and using a transfer punch to mark the drill locations.

PC161304.jpg


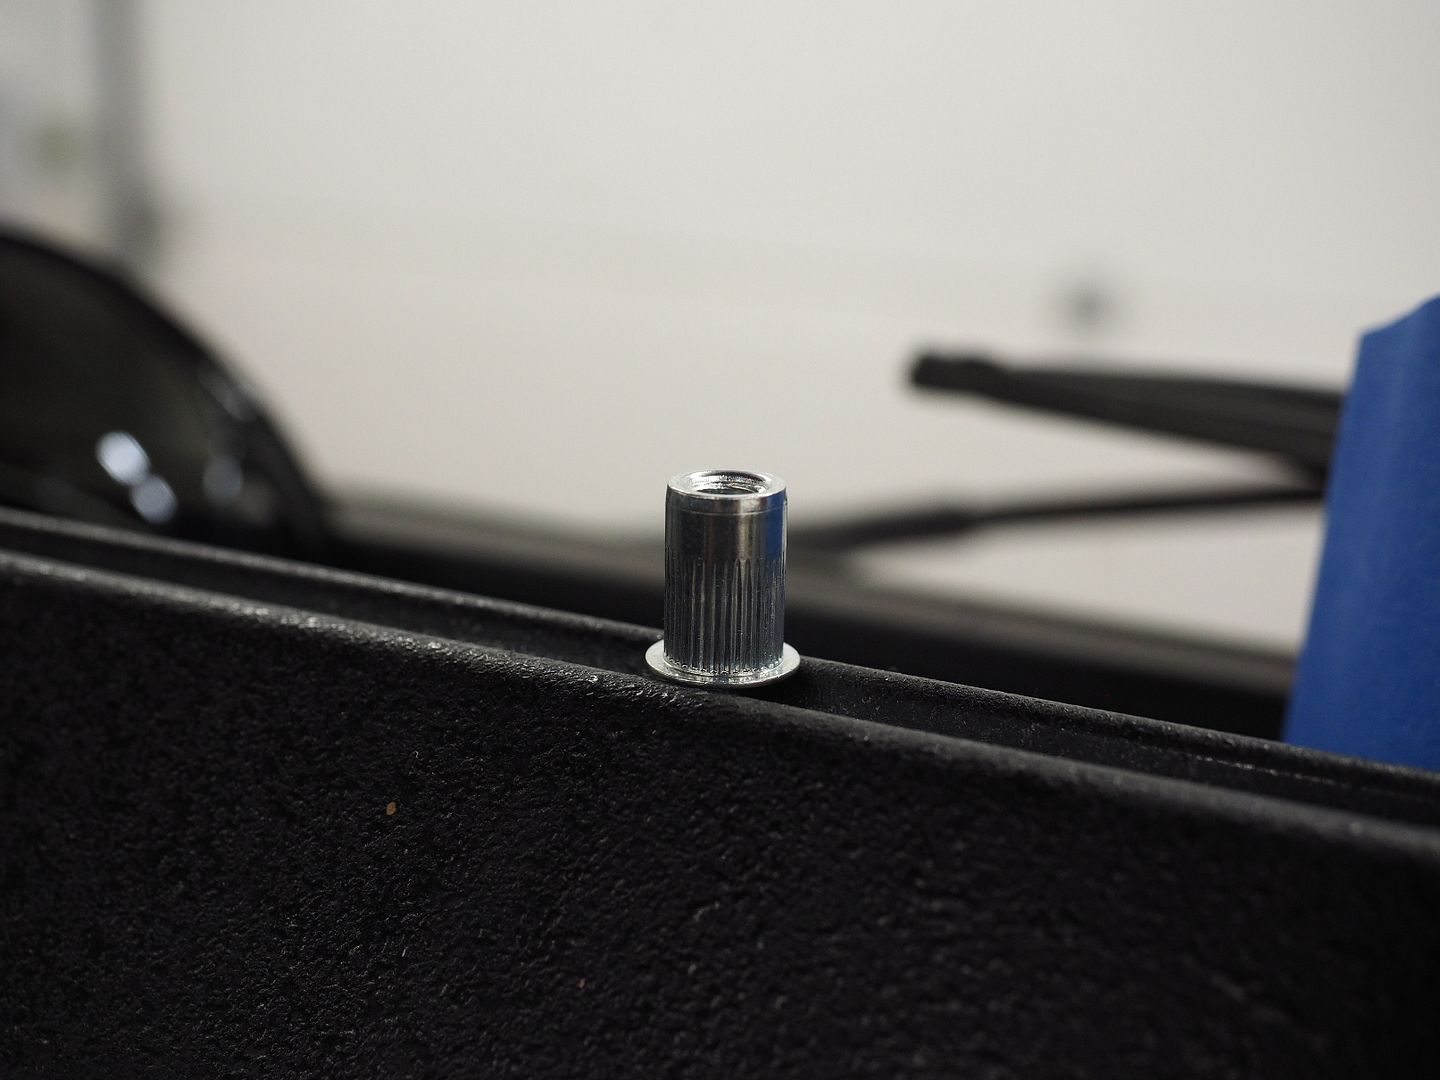
Next we drilled the holes out to the proper size and installed steel rivet nuts in the truck. The rivet nut is installed in the hole and you compress it with a rivet nut tool, it works similar to a pop rivet. The console will now bolt directly to the body and will be very secure.

PC161308.jpg


PC161318.jpg


Rivet nuts set and console in place to see how everything fits. I will use button head hardware during the final install. The factory used rivet nuts for the upper grab handles as well (Gold colored rivet nuts).

PC161322.jpg


PC161337.jpg


PC161353.jpg


PC161355.jpg


PC161347.jpg


More to come.

Hodakaguy
 

Forum statistics

Threads
187,467
Messages
2,894,850
Members
228,400
Latest member
rpinkall1
Top