You are using an out of date browser. It may not display this or other websites correctly.
You should upgrade or use an alternative browser.
You should upgrade or use an alternative browser.
Meet the Trot'n Turtle - Unimog U1300L Build
- Thread starter Hodakaguy
- Start date
Hodakaguy
Adventurer
What Gage steel are you using ?
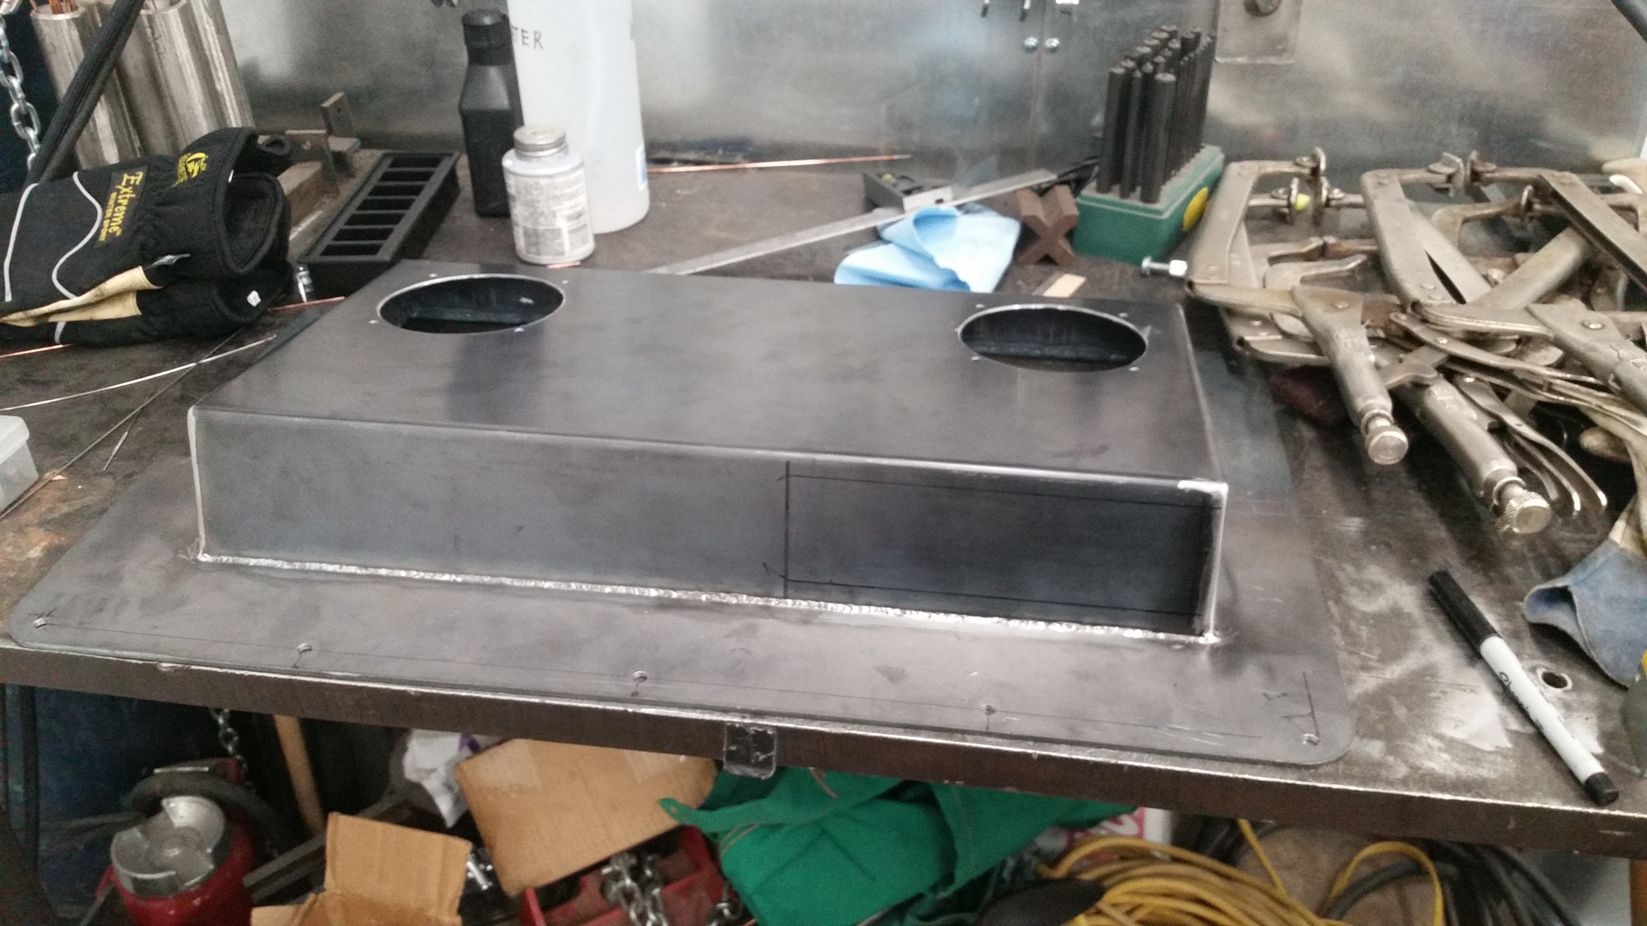
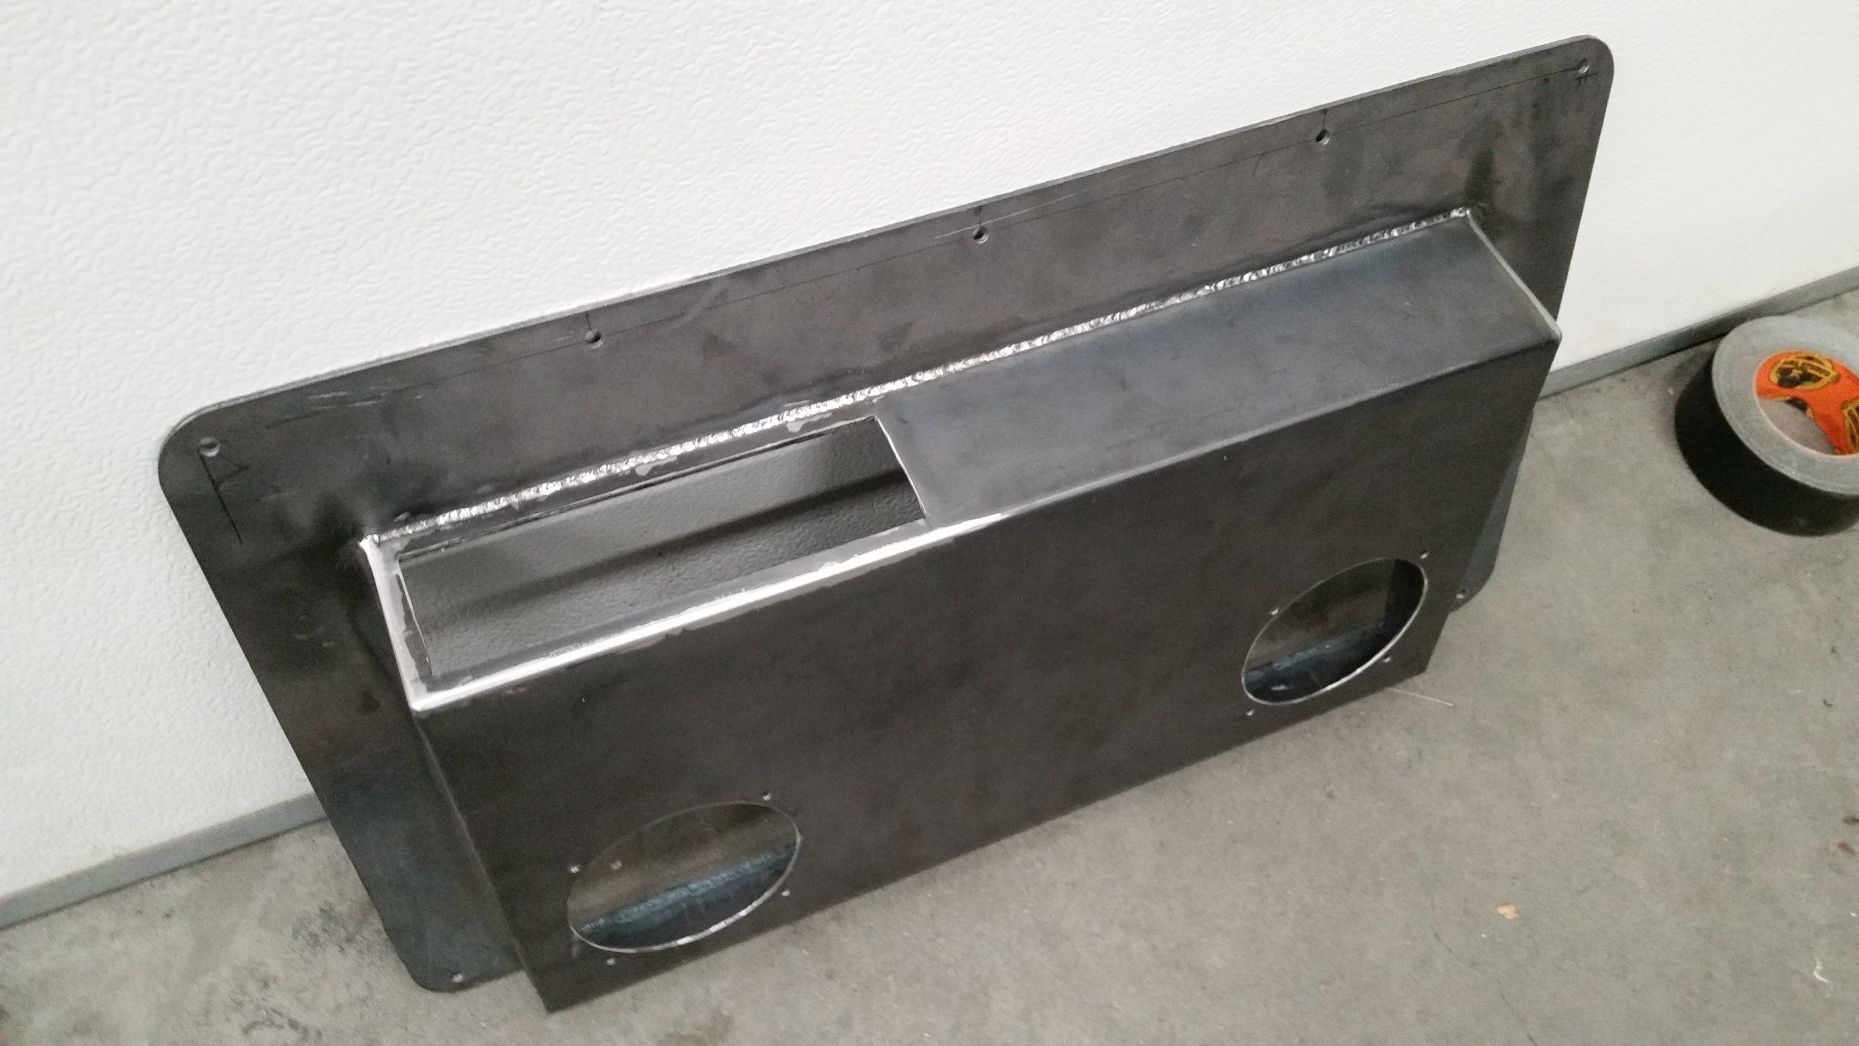
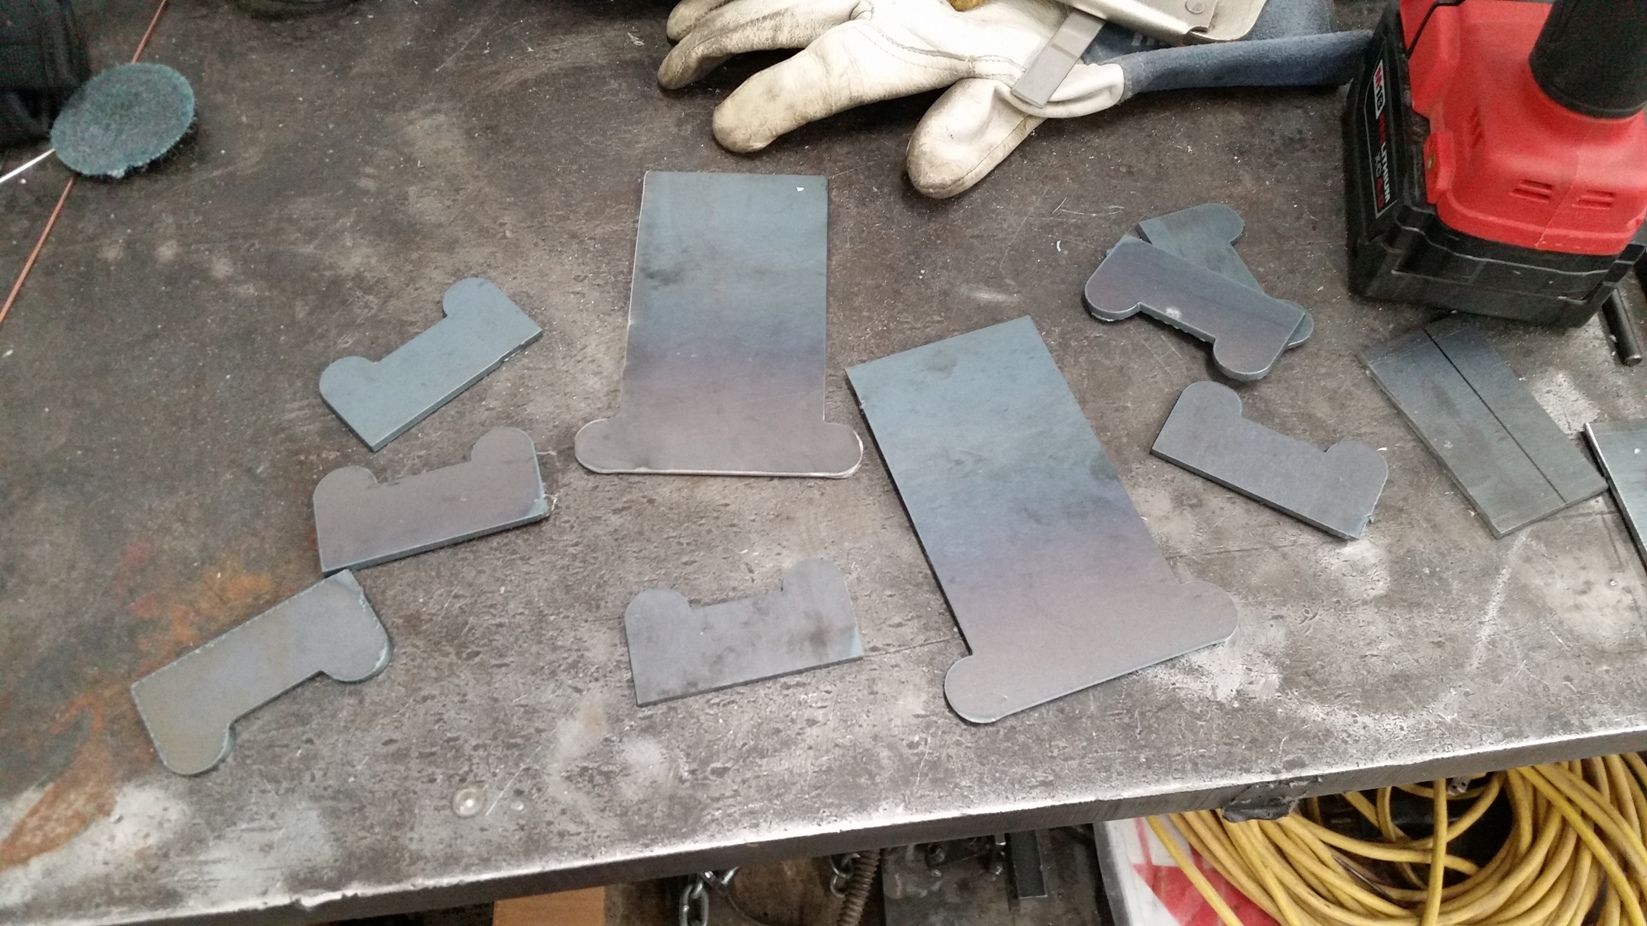
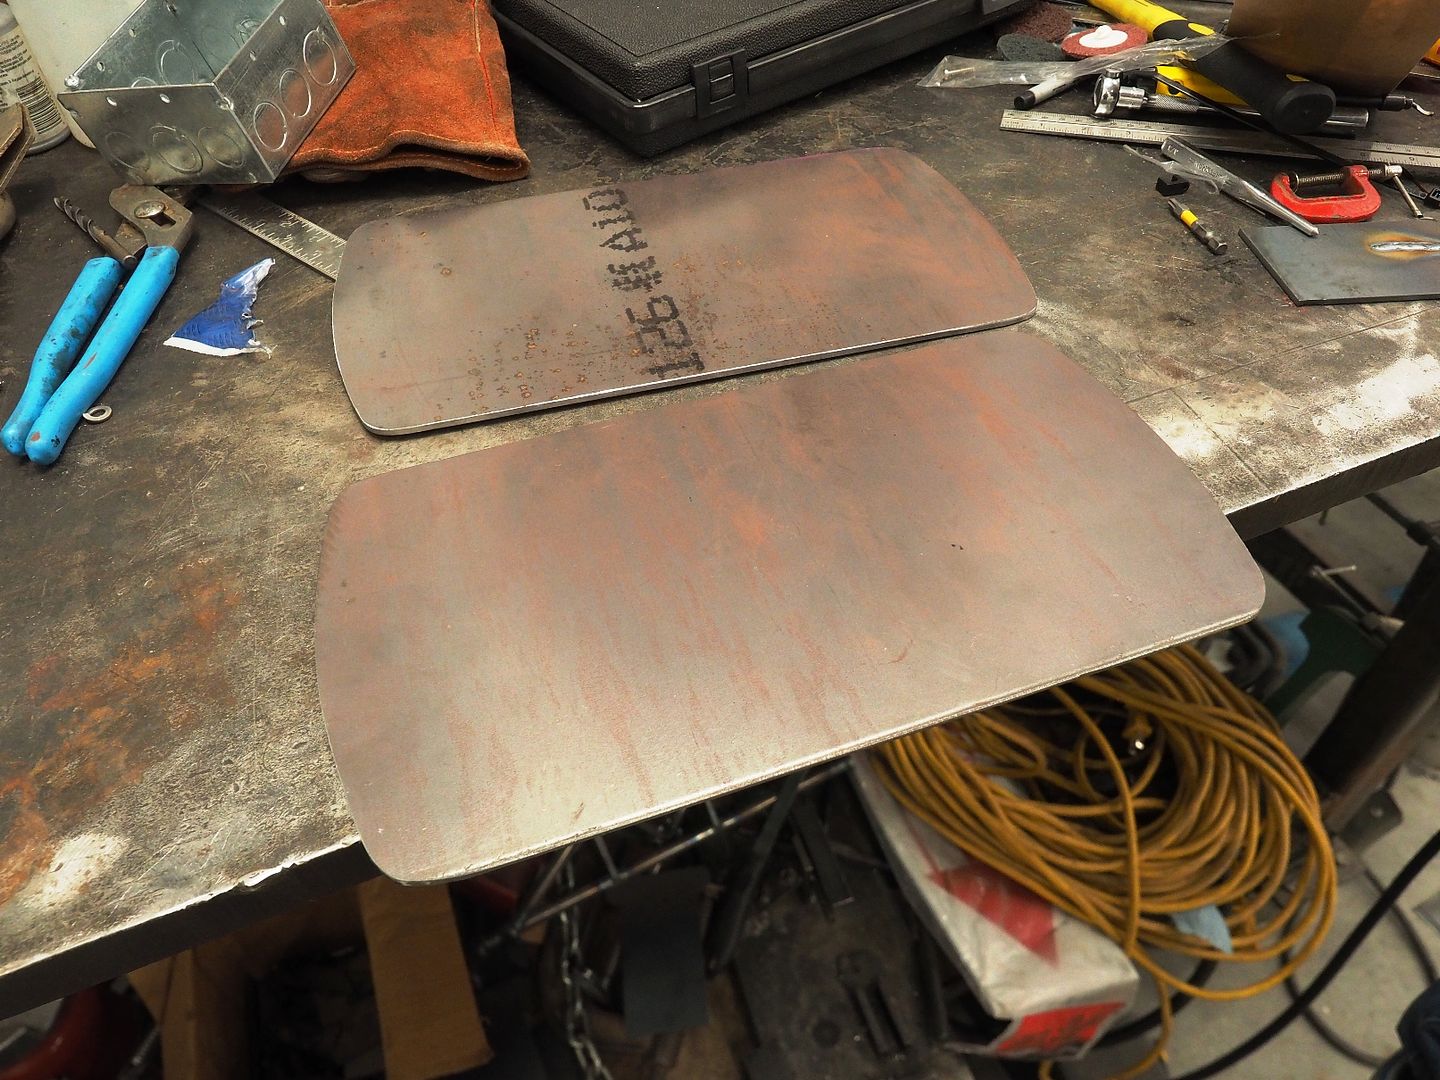
The top plate is 10ga, wanted it to stay nice and straight. The "box" portion is 16ga. A compromise between staying light and being plenty rigid.
Hodakaguy
Hodakaguy
Adventurer
Got a little work done today, seems like a lot of time is spent just staring at it and trying to figure out how I want stuff designed.
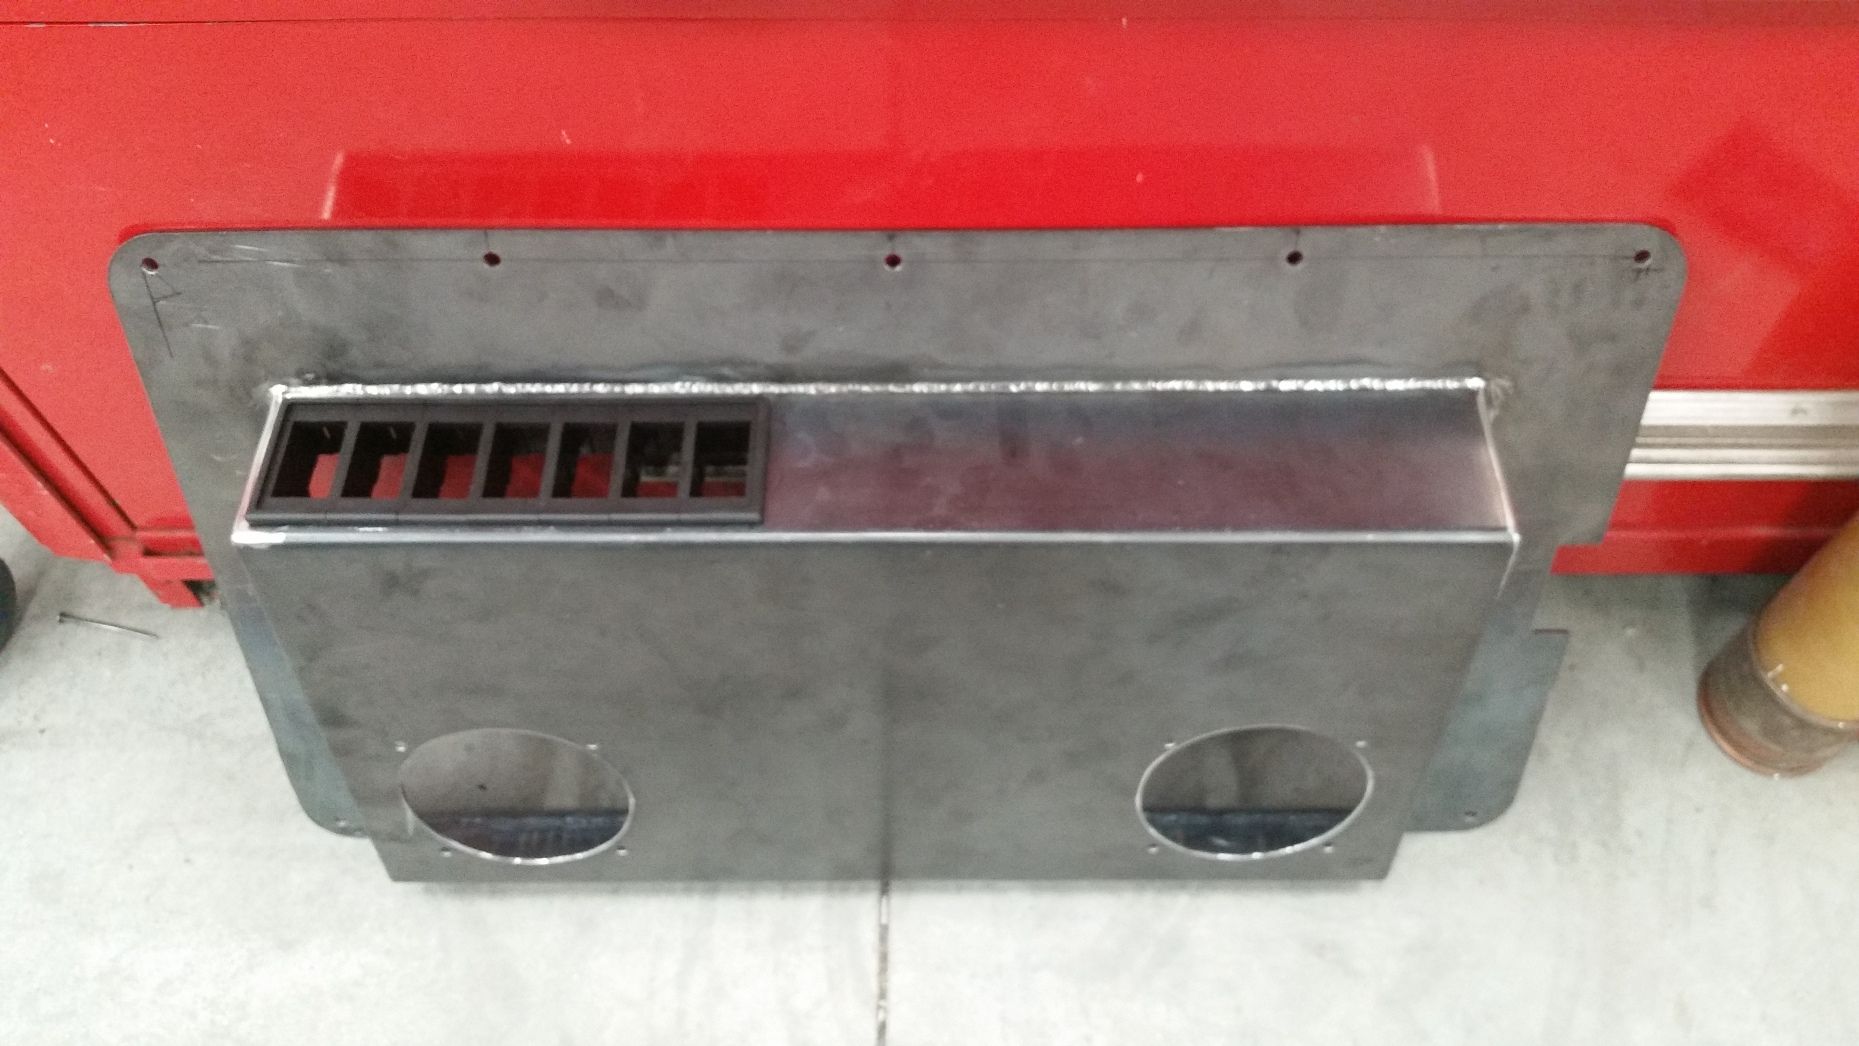
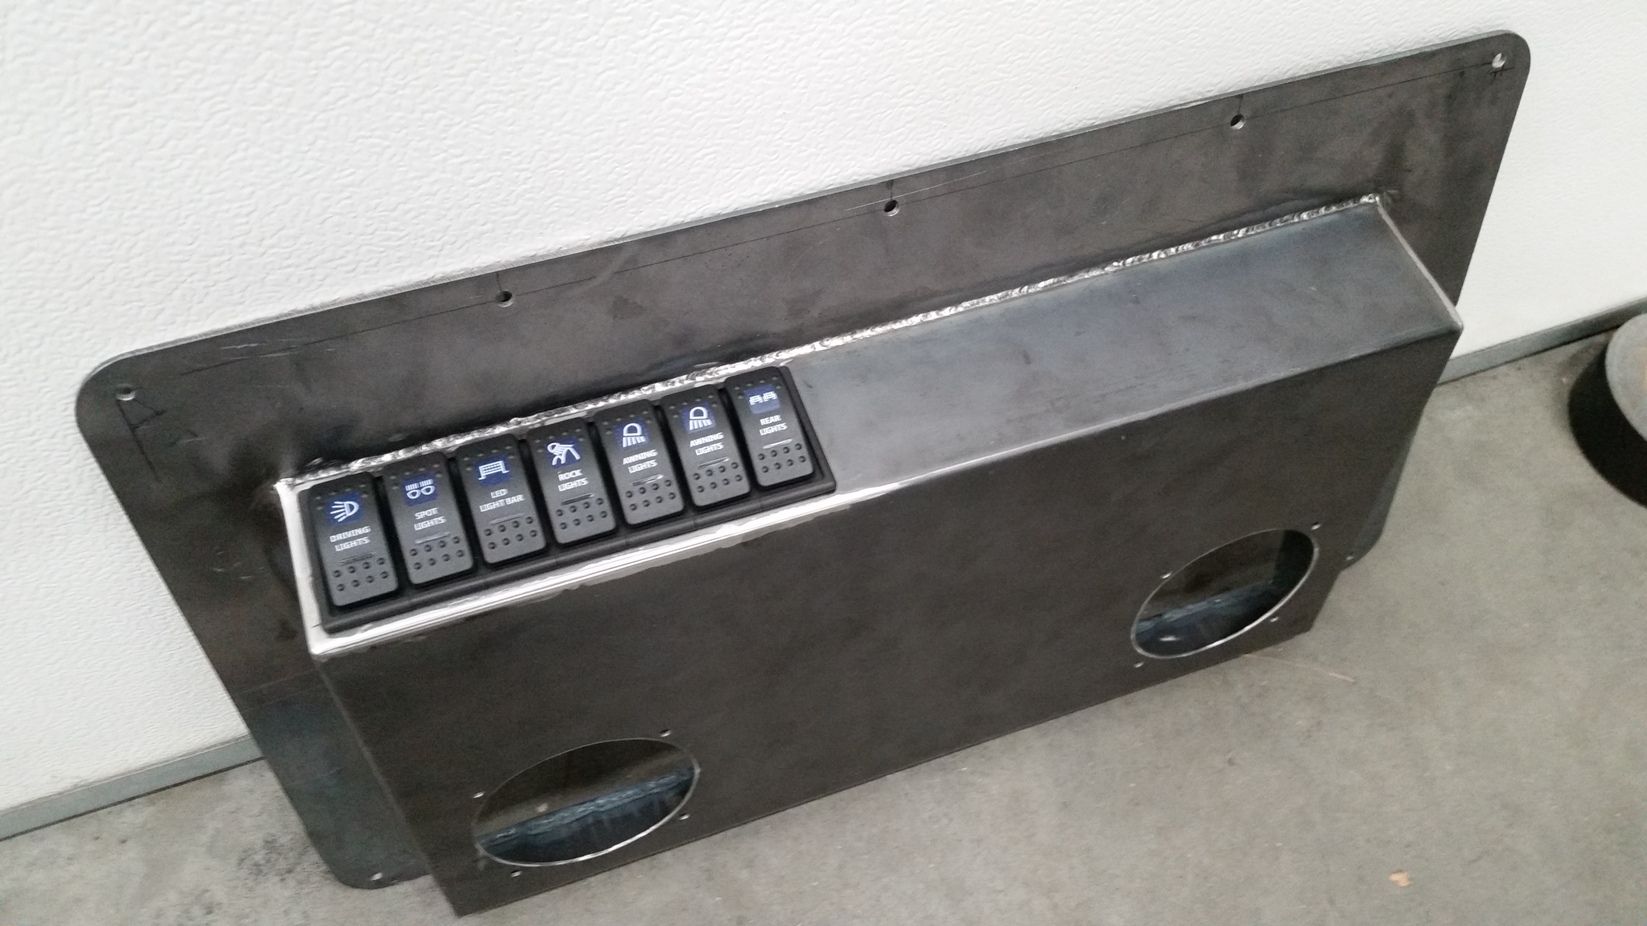
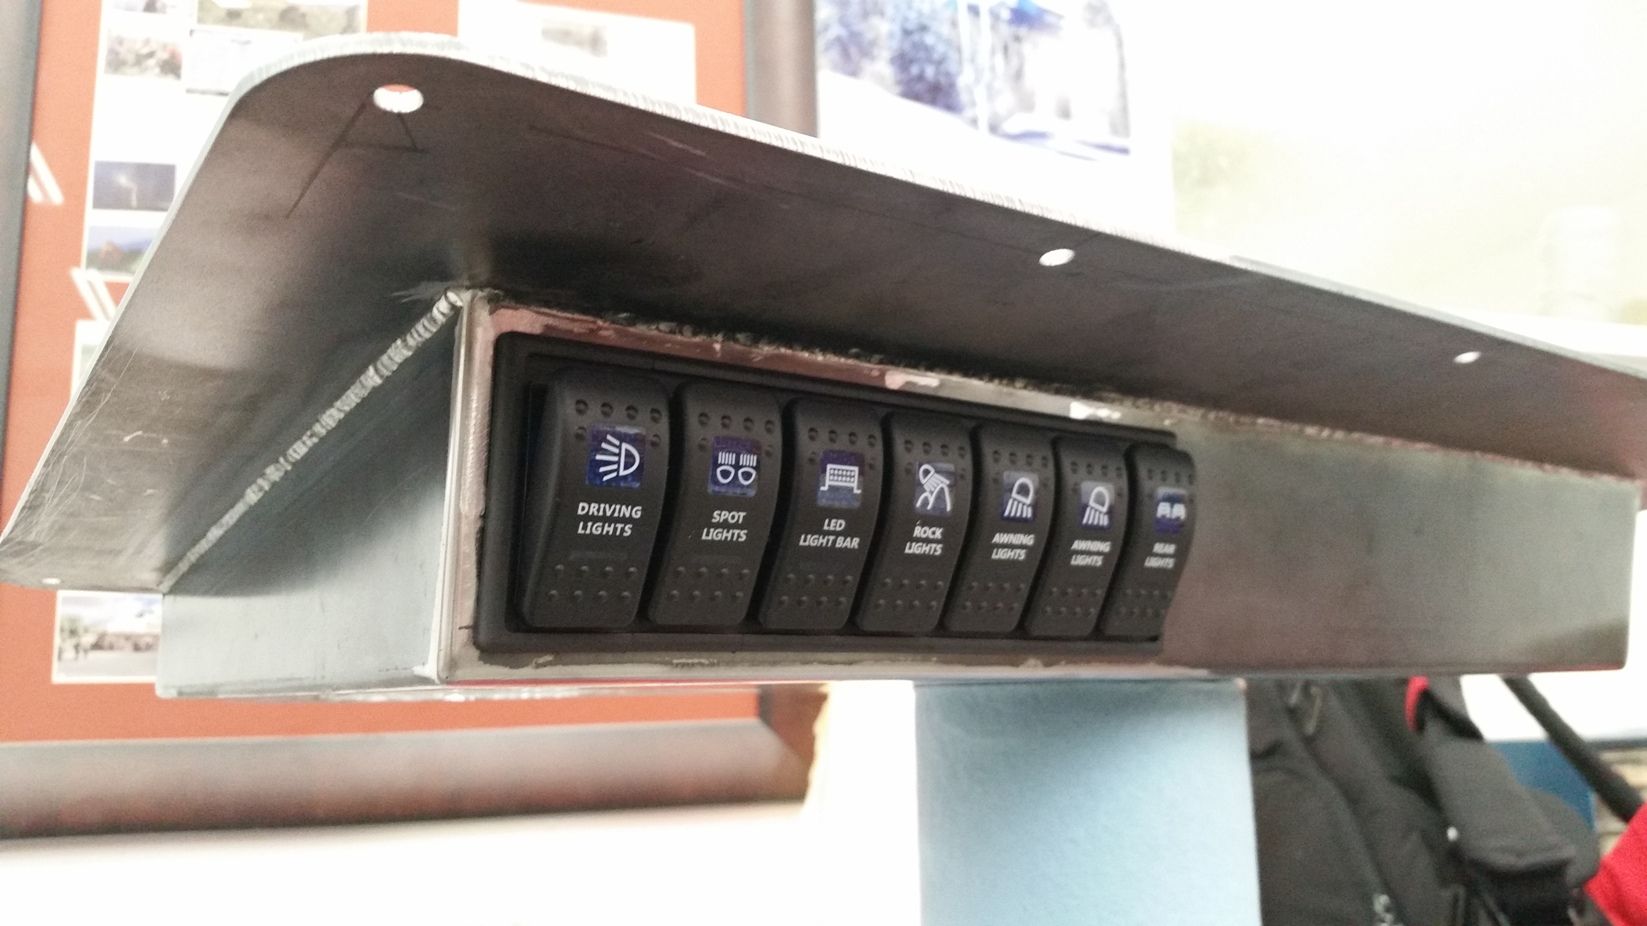
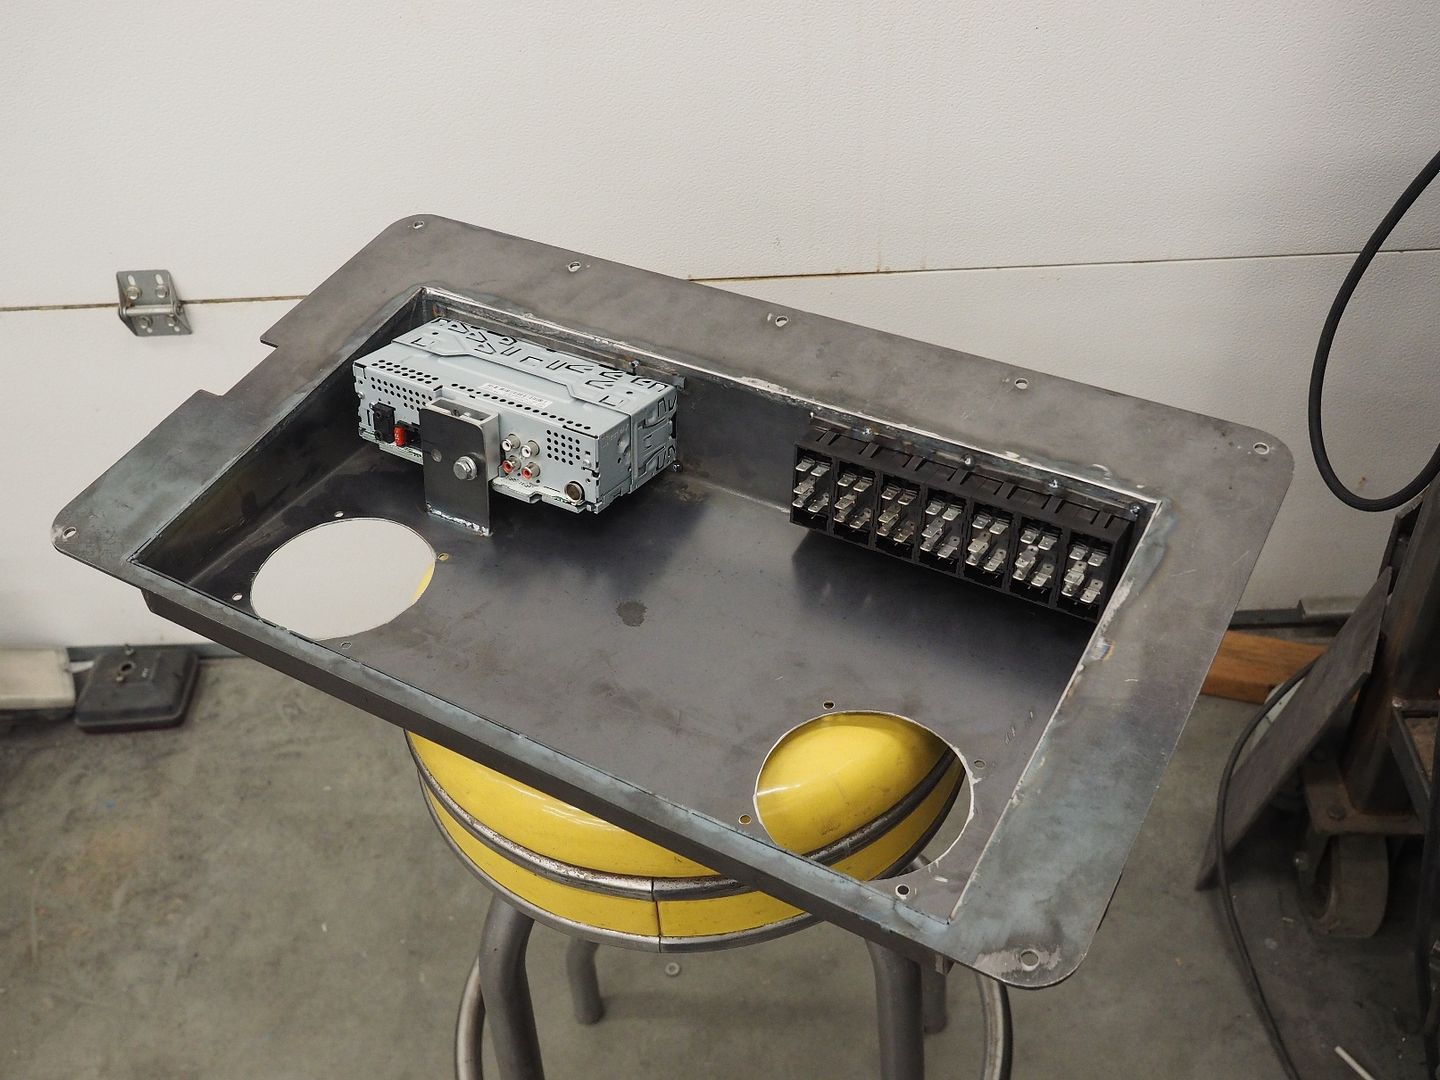
First up cut the hole for the radio in the over head console. I fabricated a support tab that was welded in behind the radio, should be nice and secure. I went with a receiver only unit that doesn't have a CD player since I mainly use Bluetooth from my phone, these radios aren't as deep and works out nicely in the console. You can also see small spacers welded onto the back side of the cutouts that allow the clips on the switches and radio to full engage the console.

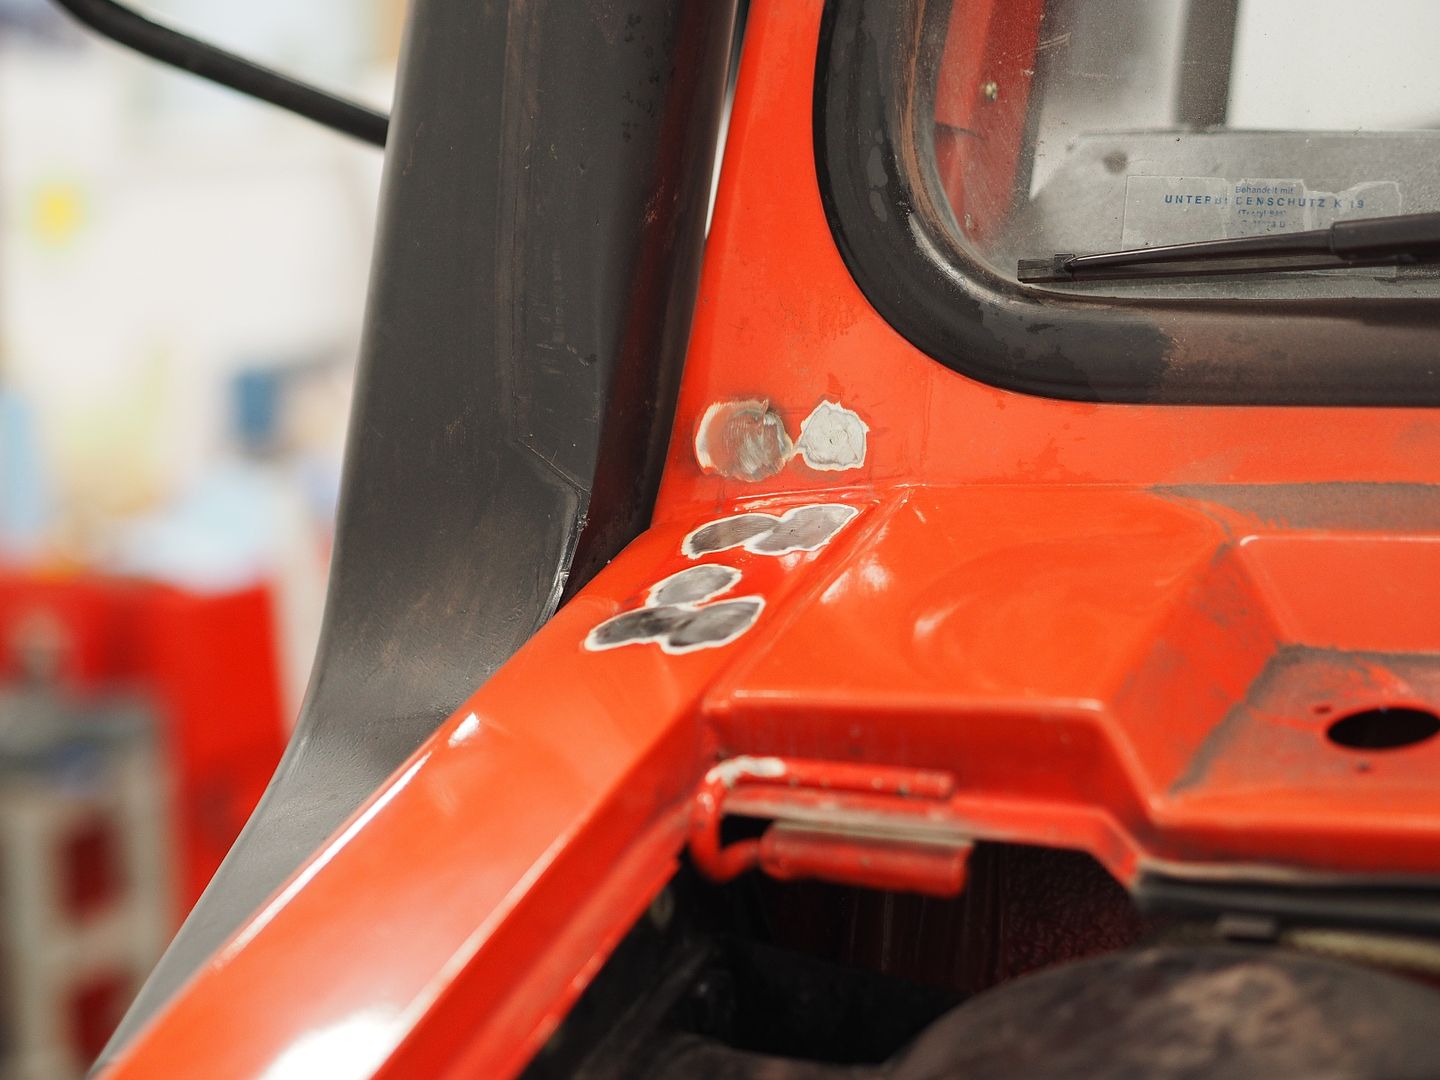
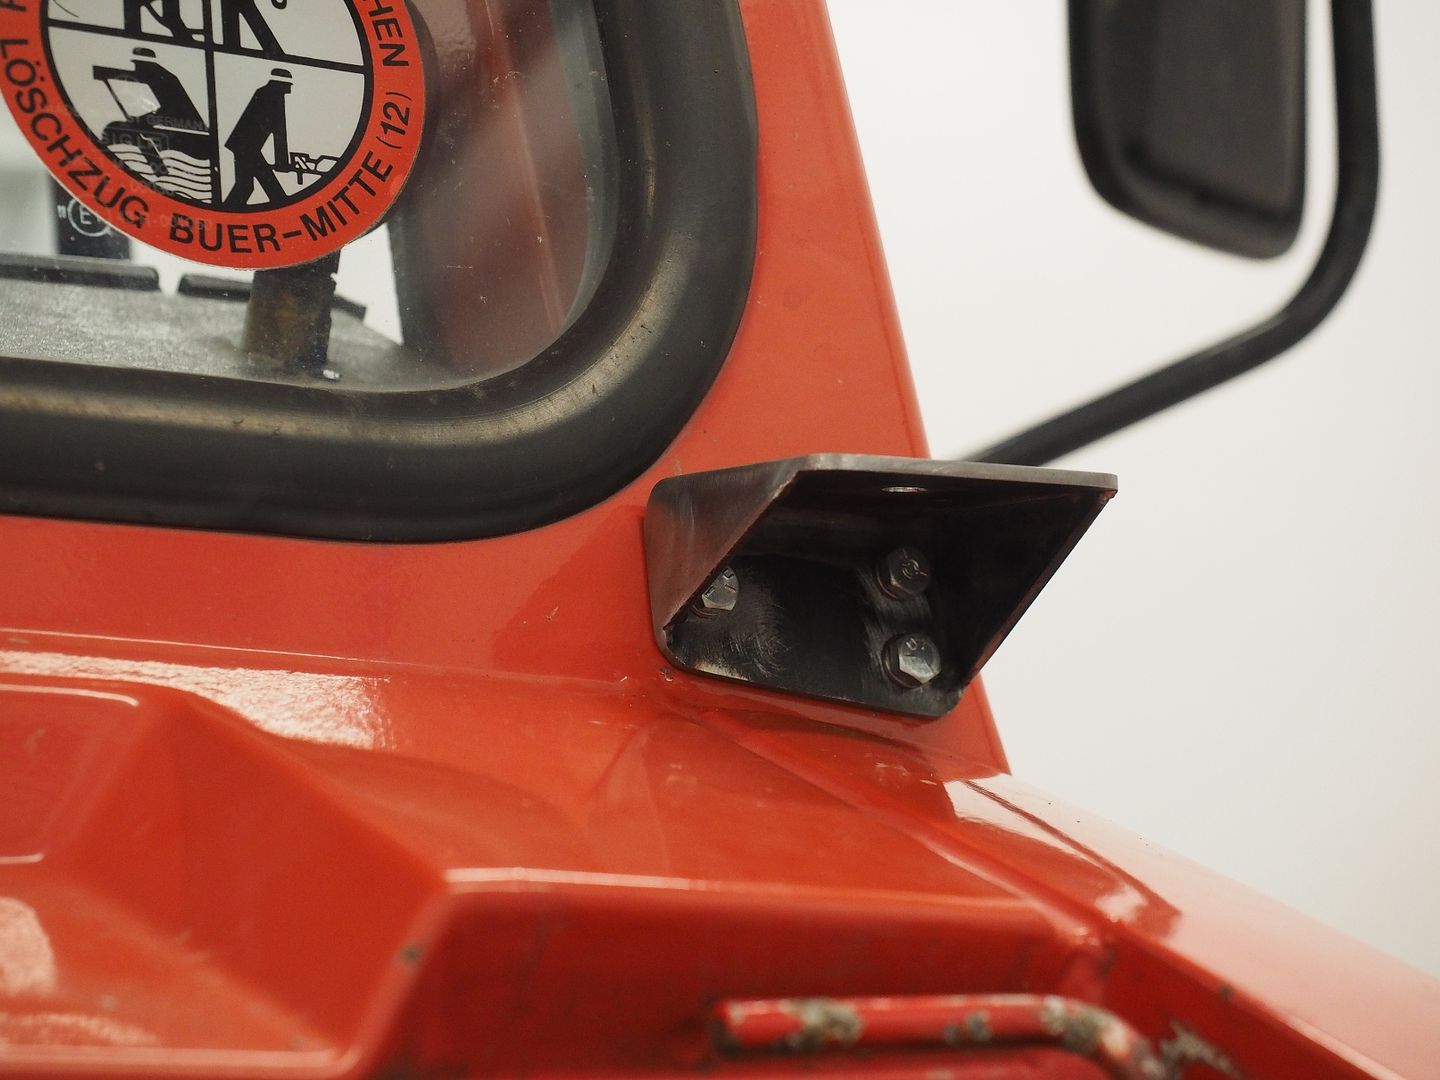
Next up I wanted to get the mounts fabricated for the LED lights that will be mounted below the windshield. There were a bunch of holes left in the body from the RW1 light mast that used to be bolted in this location, these were welded in and ground smooth before starting on the brackets.
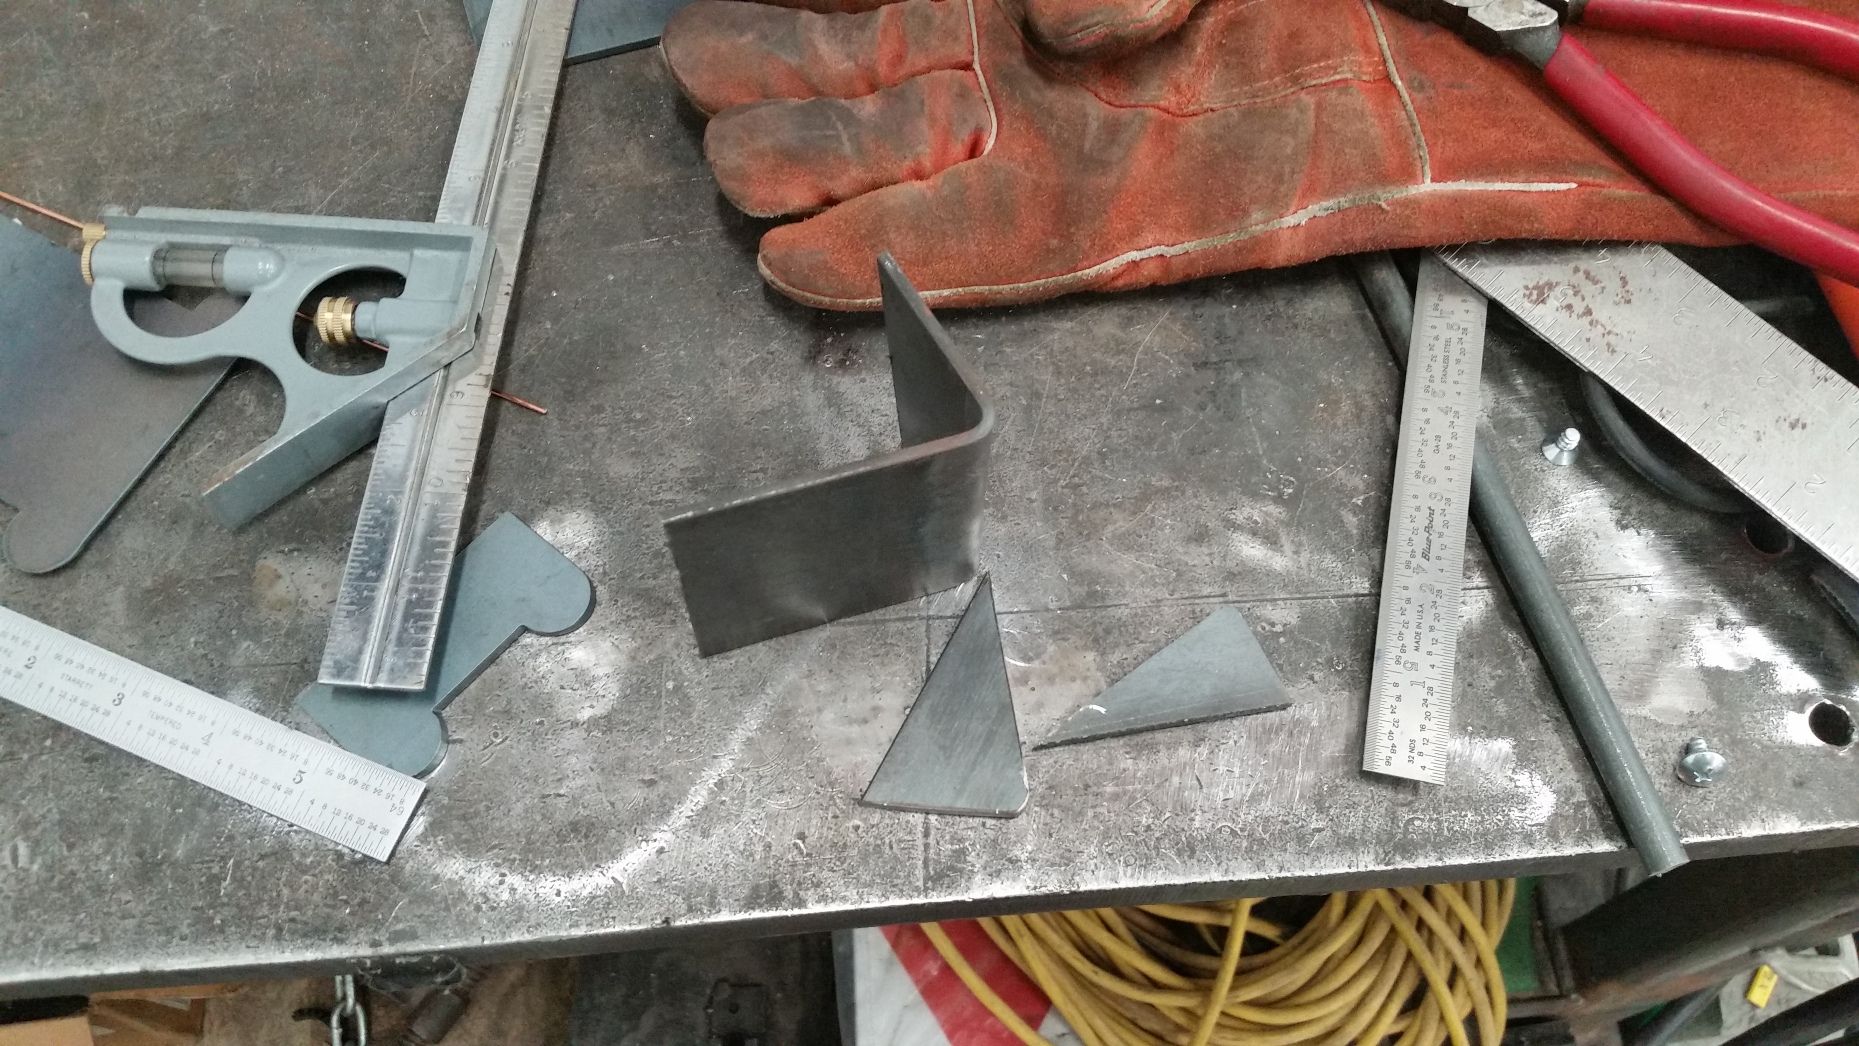
I went back and forth on a couple design ideas for the light brackets and ultimately decided on going with a clean and simple approach. With the help of some CAD work (Cardboard Aided Design) we tested out a couple different configurations for fit.

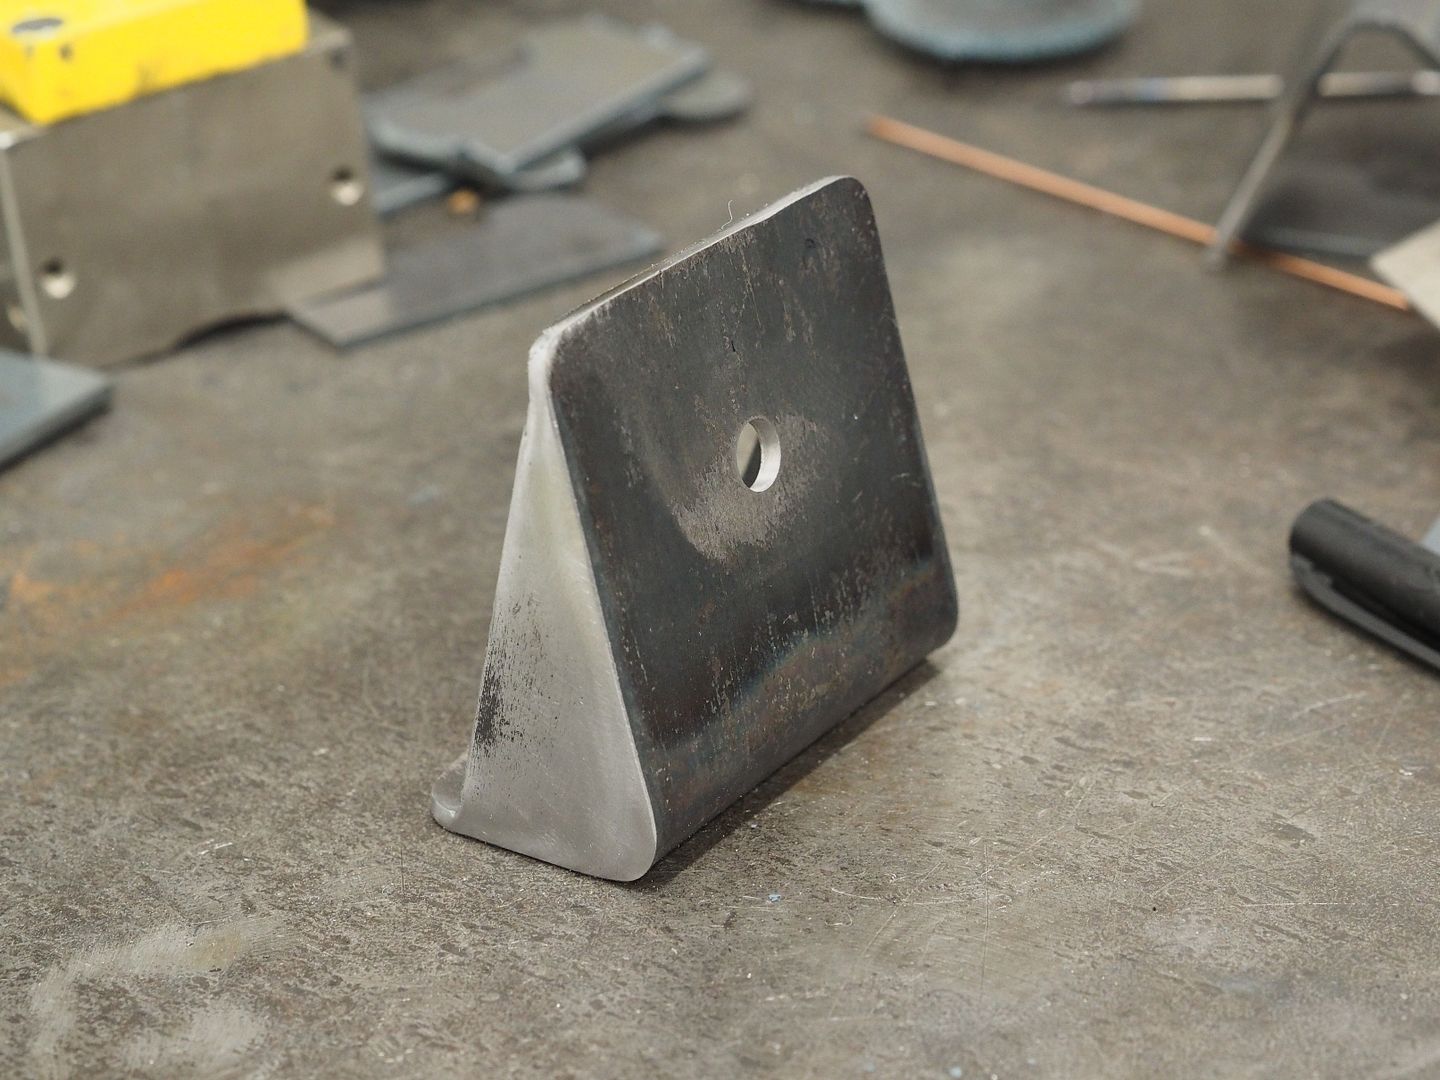
Fabricating the passenger side bracket. The bracket is build to follow the angles of the cab.

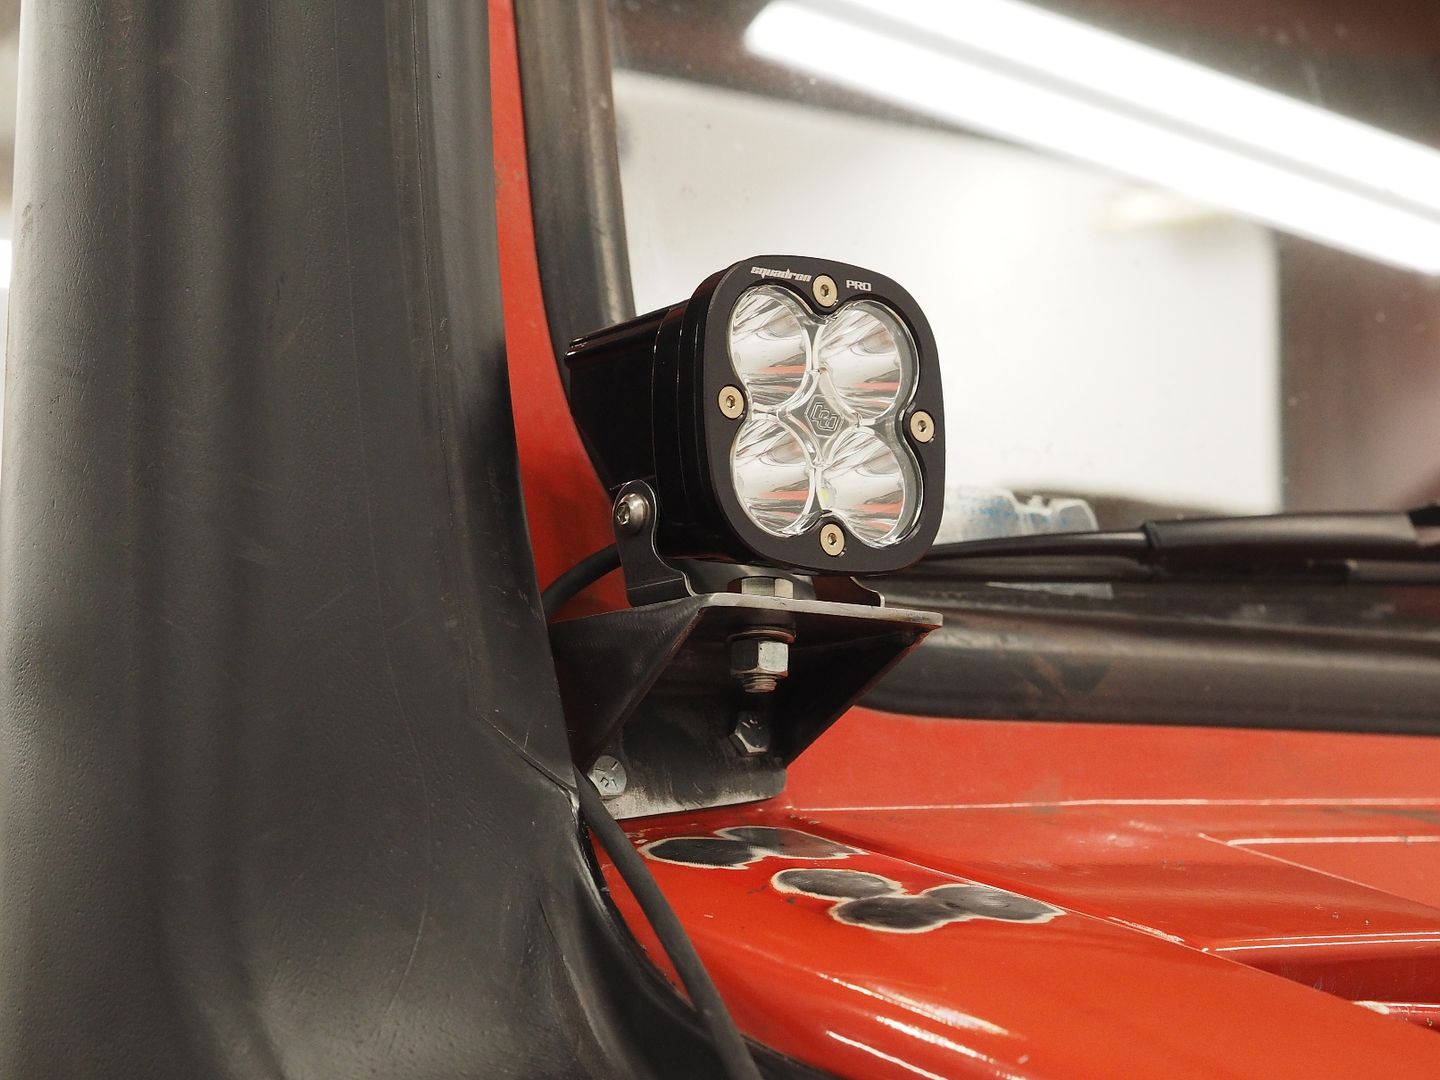
And mounted on the truck with the Baja Designs Squadron Pro light installed.

More to come....
Hodakaguy
First up cut the hole for the radio in the over head console. I fabricated a support tab that was welded in behind the radio, should be nice and secure. I went with a receiver only unit that doesn't have a CD player since I mainly use Bluetooth from my phone, these radios aren't as deep and works out nicely in the console. You can also see small spacers welded onto the back side of the cutouts that allow the clips on the switches and radio to full engage the console.
Next up I wanted to get the mounts fabricated for the LED lights that will be mounted below the windshield. There were a bunch of holes left in the body from the RW1 light mast that used to be bolted in this location, these were welded in and ground smooth before starting on the brackets.
I went back and forth on a couple design ideas for the light brackets and ultimately decided on going with a clean and simple approach. With the help of some CAD work (Cardboard Aided Design) we tested out a couple different configurations for fit.
Fabricating the passenger side bracket. The bracket is build to follow the angles of the cab.
And mounted on the truck with the Baja Designs Squadron Pro light installed.
More to come....
Hodakaguy
thebigblue
Adventurer
Yeah, this MOG will be a beauty to behold; I might try to look harder for a nice DOKA.
Hodakaguy
Adventurer
Thanks guys, I love working with metal...wood not so much ") . A DOKA would be awesome!
. A DOKA would be awesome!
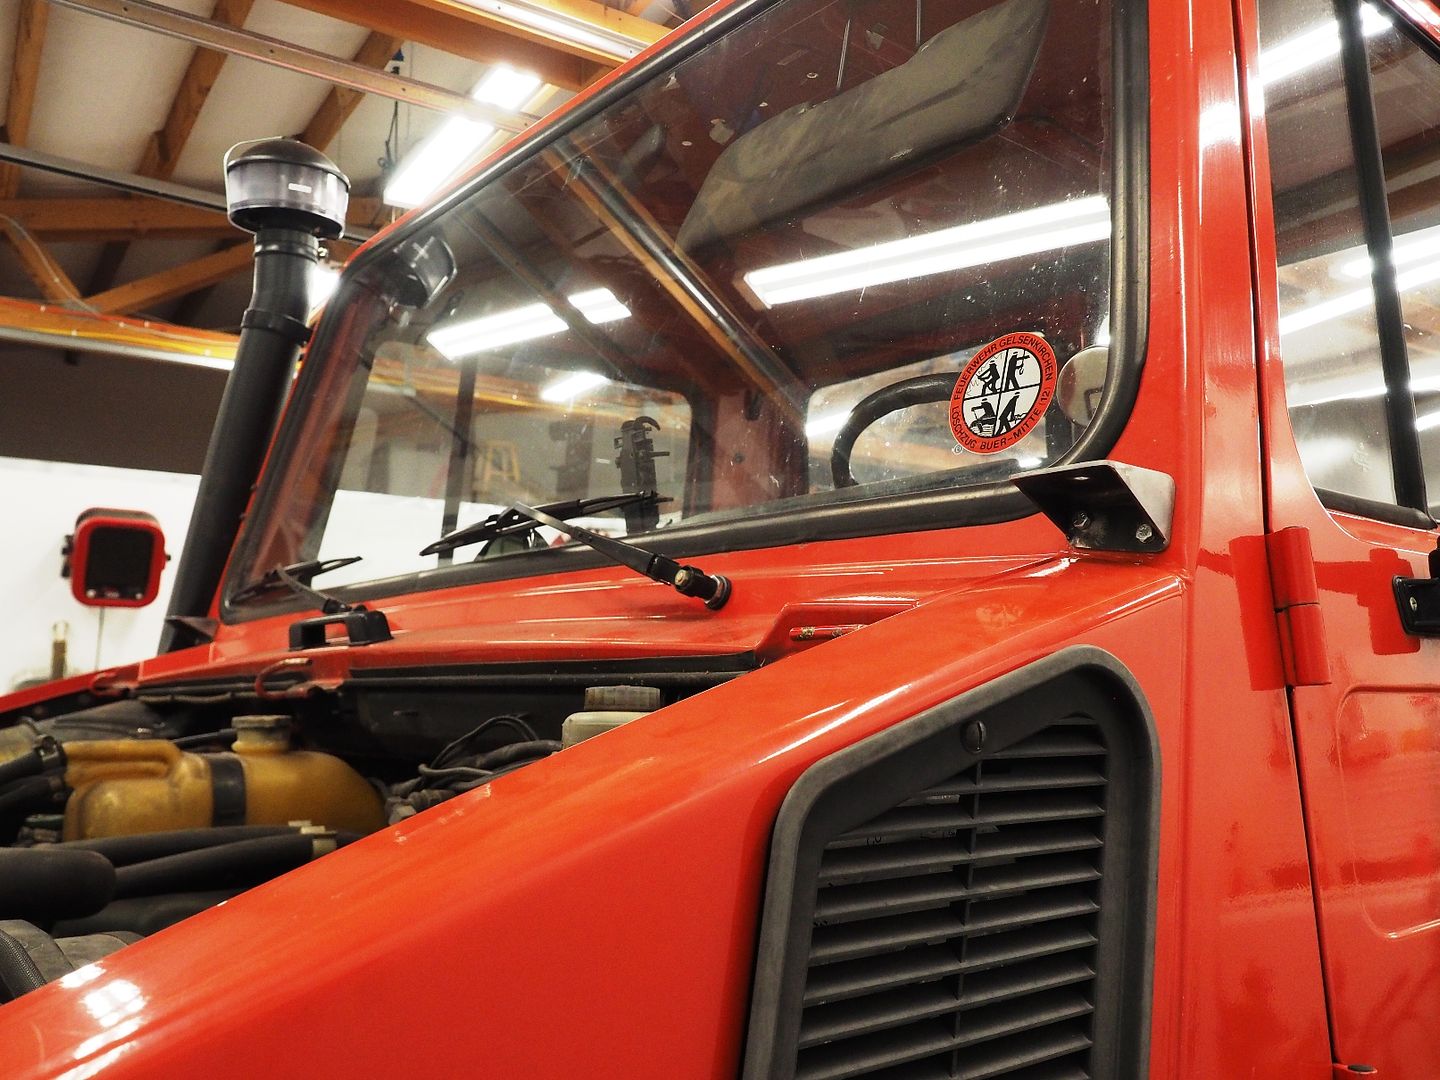
Finished the drivers side light bracket, those are done for now.

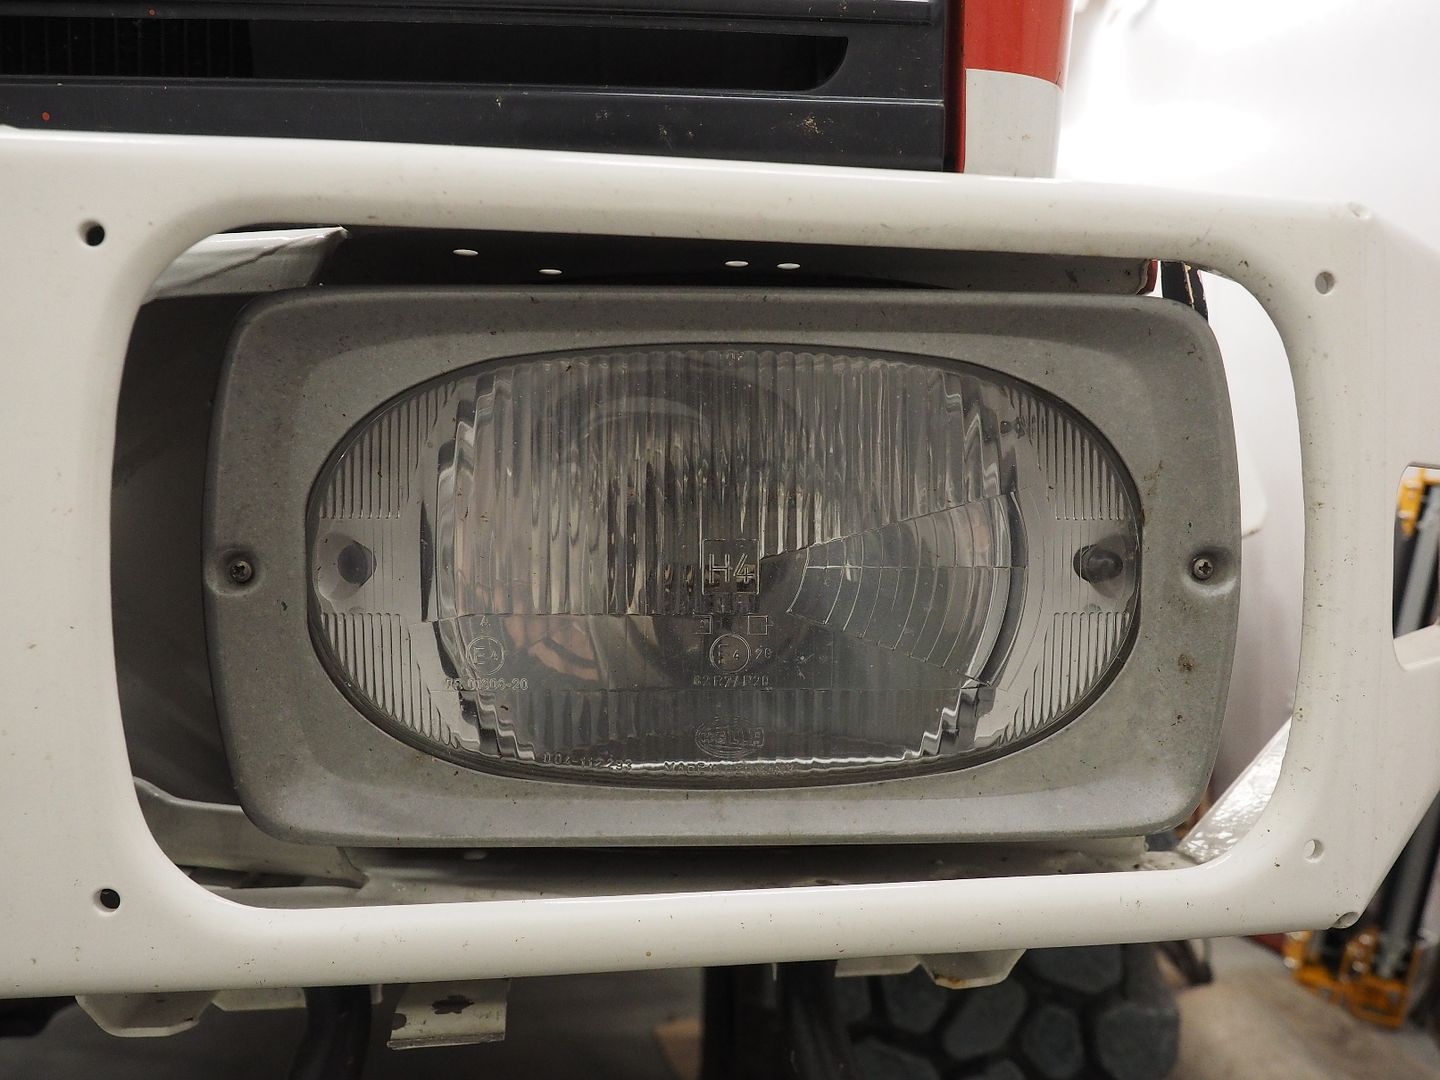
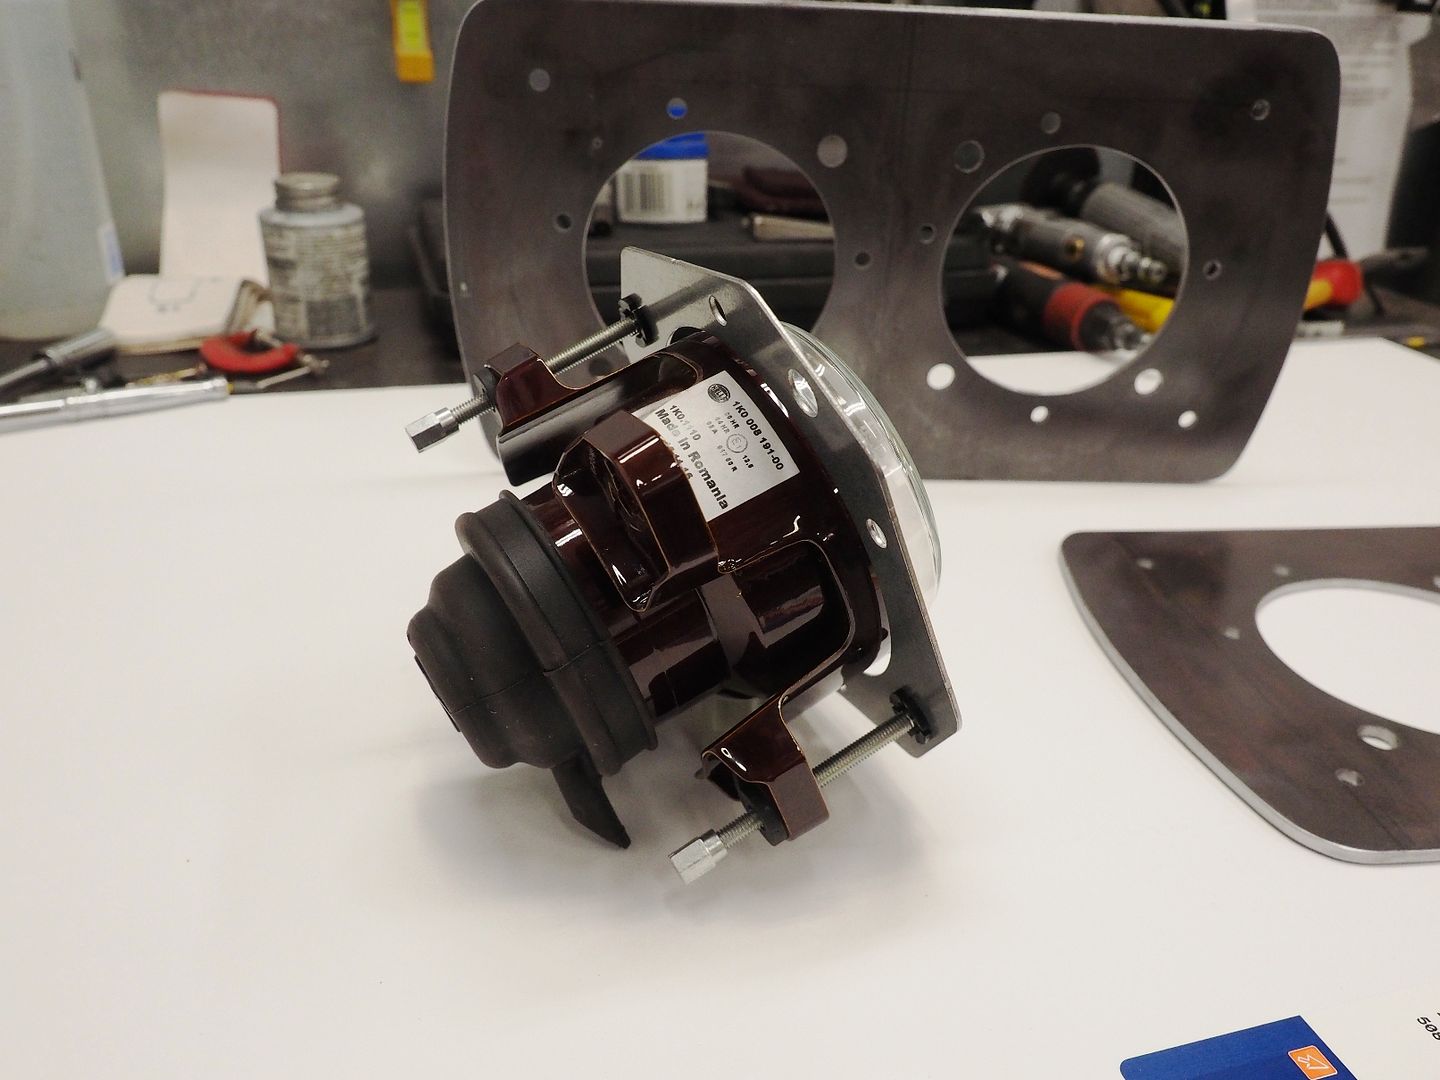
Next up...headlights. The headlights on the U1300L are some of the worst that I've ever driven behind, and that's saying something because the Syncro's stock headlights sucked as well. After doing a lot of reading I decided on Hella 90mm lights in Halogen. Originally I wanted to go with Xenon but decided for the money these will be fine, plus I'll have a large compliment of LED lights to back them up when needed. Each light will have a 70 watt bulb.
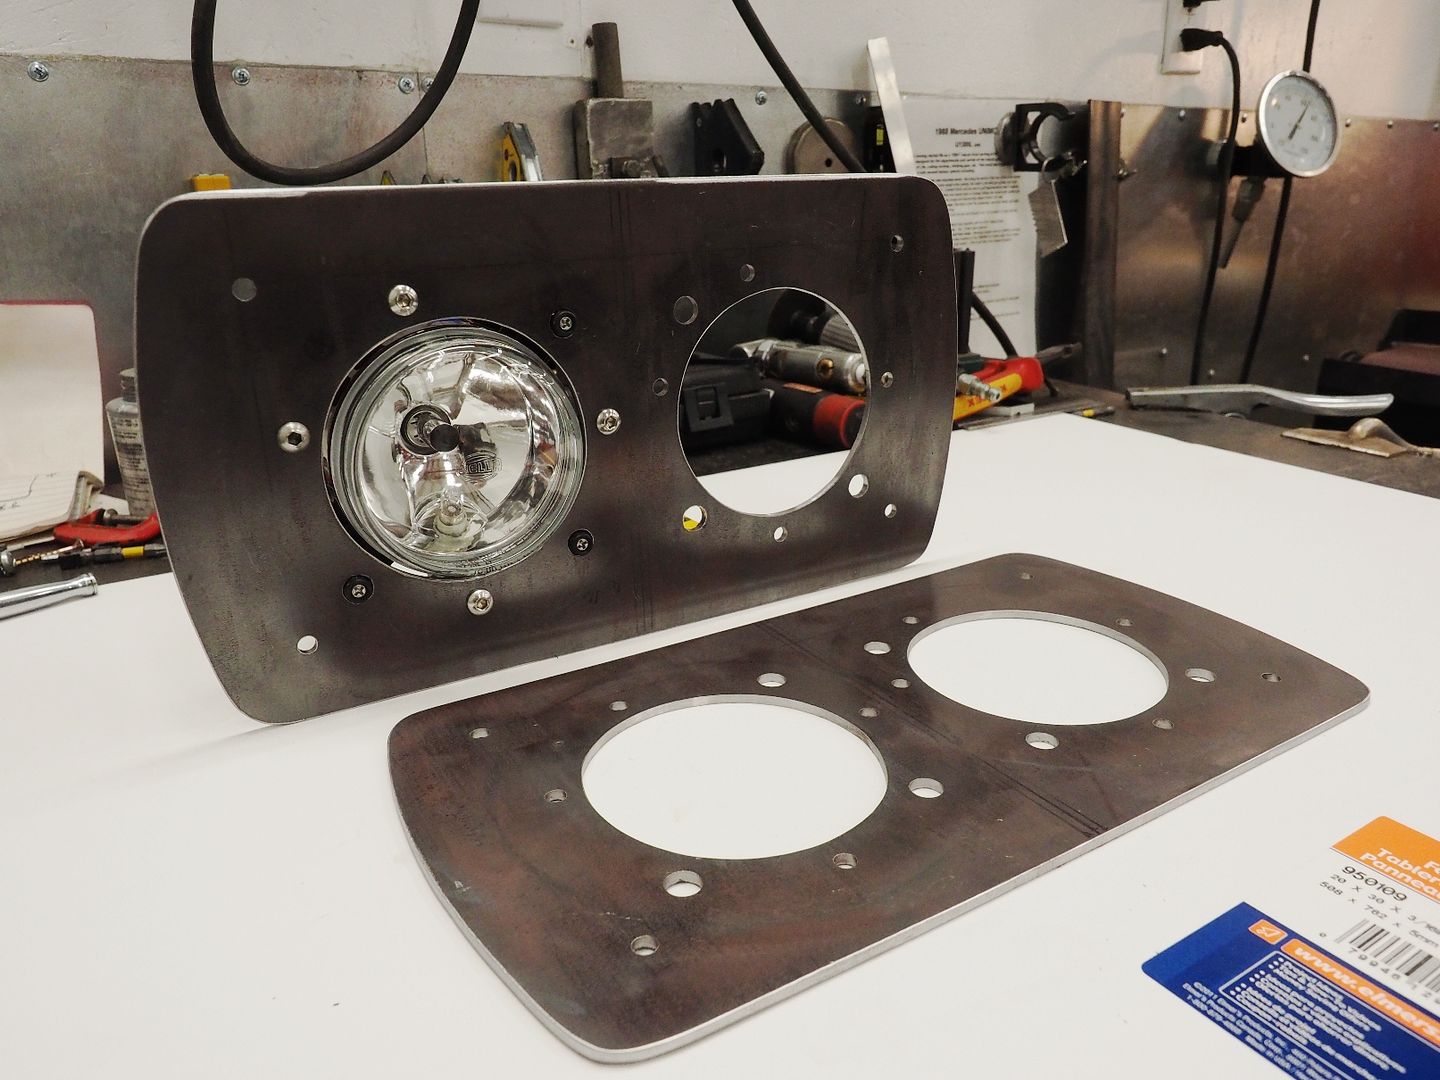
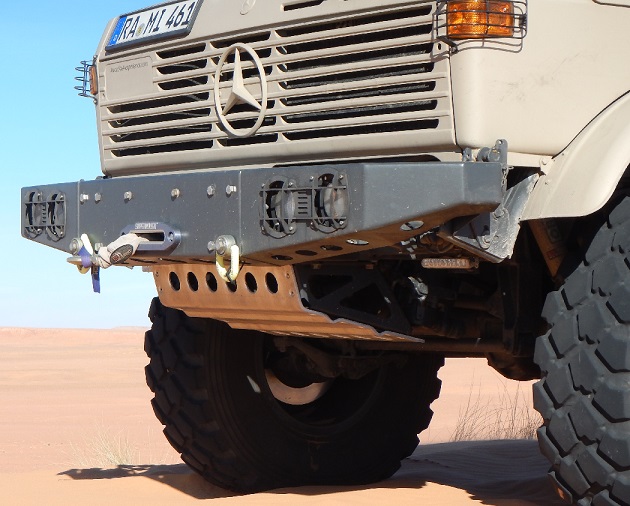
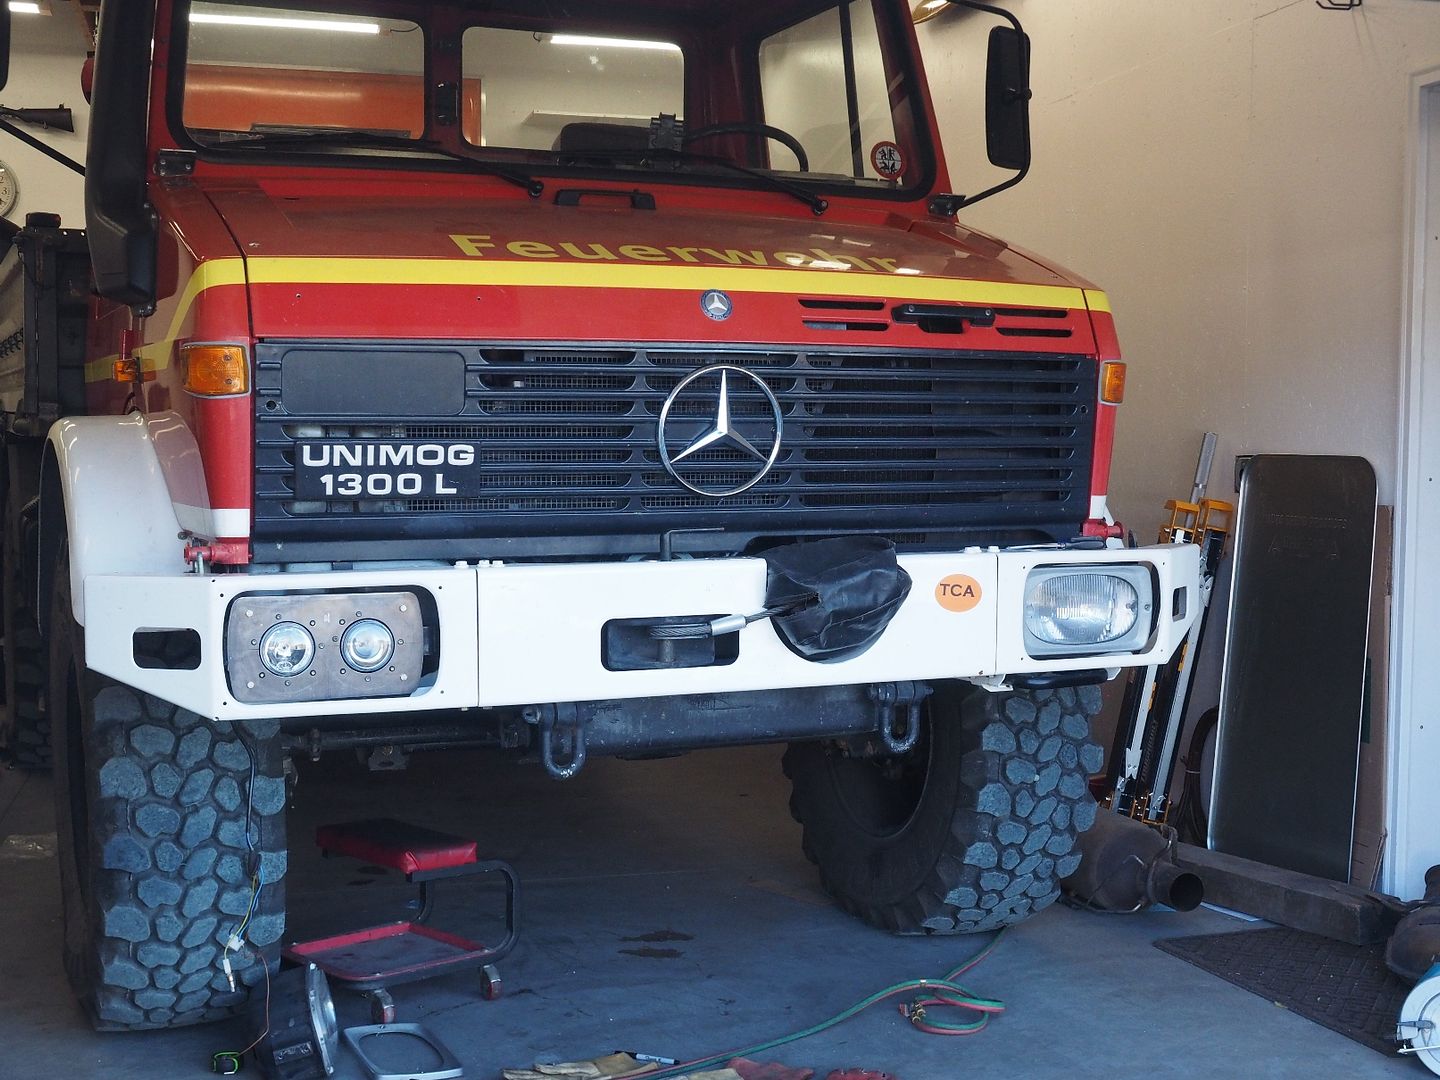
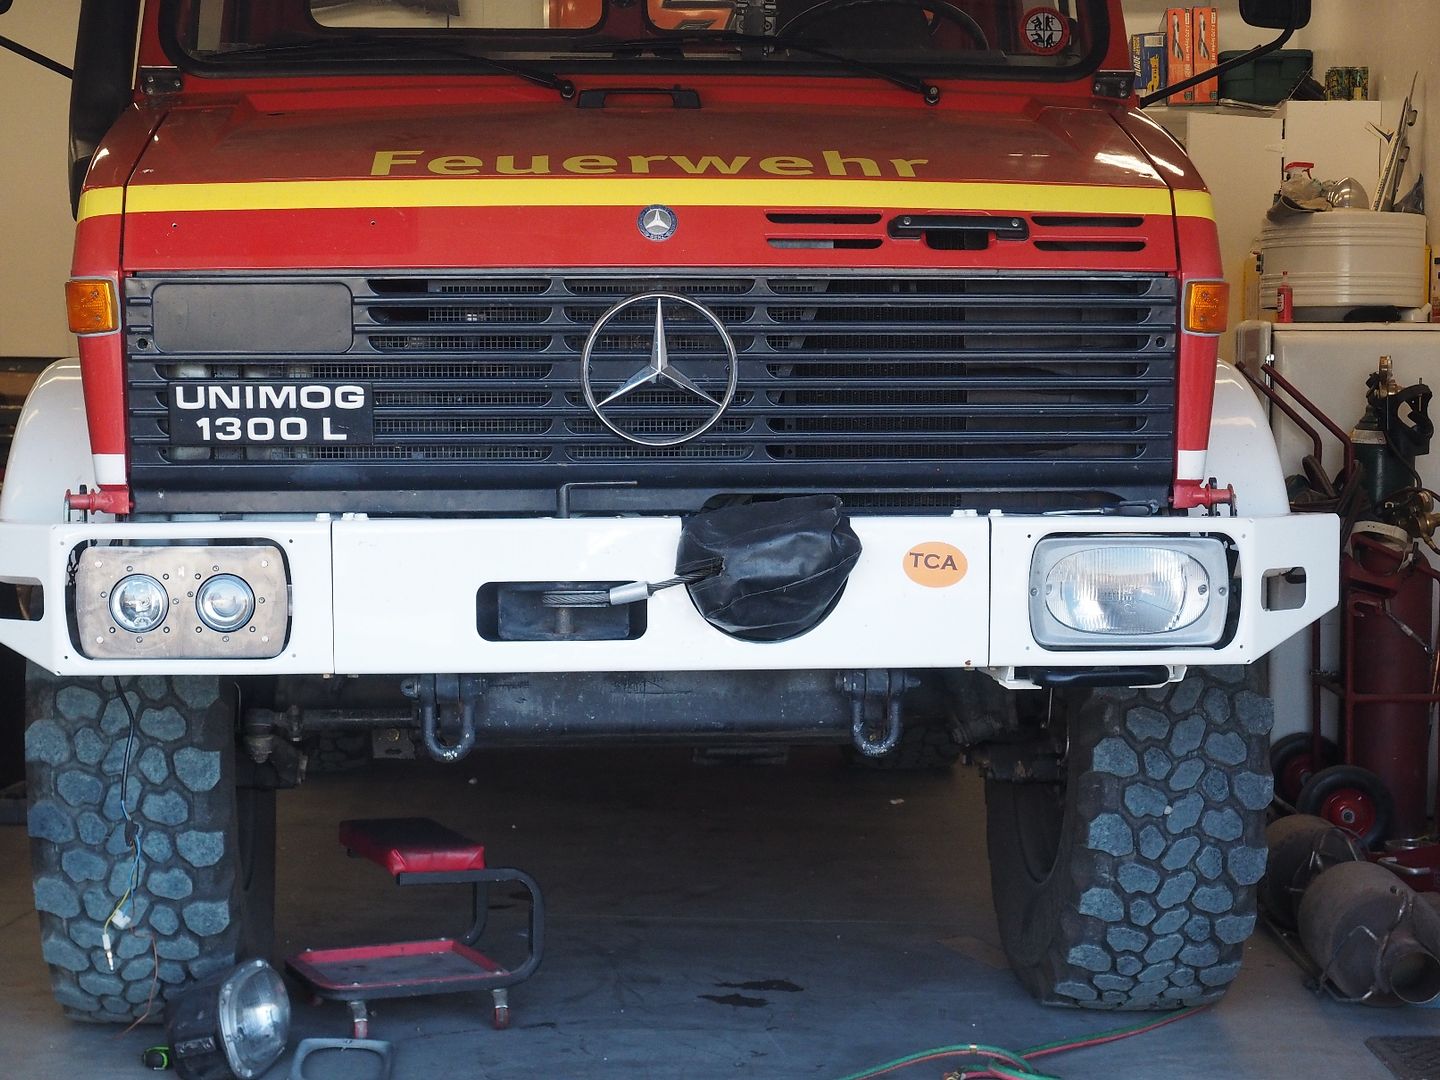
We were going to build a full custom bumper for the truck but ultimately decided that the stock bumper is pretty hard to beat, it's very functional, stout and looks pretty dang good. We will be making some sort of brush guard to fit the stock bumper in the near future. Since we are keeping the bumper we needed to build adapters for the Hella 90mm lights. These will replace both the stock lights and buckets.
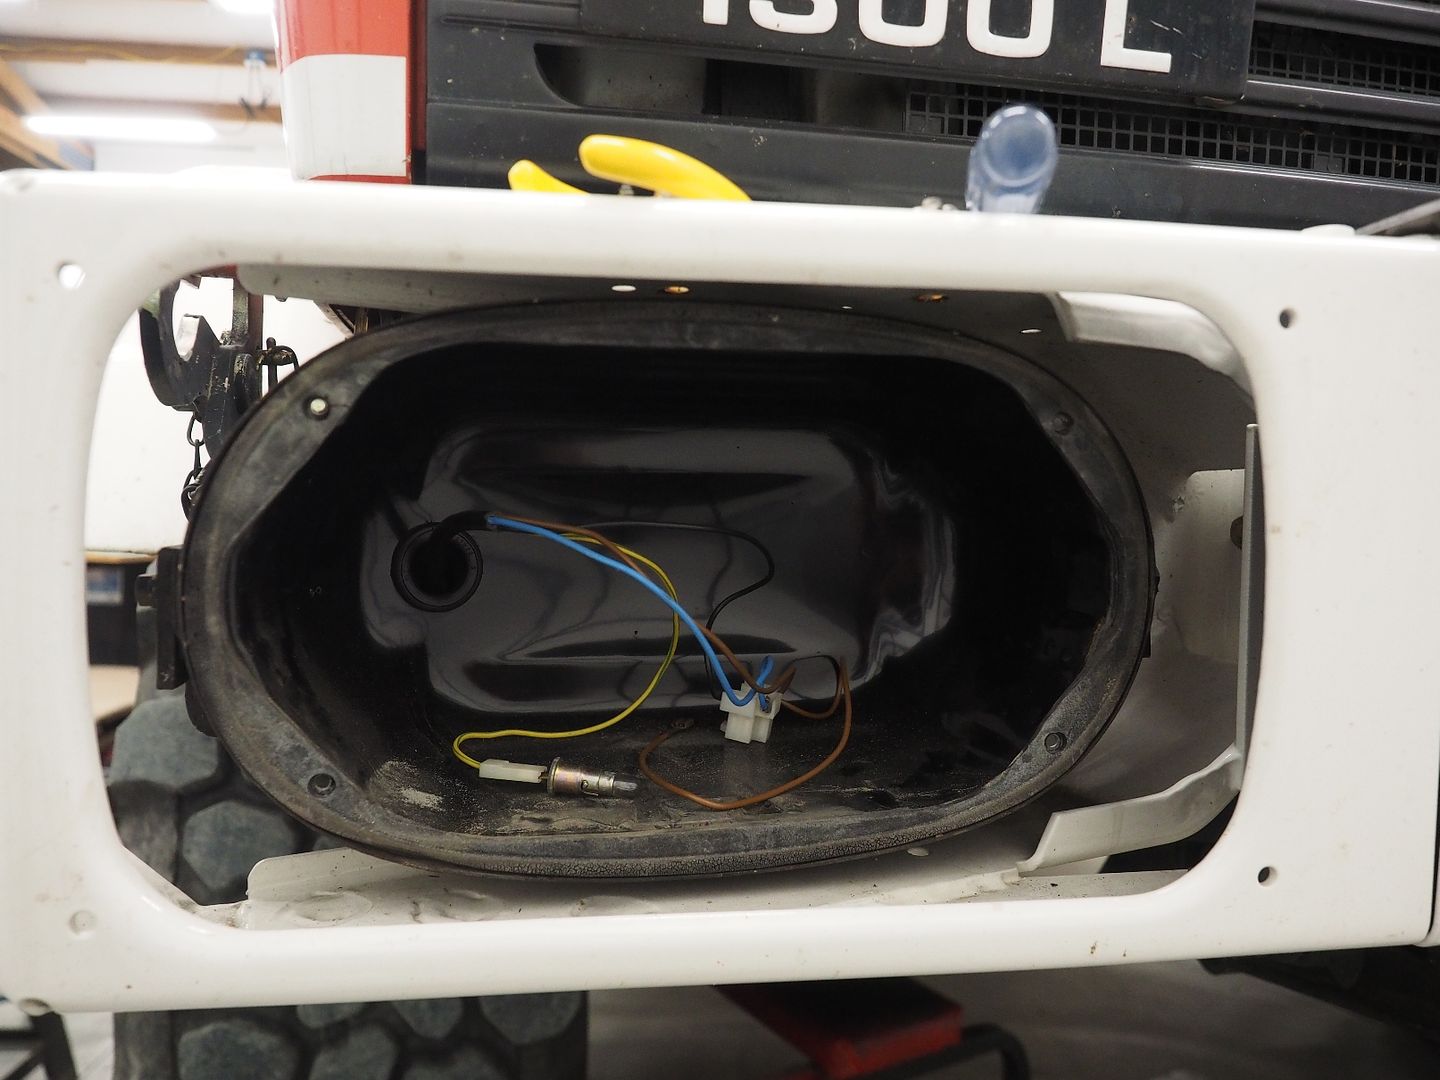
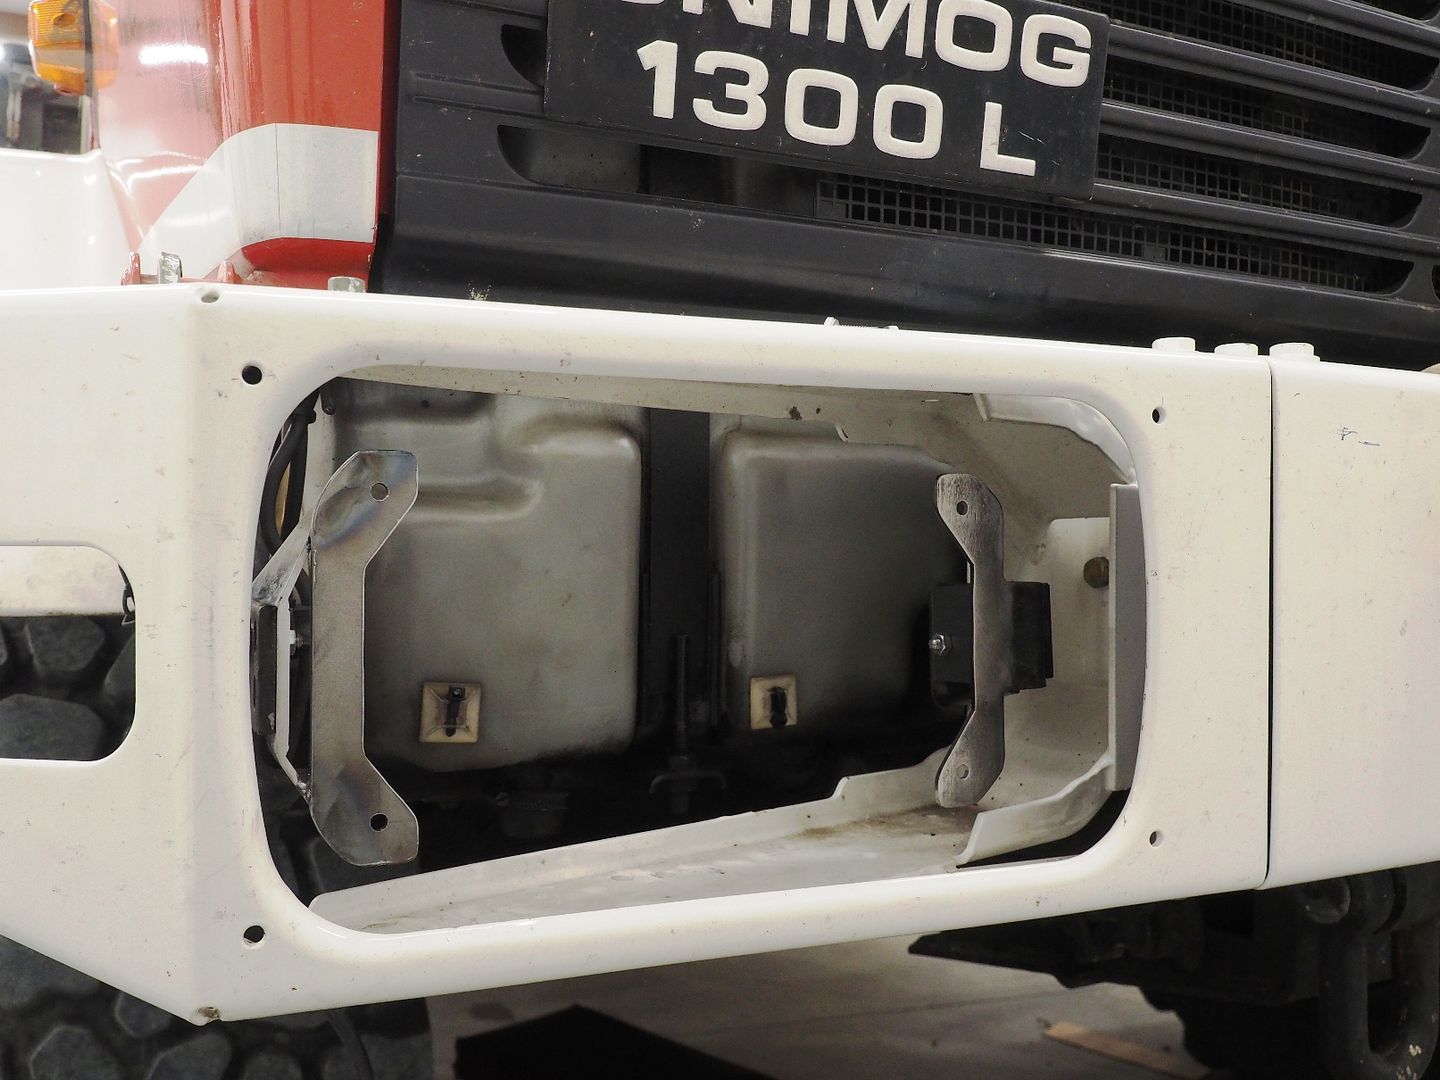
Stock headlight assy, and bucket that will be removed.
Using the stock trim rings for a pattern.

Laying out the holes to be cut/drilled.
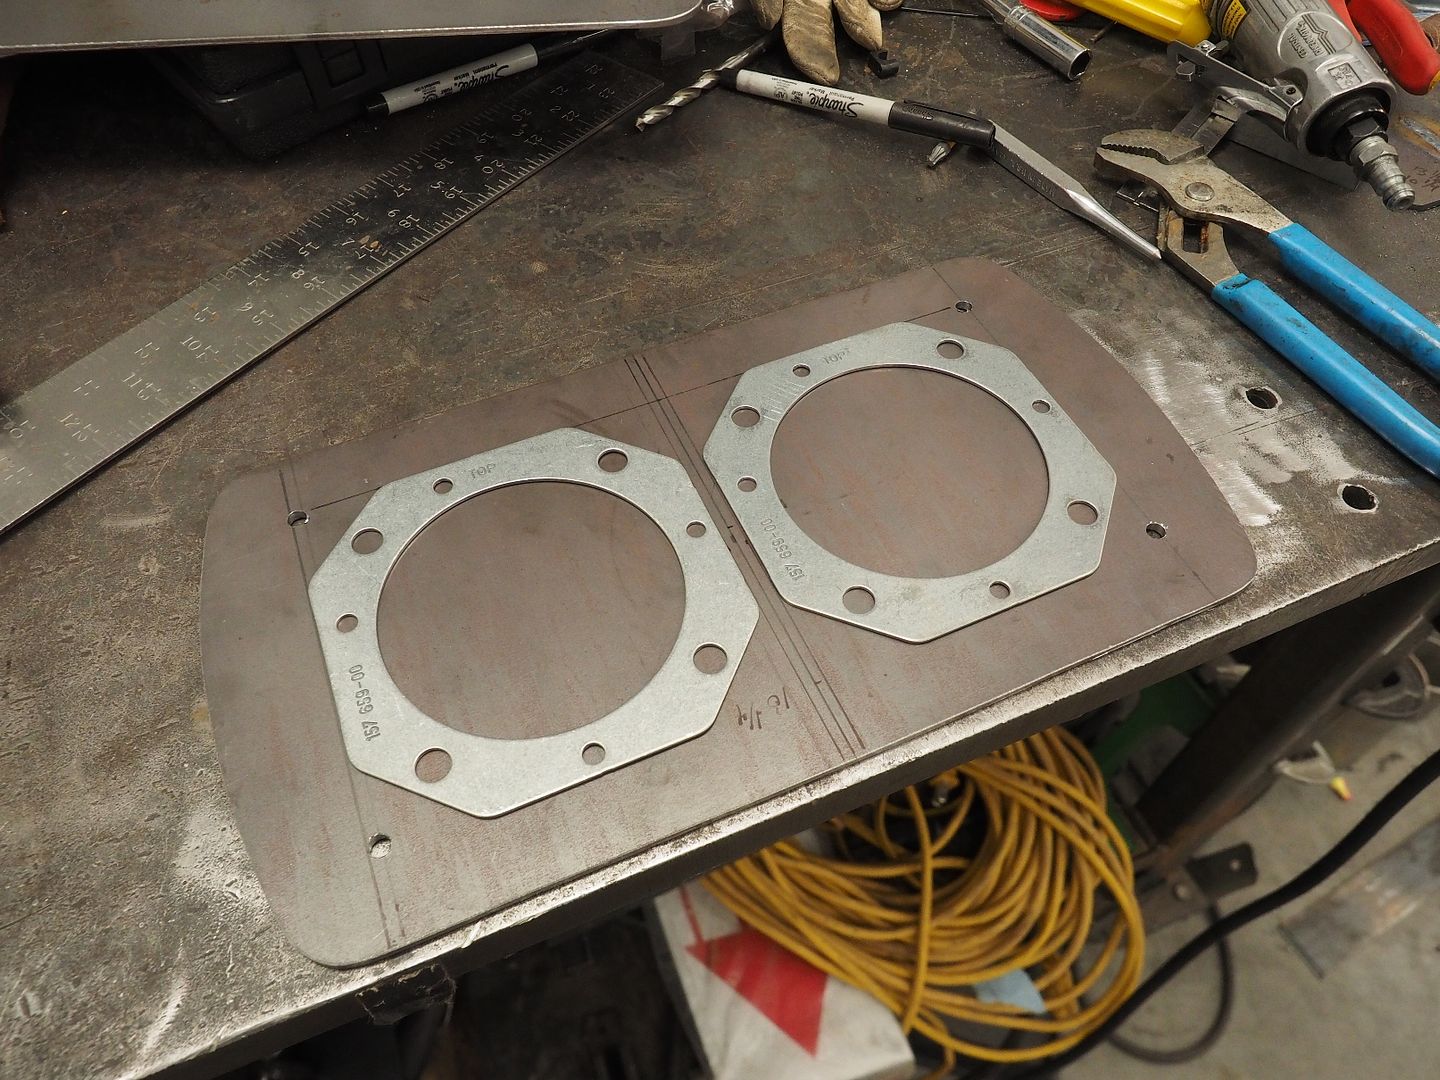
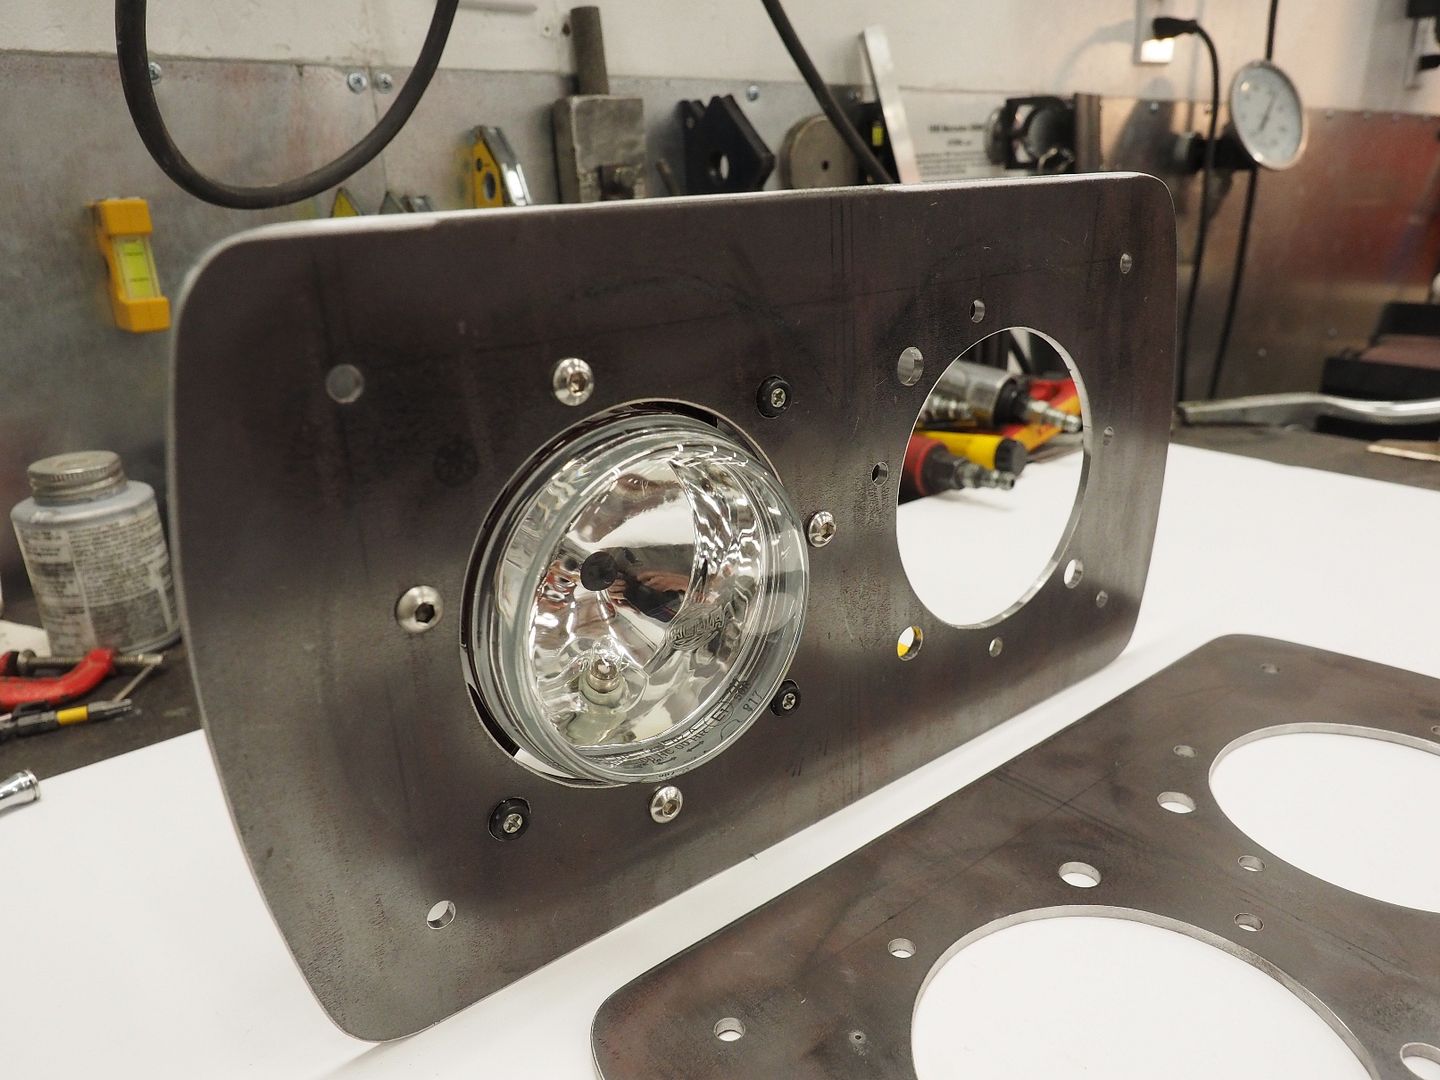
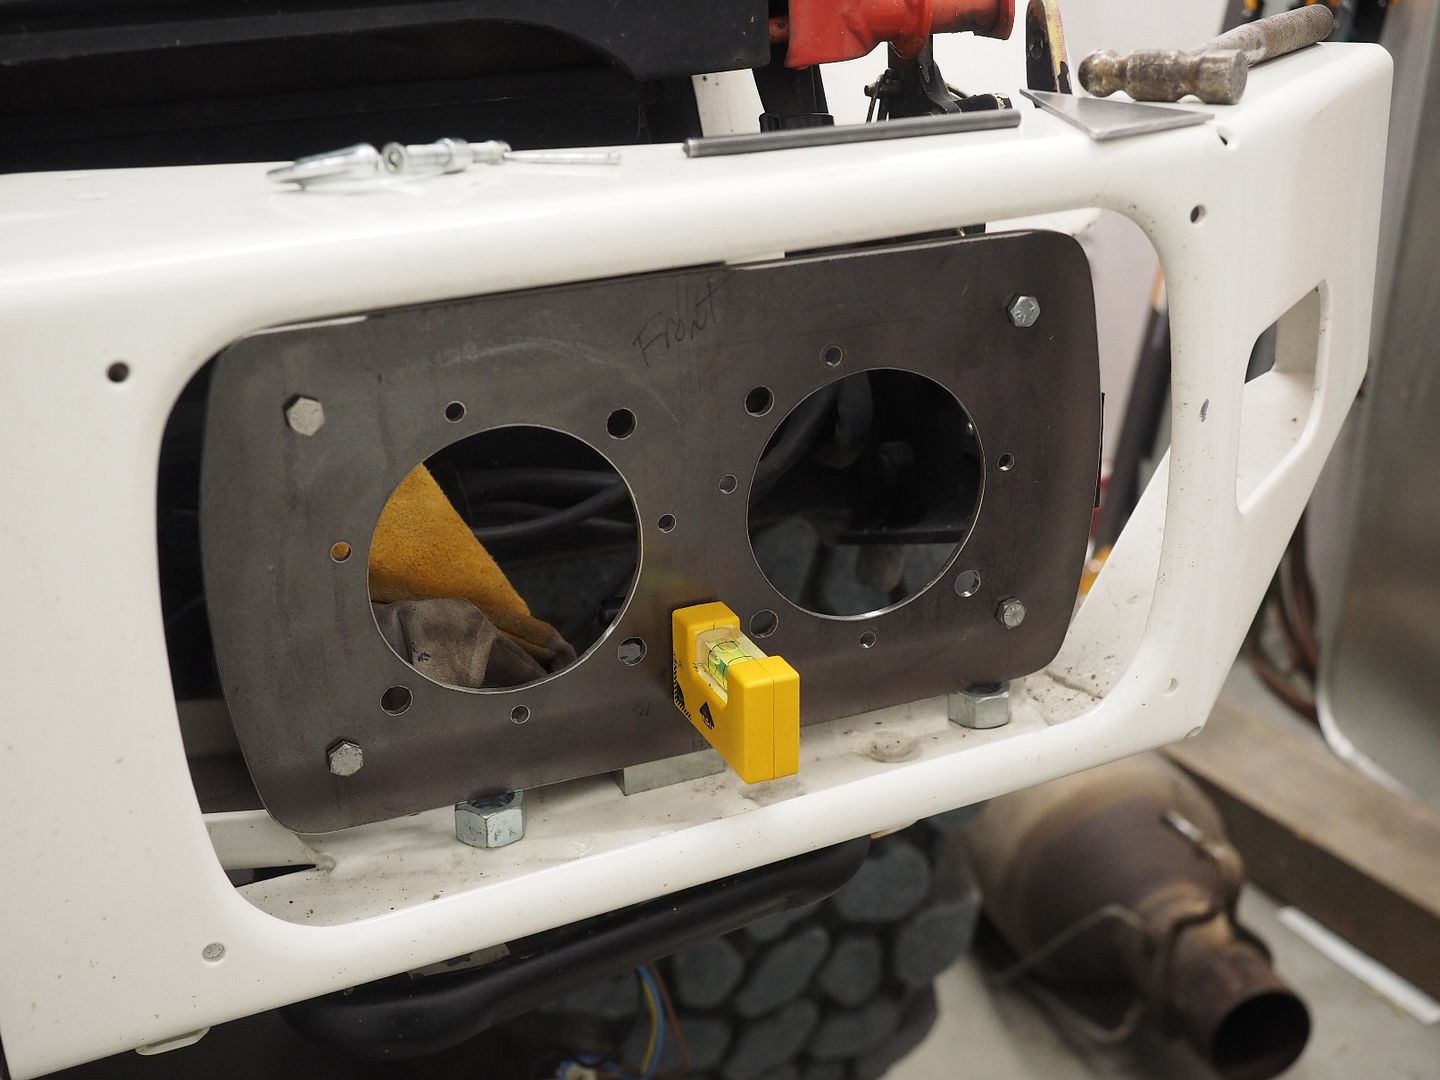
Both plates drilled and ready to accept lights.
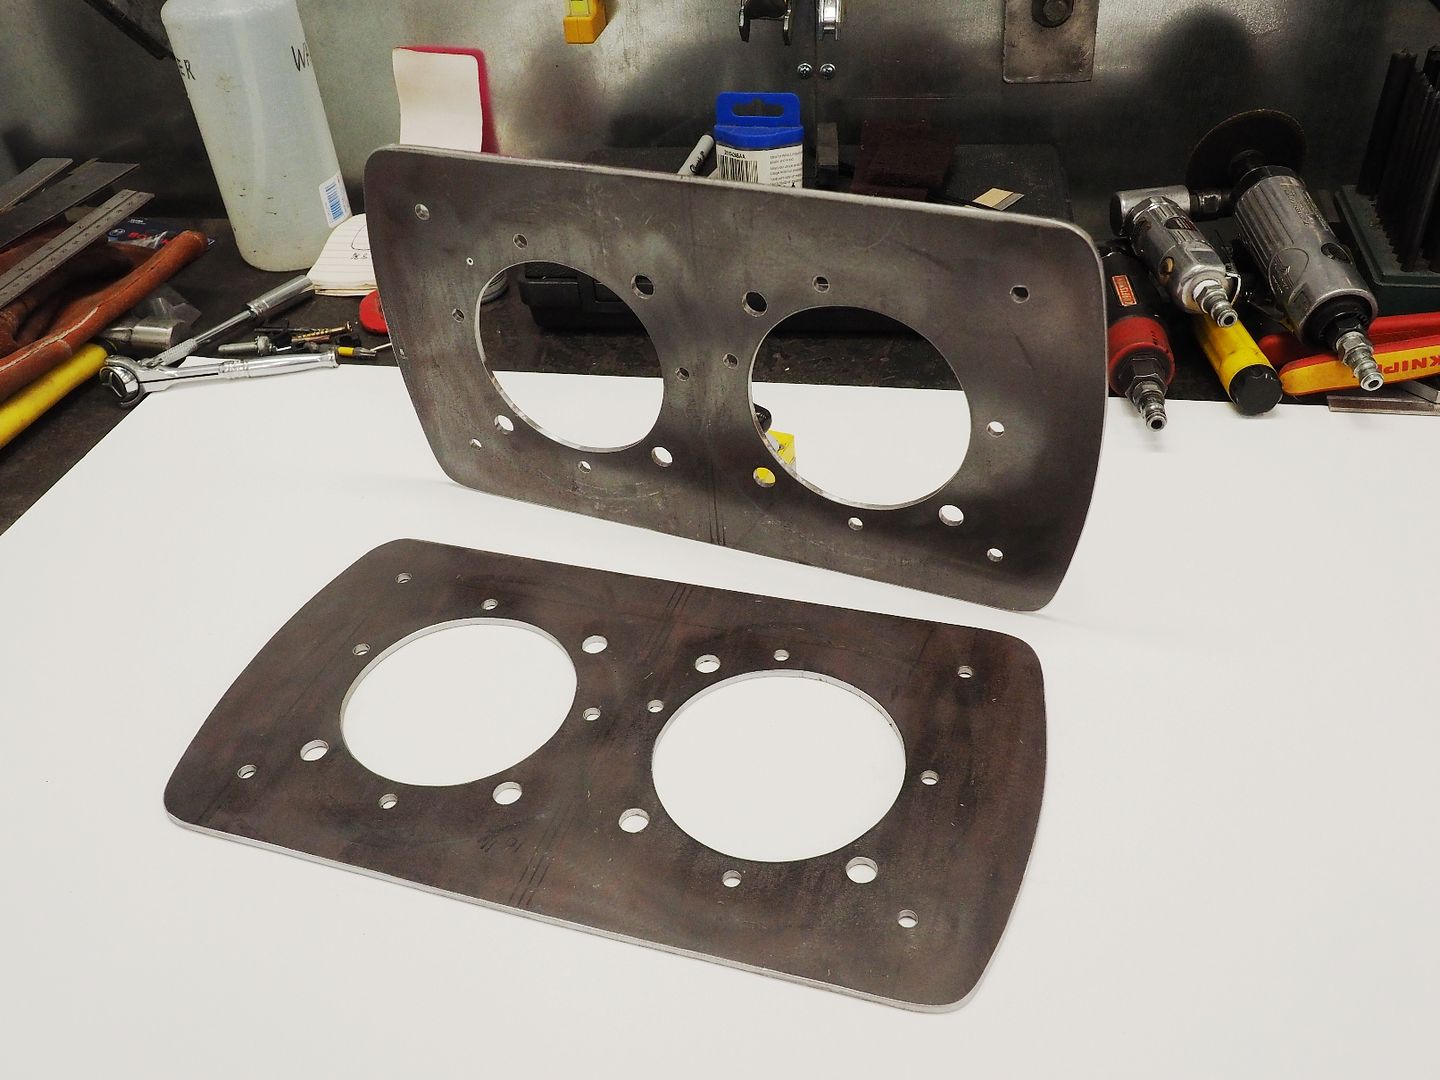
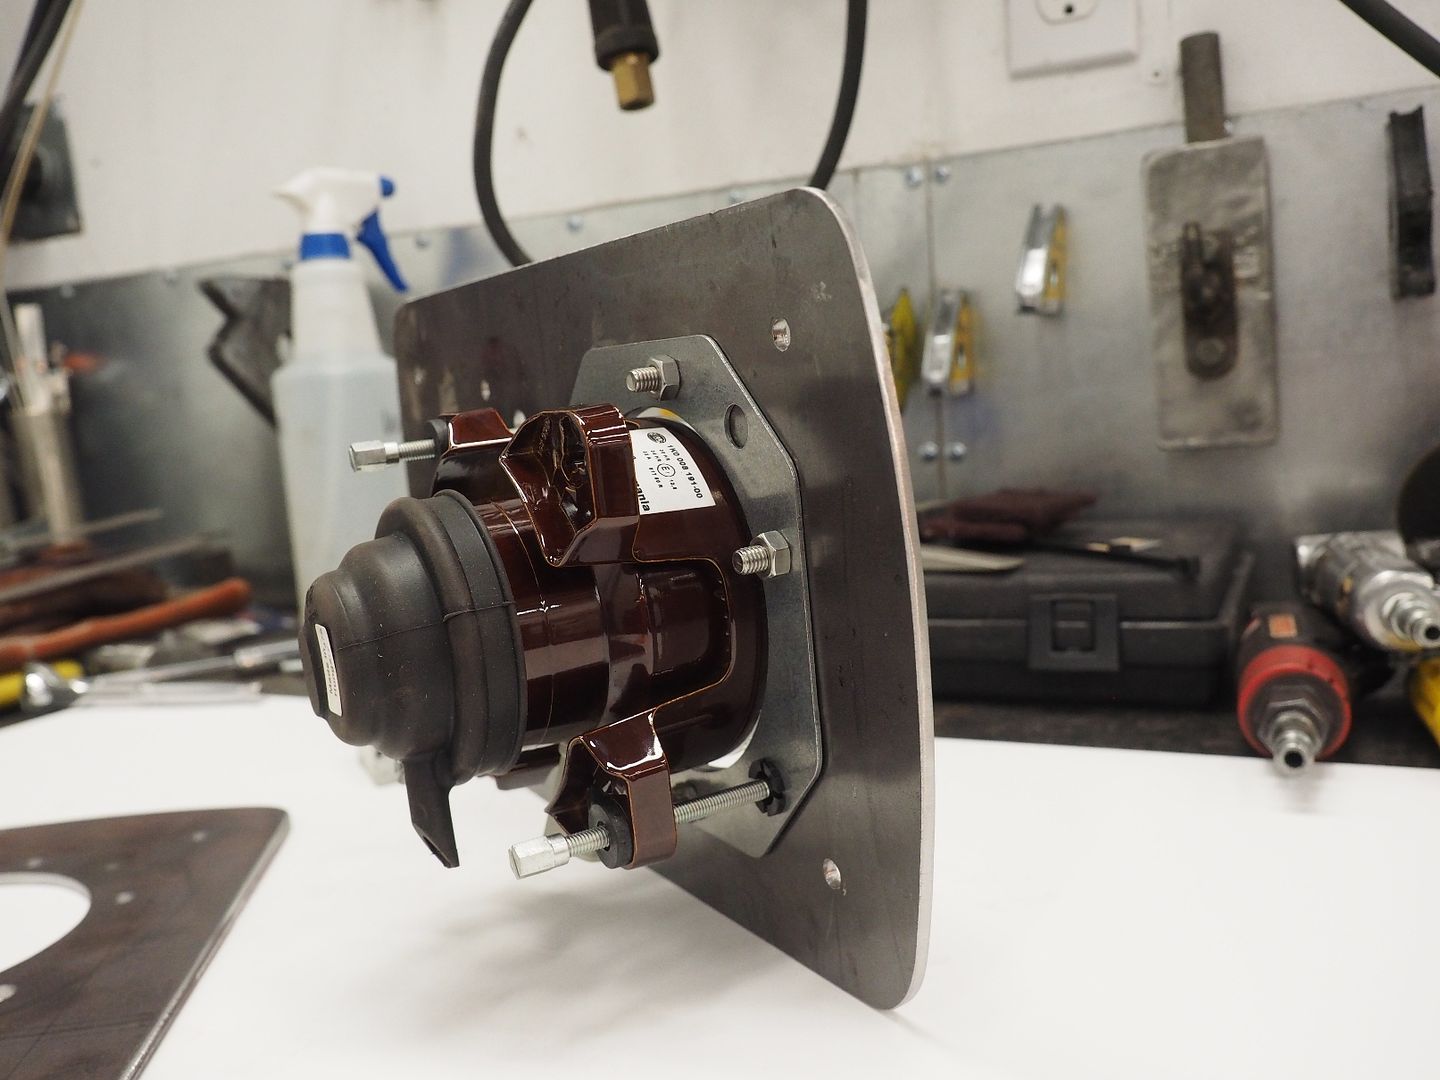
This is the high beam assy. The light is supported by its adjusters, the adjusters snap into the Hella metal mounting plate. If you build the front assy the same thickness as the Hella mounting plate the plastic adjuster cups would snap right into the front plate and there would only be 3 holes per light. Since my plate is thicker I will have 7 holes per light, 4 holes will mount the Hella mounting plate to my front plate and the three larger holes will allow the plastic adjuster cups to clear my plate. The whole assy will be powder coated black when finished and I'll use black hardware for the mounting. I'll use a good amount of dielectric grease and extend the vent line up into the engine bay to keep the lights waterproof.
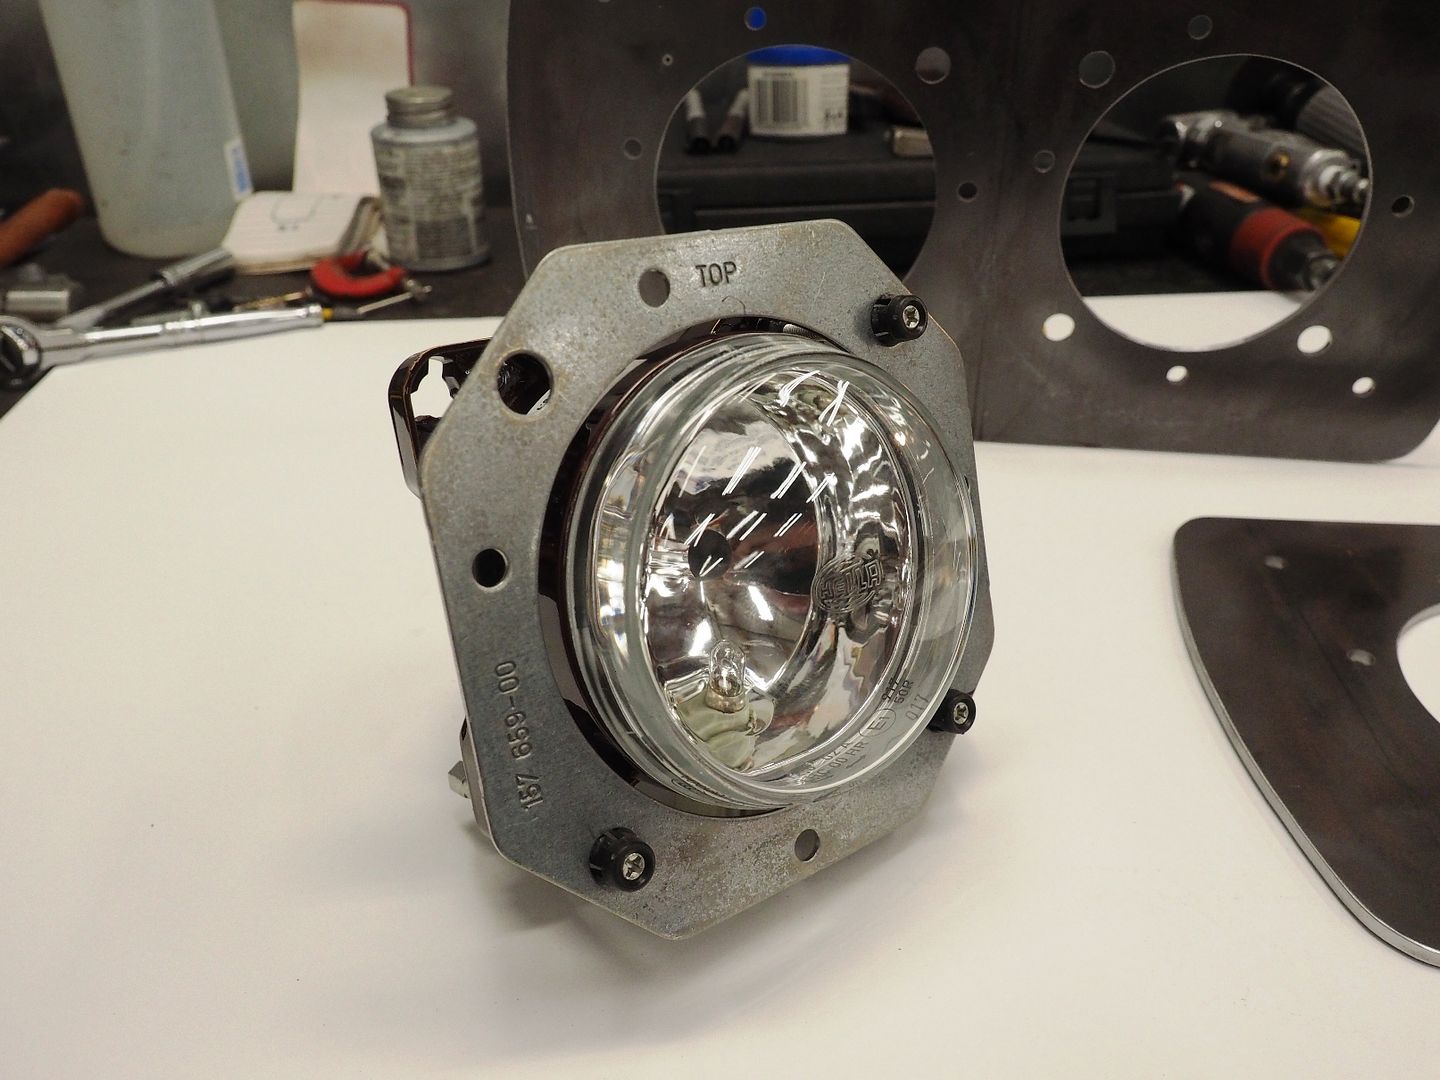
Temporarily mounted in the plate.

More to come....
Hodakaguy
. A DOKA would be awesome! Finished the drivers side light bracket, those are done for now.
Next up...headlights. The headlights on the U1300L are some of the worst that I've ever driven behind, and that's saying something because the Syncro's stock headlights sucked as well. After doing a lot of reading I decided on Hella 90mm lights in Halogen. Originally I wanted to go with Xenon but decided for the money these will be fine, plus I'll have a large compliment of LED lights to back them up when needed
. Each light will have a 70 watt bulb. We were going to build a full custom bumper for the truck but ultimately decided that the stock bumper is pretty hard to beat, it's very functional, stout and looks pretty dang good. We will be making some sort of brush guard to fit the stock bumper in the near future. Since we are keeping the bumper we needed to build adapters for the Hella 90mm lights. These will replace both the stock lights and buckets.
Stock headlight assy, and bucket that will be removed.
Using the stock trim rings for a pattern.
Laying out the holes to be cut/drilled.
Both plates drilled and ready to accept lights.
This is the high beam assy. The light is supported by its adjusters, the adjusters snap into the Hella metal mounting plate. If you build the front assy the same thickness as the Hella mounting plate the plastic adjuster cups would snap right into the front plate and there would only be 3 holes per light. Since my plate is thicker I will have 7 holes per light, 4 holes will mount the Hella mounting plate to my front plate and the three larger holes will allow the plastic adjuster cups to clear my plate. The whole assy will be powder coated black when finished and I'll use black hardware for the mounting. I'll use a good amount of dielectric grease and extend the vent line up into the engine bay to keep the lights waterproof.
Temporarily mounted in the plate.
More to come....
Hodakaguy
thebigblue
Adventurer
Nice to go with the HELLAs, I would love if you did the lights fully integrated as om the Excap Steyr

or ATLAS Unimogs
or ATLAS Unimogs
Hodakaguy
Adventurer
Nice to go with the HELLAs, I would love if you did the lights fully integrated as om the Excap Steyr
or ATLAS Unimogs
That was the original plan when we were going to make a complete bumper. I still may build one down the road, for now lots of other things to build before spring
Hodakaguy
Hodakaguy
Adventurer
Another bit of progress today on the headlight install.
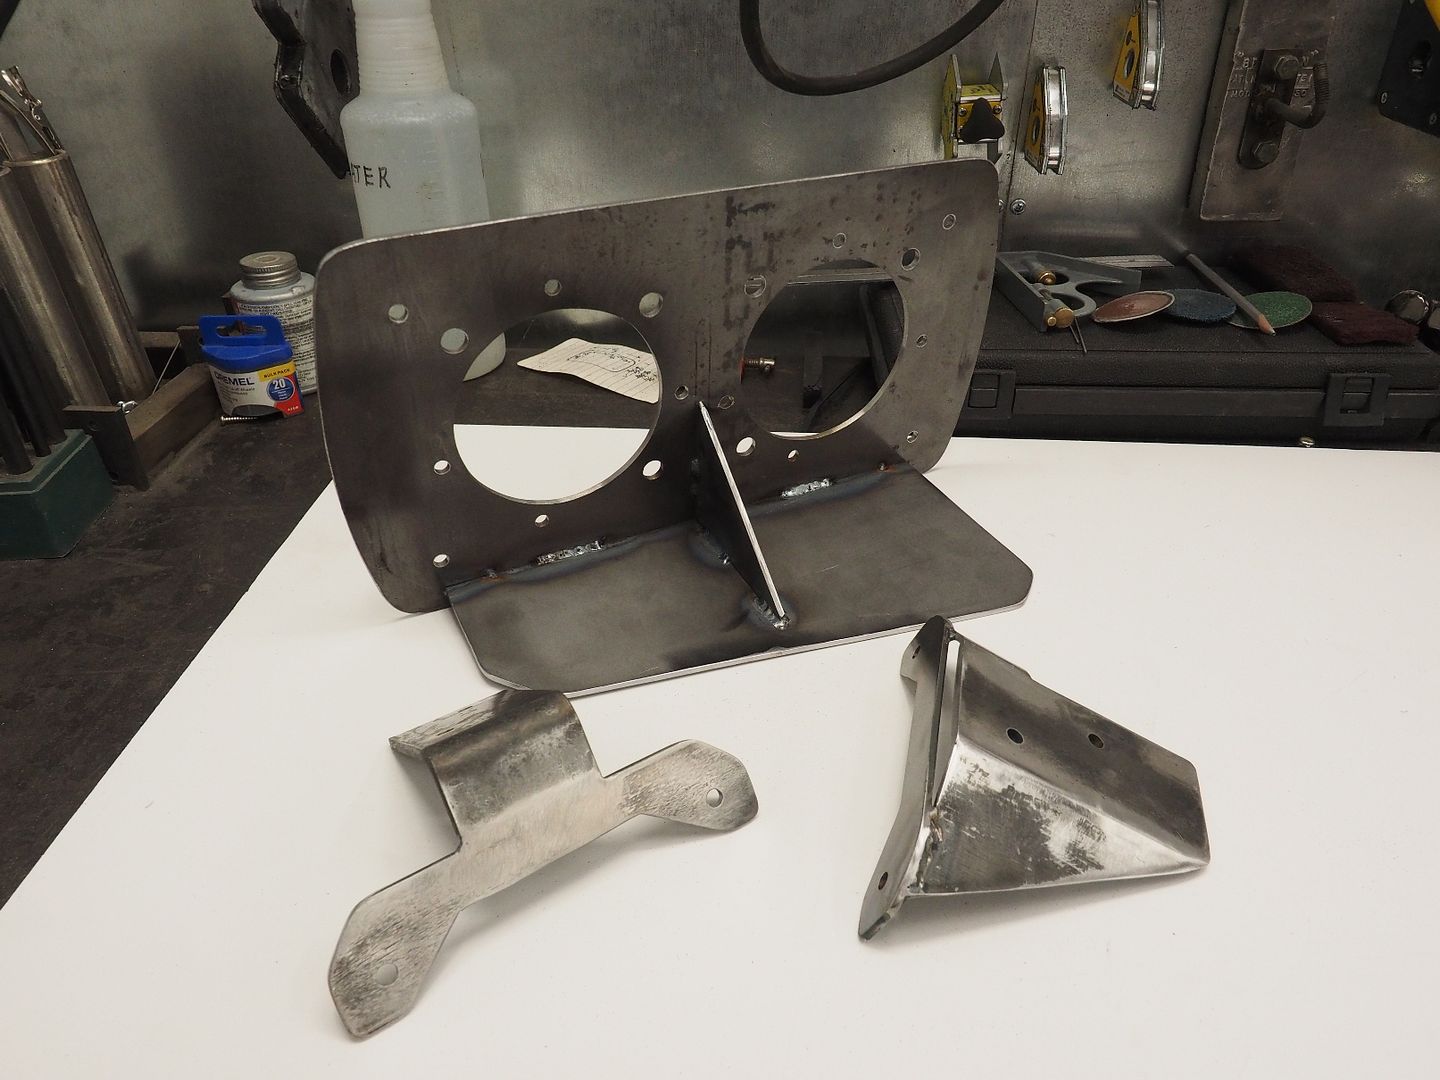
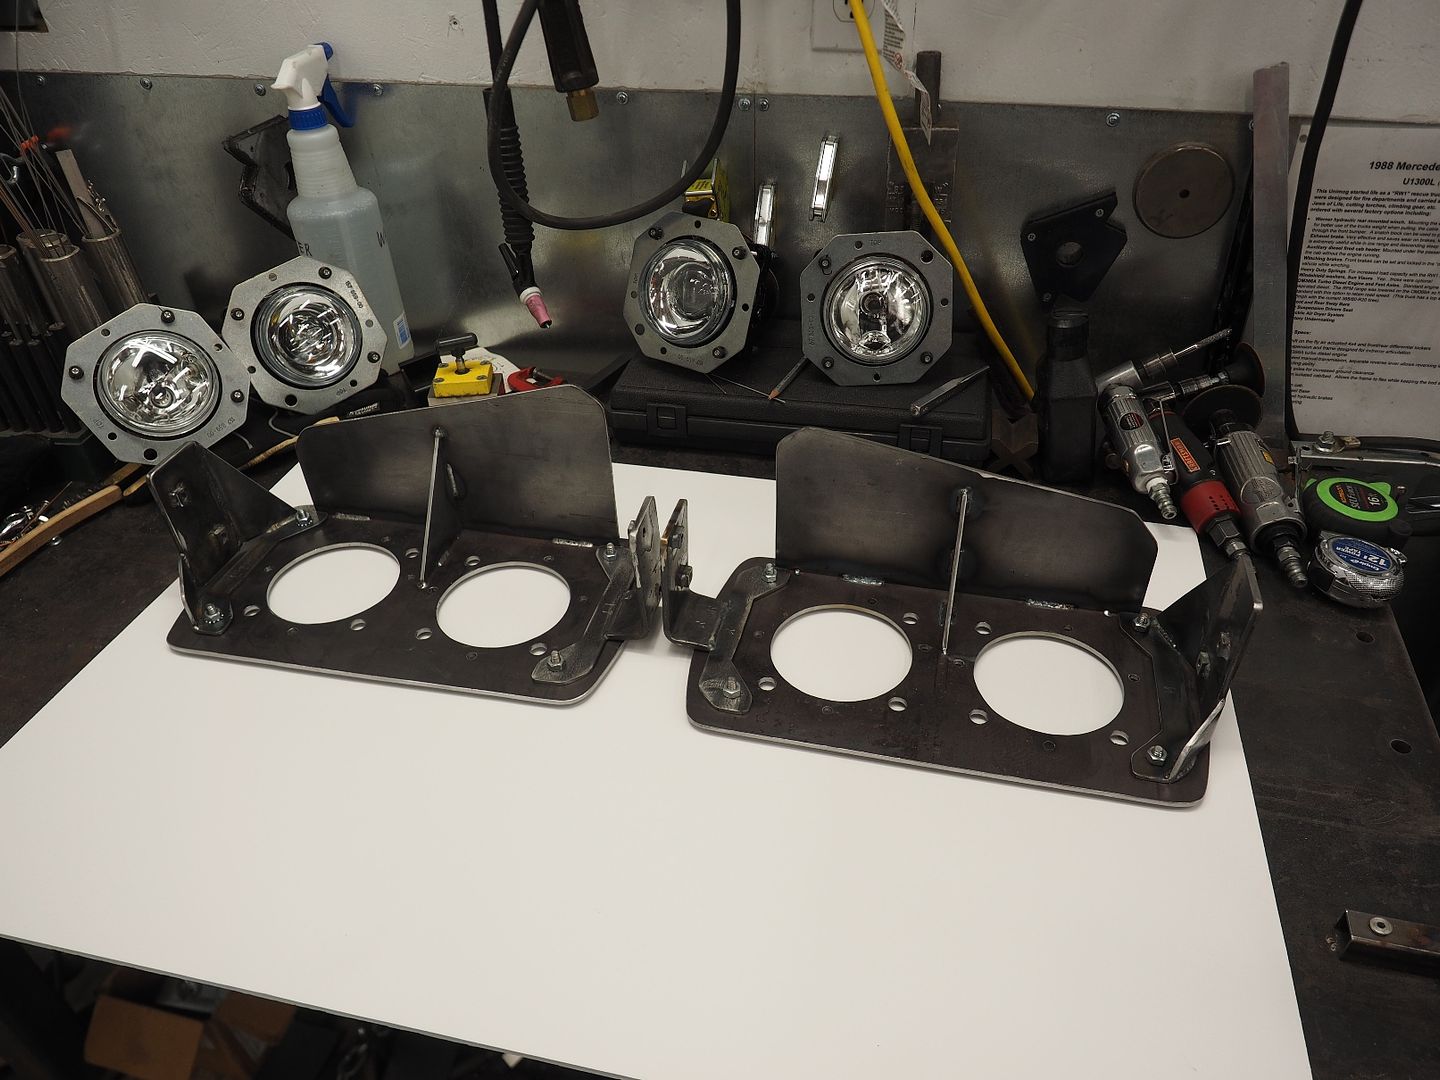
Fabricating the mounts for the light plate.

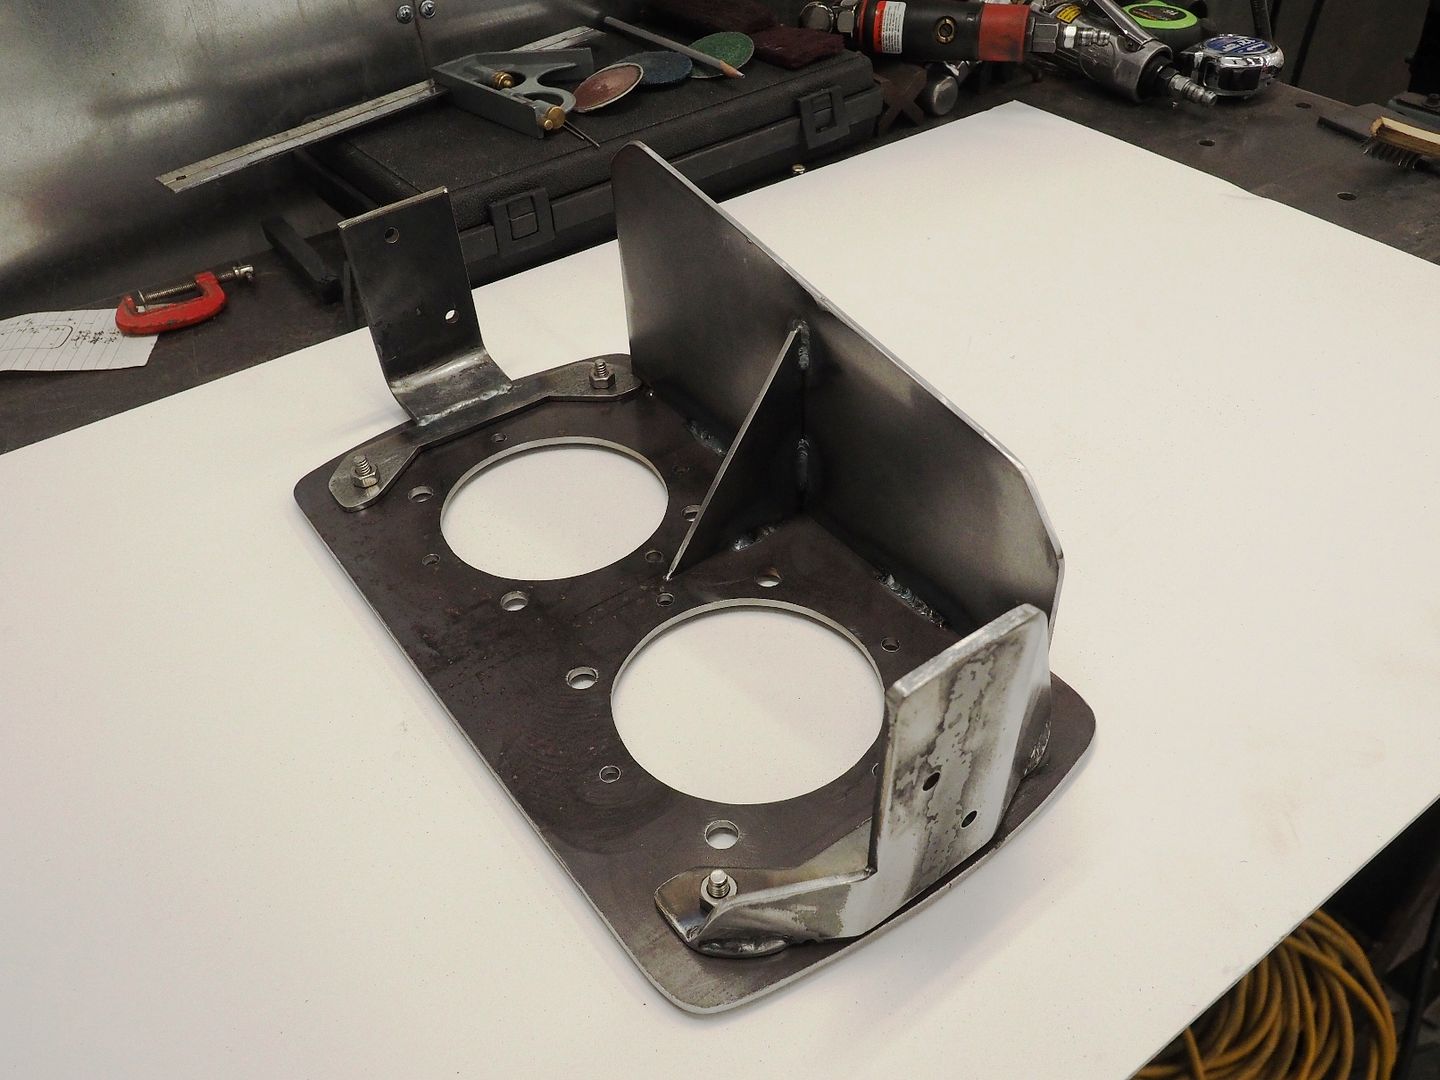
Mounts and front light plate. I added a guard to cover the top of the lights, it will protect the lights from anything falling from above...tools, etc. The outside mount is wider to act as a shield for the lights, the inside light is protected by the factory bumper assy. Originally I was going to use these with the factory buckets so I had drilled the mounting holes in those locations, I then decided to ditch the stock buckets so I could now weld up the holes or make mounts to accommodate the existing holes. In the end I decided just to make the mounts for the existing holes.

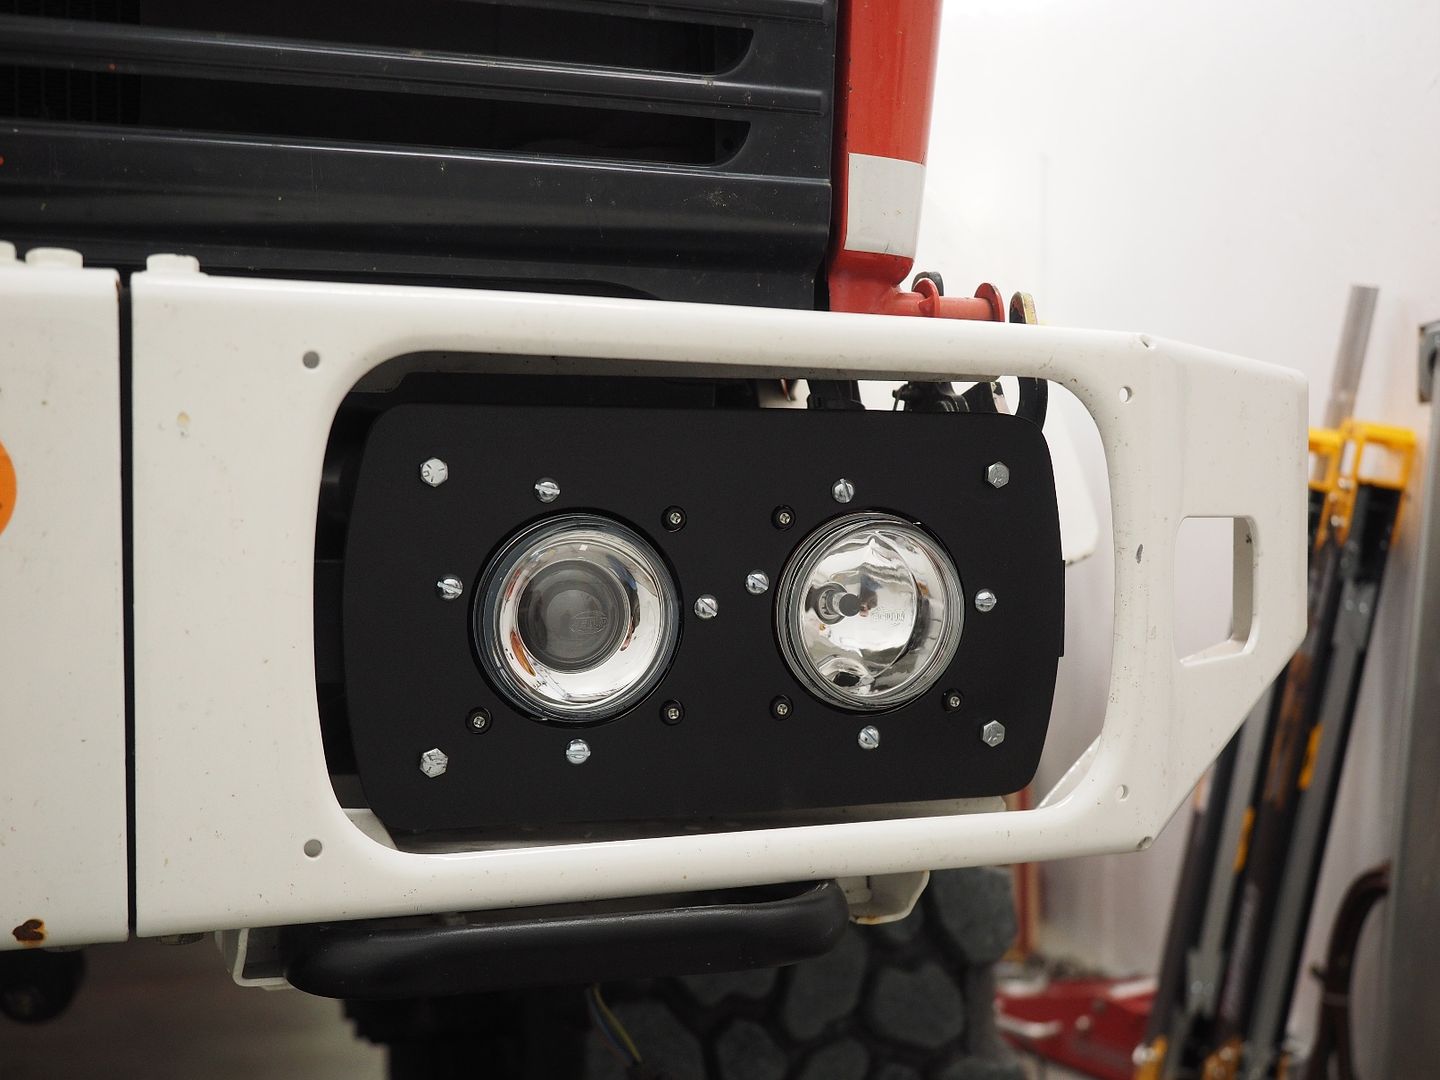
Both lights fitted.

And mounted up in the bumper. You can see the top and side guard here.
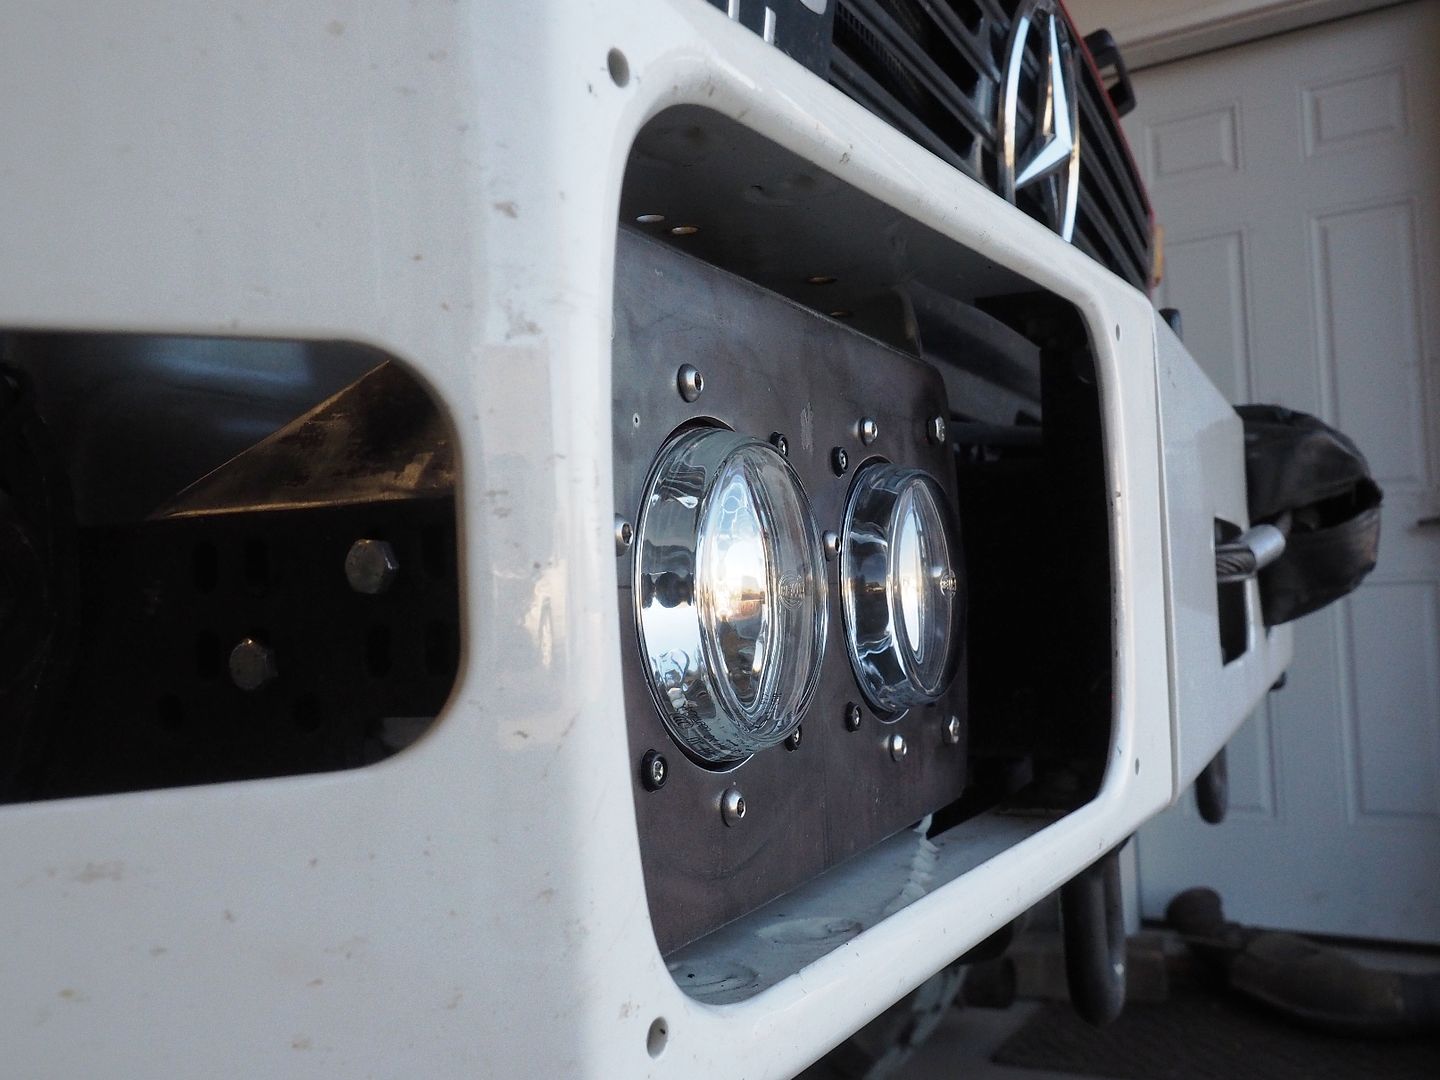

Comparison between the new and old. Should look a lot better once the bumper and light assy is powder coated black.
Hodakaguy
Fabricating the mounts for the light plate.
Mounts and front light plate. I added a guard to cover the top of the lights, it will protect the lights from anything falling from above...tools, etc. The outside mount is wider to act as a shield for the lights, the inside light is protected by the factory bumper assy. Originally I was going to use these with the factory buckets so I had drilled the mounting holes in those locations, I then decided to ditch the stock buckets so I could now weld up the holes or make mounts to accommodate the existing holes. In the end I decided just to make the mounts for the existing holes.
Both lights fitted.
And mounted up in the bumper. You can see the top and side guard here.
Comparison between the new and old. Should look a lot better once the bumper and light assy is powder coated black.
Hodakaguy
thebigblue
Adventurer
Looks great! Bet you some MOG owners would want this mod. I hugely respect your metal fabrication skilles.
thebigblue
Adventurer
Inspiration for washers:

Hodakaguy
Adventurer
Inspiration for washers:
That's the pic that gave me the idea for these lights. I don't see a huge need for washers on mine, If they get that bad I'll hop out and clean them
. Hellgeth used thinner metal on their mounts so they didn't have to drill the extra mounting holes for the Hella adapter, they build nice stuff!Hodakaguy
Hodakaguy
Adventurer
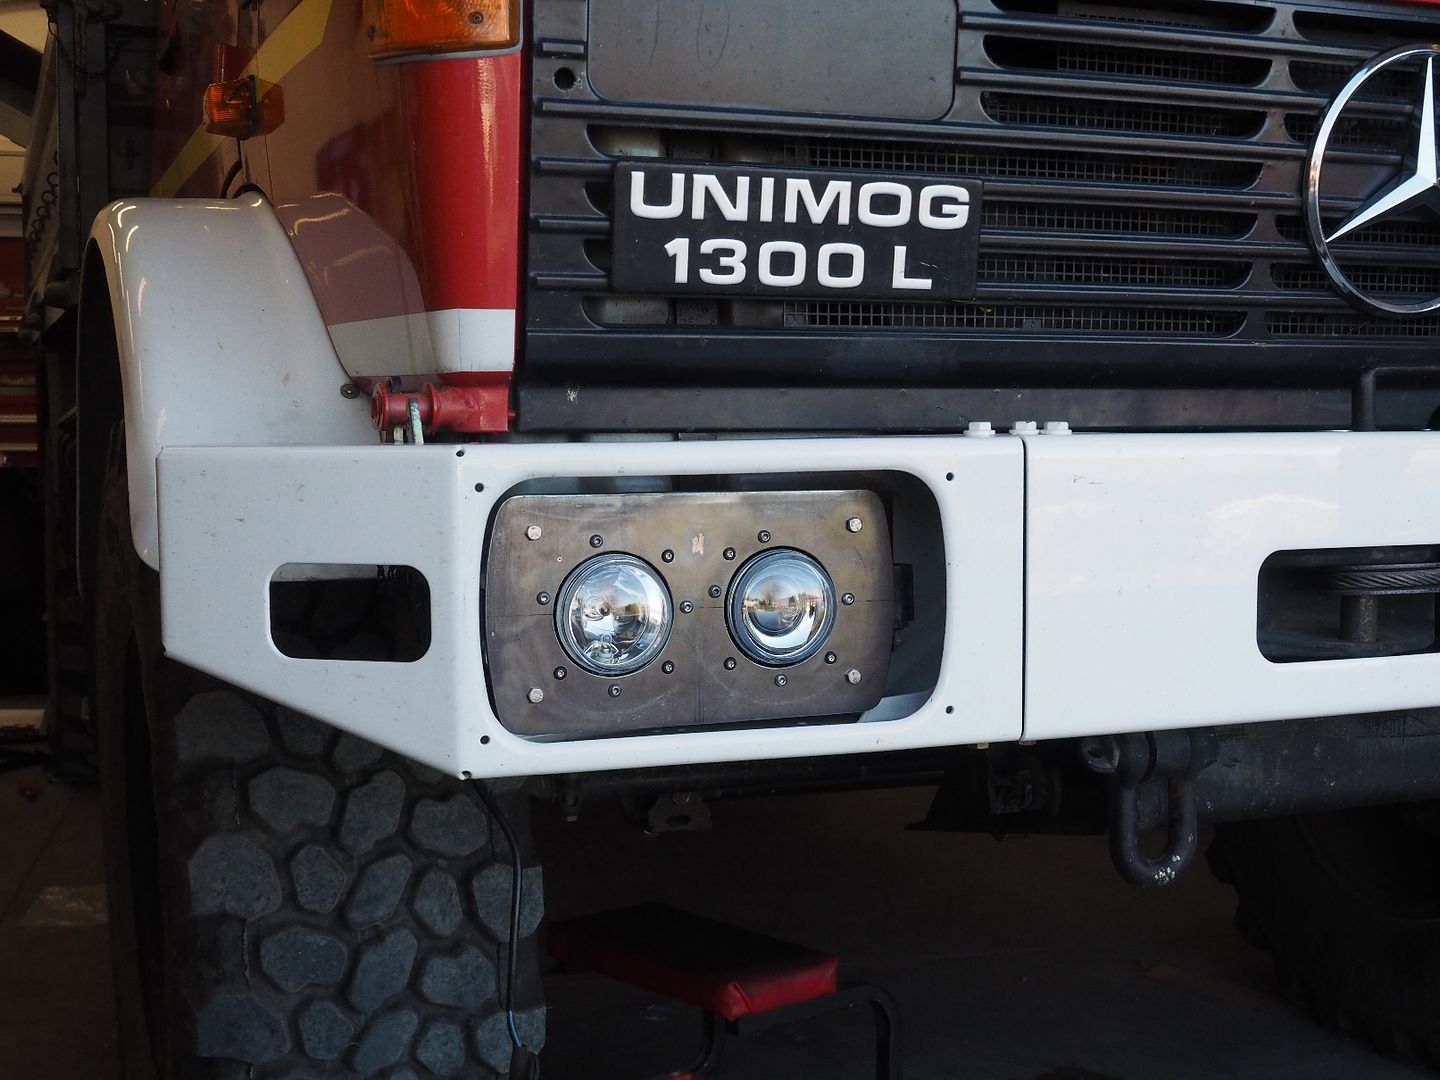
Finished up the headlights for now.
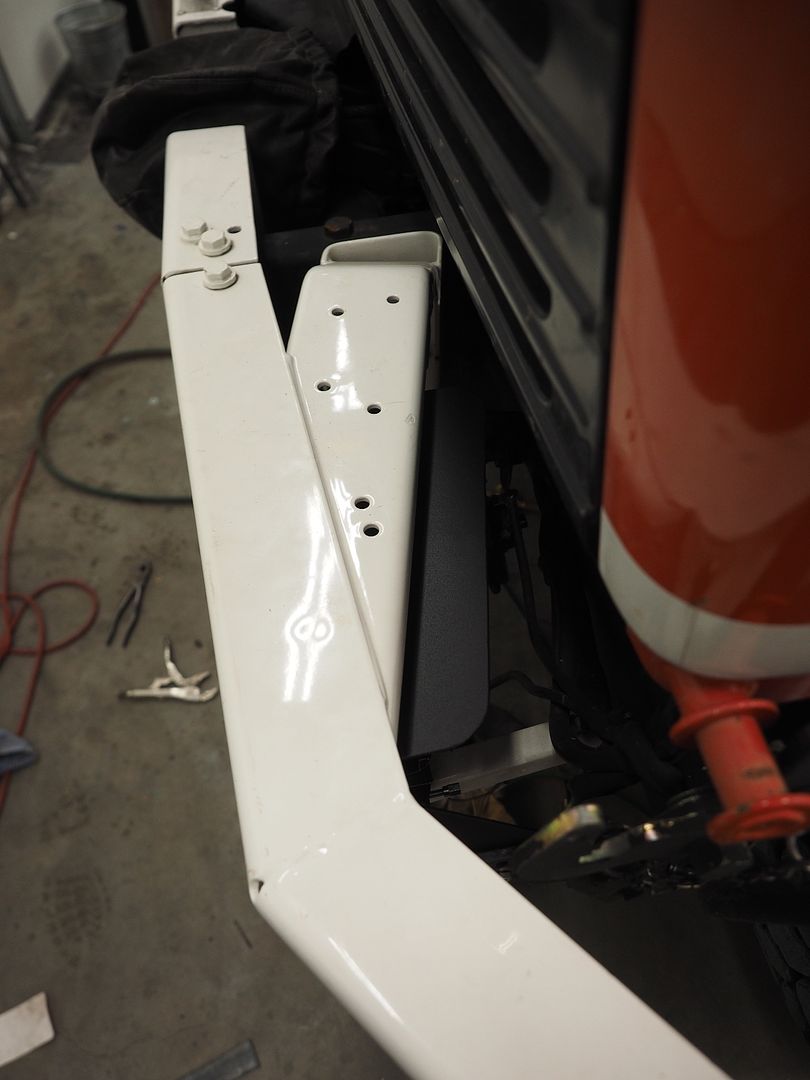
Fabricating the drivers side bracket, the second one always goes a lot quicker once you have the design nailed down.
And both brackets completed. I applied a quick (and sloppy lol) spray paint job to keep them from rusting for now, they will be powder coated this spring.

Brackets mounted up.

And finished for now, I'll use different hardware during the final install after powder coating. I really like the looks of the Hella's on the 1300

Hodakaguy
Fabricating the drivers side bracket, the second one always goes a lot quicker once you have the design nailed down.
And both brackets completed. I applied a quick (and sloppy lol) spray paint job to keep them from rusting for now, they will be powder coated this spring.
Brackets mounted up.
And finished for now, I'll use different hardware during the final install after powder coating. I really like the looks of the Hella's on the 1300
Hodakaguy
Last edited:
Forum statistics
Members online
- SDDiver5
- NomadQ
- camperthingy
- dizzydom
- Joker
- Camper123
- Verkstad
- ajn507
- taco2go
- CJD
- ripperj
- topofpalomar
- gamucm
- Milspec Longhorn
- lunchwagon
- Grandbymaster
- gregmchugh
- matttahoe53
- Skinhyfish
- PathNotTaken
- Catalanbull
- LEMKER
- NOPEC
- NYLASurf
- ajb526
- ocex
- 85_Ranger4x4
- lucernech
- MatttheHatt
- Neversatisfied
- noey
- tc275
- Antwon412
- habakuk
- wild1
- retiredruralmailman
- sundaeman
- scaredsharp
- Dumpolina
- scoolbubba
- gkieser92
- Lynx
- EMIEXPLORERS
- Fefrank
Total: 537 (members: 50, guests: 487)