Your welcome.
Ive found may will say that the CPES is enough and painting right over it will do you fine.
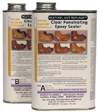
However in my experience the CPES is thinned so much that the epoxy within the CPES cannot build, and it still leaves the wood fibers exposed to a degree.
So I always top coat the CPES with a very thin layer of full-bodied epoxy.
Running a layer, regardless of just how thin/thick also allows you some ability to sand/smooth the surface prior to painting, without worry of exposing the wood fibers that you just tied to seal up
")